Learn about options within the Account tab of Backstage view in PowerPoint 2016 for Mac. You can update user info, make customizations, and identify your PowerPoint version and release.
Author: Geetesh Bajaj
Product/Version: PowerPoint 2016 for Mac
OS: Mac OS X
In PowerPoint and in other Office 2016 programs on the Mac, you typically need to sign in to a Microsoft Account so that you can access saved settings, customizations, and even some files from the cloud. You typically do so by managing your Account, right inside PowerPoint or another Office 2016 program such as Word and Excel. The Account tab in Backstage view is not as full-featured as what you see within PowerPoint 2016 for Windows, but most options can be found elsewhere, as we will explore within this tutorial.
Follow these steps to access Account options in PowerPoint 2016 for Mac:
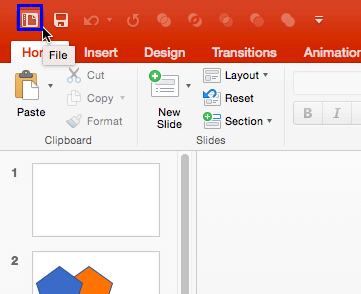
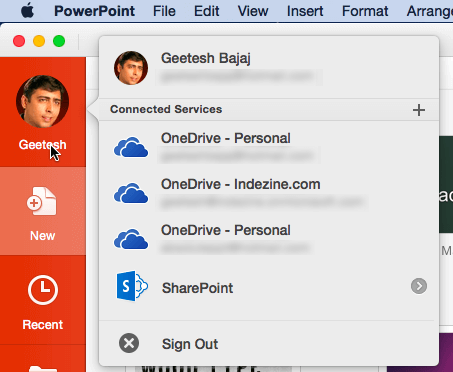
To access User Information, select the PowerPoint menu option and choose Preferences in the subsequent menu, as shown in Figure 3, below. You can also use the ⌘ + Comma (,) keyboard shortcut.
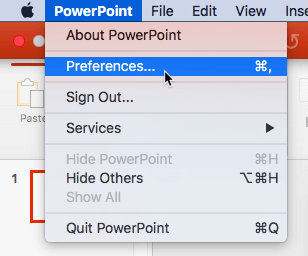
Figure 3: Access PowerPoint Preferences
Doing so brings up the PowerPoint Preferences dialog box, as shown in Figure 4, below. Click the User Information icon, as shown highlighted in red within Figure 4.
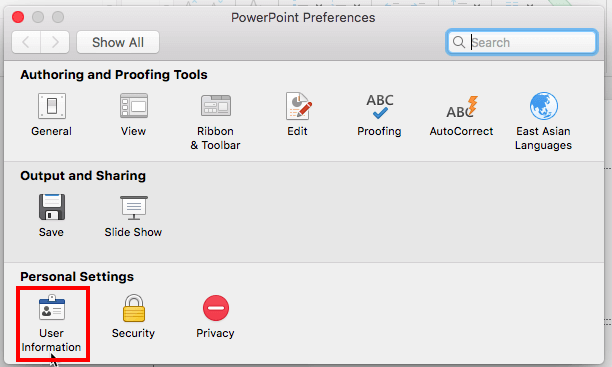
Figure 4: PowerPoint Preferences dialog box
Doing so brings up User Information options, as shown in Figure 5, below. Here, you can change the user name and initials.

Figure 5: User Information options
To sign out, choose the last option in the Account window, shown in Figure 2, previously on this page. This action will bring up a message window, as shown in Figure 6, below.
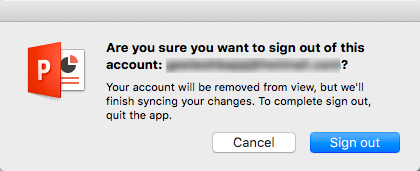
Figure 6: Do you want to sign out?
Click the Sign out button to sign out of PowerPoint. Do note that you will also end up signing out of all other Microsoft Office applications on your Mac.
Once you are signed out, the Account tab in Backstage view no longer shows your profile photo, as shown highlighted in green within Figure 7, below.
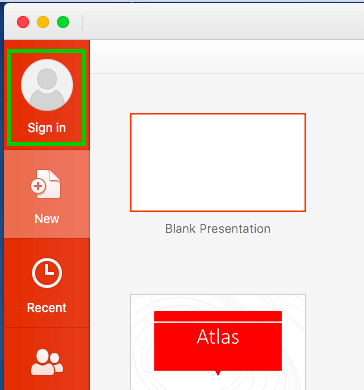
Figure 7: Sign in to see your profile photo
To sign in again, or to switch to another account, please click the Sign in button, as shown highlighted in green within Figure 7, above. Doing so brings up the Sign in window, shown in Figure 8, below. Here, you can enter your email address and password in successive screens. Your profile photo will now show, as seen previously in Figure 2.
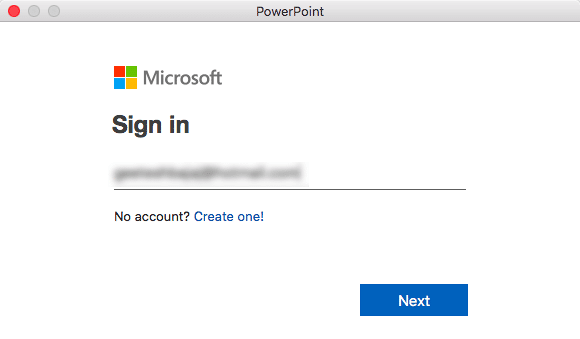
Figure 8: Sign in to your Microsoft Account
At this point in time, the Office Background option available in PowerPoint 2016 for Windows is not available on the Mac.
Office Theme enables you to change the PowerPoint 2016 for Mac interface color.
Connected services help you access your settings and recent files or templates across all your devices, including laptops, tablets and even smartphones. Additionally, some services allow you to access media and document files too. Learn how to Manage and Remove Connected Services in PowerPoint 2016 for Mac.
Learn more in our Add Services in PowerPoint 2016 for Mac tutorial.
Product info can be useful to ascertain what type of license you are using. You can also determine whether the application is activated or not.
The information and options available in this area may be a little different, depending on whether you are using an Office 365 subscription or a perpetual licensed version of Office 2016. To understand the differences, explore our Version and License of Microsoft PowerPoint and Office tutorial.
Learn more in our Identify Your Version and License of Microsoft PowerPoint and Office on Mac page.
To access Office updates, choose the Help | Check for Updates option, as shown in Figure 9, below.

Figure 9: Check for Updates
Doing so brings up the Microsoft AutoUpdate dialog box, as shown in Figure 10, below.
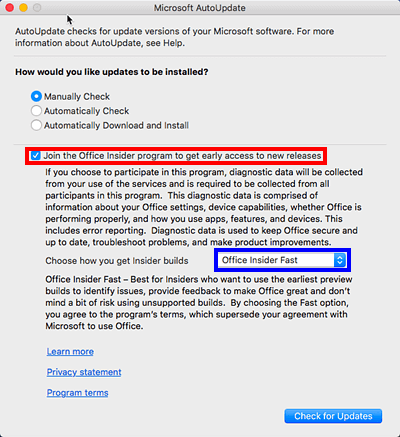
Figure 10: Microsoft AutoUpdate dialog box
Office Insider is an Office 365 release ring that lets subscribers receive new updates sooner than other subscribers. To join Office Insider, you can check in the Join the Office Insider program to get early access to new versions option, as shown highlighted in red within Figure 10, above.
Options within this menu are explained below:
Once you opt, you will find that there are two levels of Office Insider, and you can choose how often you want to receive new updates. Clicking the button highlighted in blue within Figure 10, above, brings up the Office Insider levels drop-down list, as shown in Figure 11, below.

Figure 11: Change levels in Office Insider
In many cases, you can only find Office Insider options if you or your sysadmin expressly chose to install an Office Insider release ring of Microsoft Office as part of your Office 365 subscription benefits. So if you don’t see Office Insider options, you need to get in touch with your sysadmin. Even then, it may not always be possible to get signed into Office Insider because most companies prohibit Office Insider access. New features may behave unpredictably or conflict with your other applications, and therefore, many companies won’t allow Office Insider access. However, it is much easier to add Office Insider to personal and home Office 365 subscriptions for the same reason.
01 08 13 - File Types, File Menu, and Backstage View: Account Tab of Backstage View in PowerPoint (Glossary Page)
Account Tab of Backstage View in PowerPoint 365 for Windows
Account Tab of Backstage View in PowerPoint 2016 for Windows
Account Tab of Backstage View in PowerPoint 2013 for Windows
You May Also Like: 7 Ways To Get Business Networking Really Wrong | Sao Tome and Principe Flags and Maps PowerPoint Templates


Microsoft and the Office logo are trademarks or registered trademarks of Microsoft Corporation in the United States and/or other countries.