Merge Shapes with Pictures in PowerPoint 2013
Learn how to merge shapes with pictures in PowerPoint 2013.
Author: Geetesh Bajaj
Product/Version: Microsoft PowerPoint 2013
OS: Windows 7 and 8
PowerPoint 2013 really did take the Merge Shapes command to a whole new level. Not only can you merge shapes with other shapes and text, you can also merge shapes with pictures! First you may wonder what's so awesome about merging shapes with pictures? But play a bit and you'll realize that this opens up huge possibilities. We will start simple in this tutorial and explore how you can create cookie cutter shapes with this option.
Follow these steps to learn how you can merge shapes with pictures in PowerPoint 2013:
- Launch PowerPoint 2013. Most of the time PowerPoint will open with a new slide in a presentation --
PowerPoint 2013 users can
change the slide layout
to Two Content by selecting Home tab | Layout |
Two Content. Figure 1 below shows a slide with the Two Content
slide layout applied.
Figure 1: Slide with the Two Content slide layout applied
Note that this layout has three placeholders in all: one title placeholder and two content placeholders.
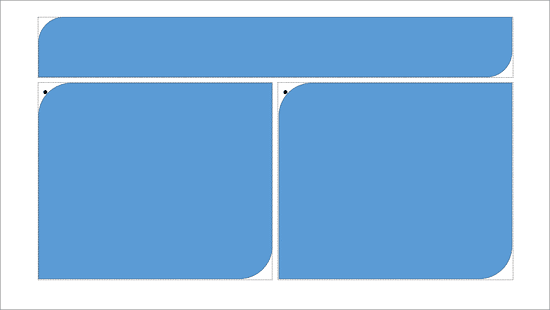
- Now insert some shapes. We choose
the Round Diagonal Corner Rectangle, and placed three of them right atop the three placeholders
(one title placeholder and two content placeholders). Make sure you
resize the shapes as accurately
as possible so that they cover the placeholders, as shown in Figure 2.
Figure 2: Shapes placed atop the placeholders
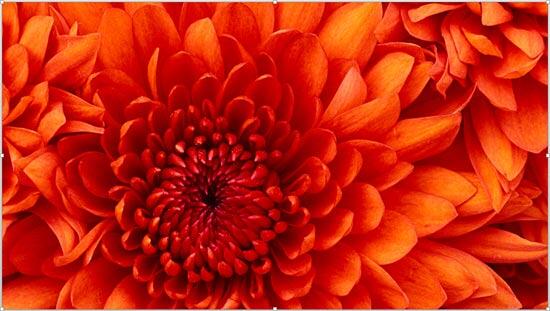
- On the same slide, insert
a picture. Make sure it fits within the slide completely, as shown in Figure 3. You may have
to crop your picture or resize it to make sure it covers the entire slide area.
Figure 3: Picture inserted within slide
- Once the picture is placed,
reorder the picture by sending
it behind the existing shapes, as shown in Figure 4.
Figure 4: Picture sent to back
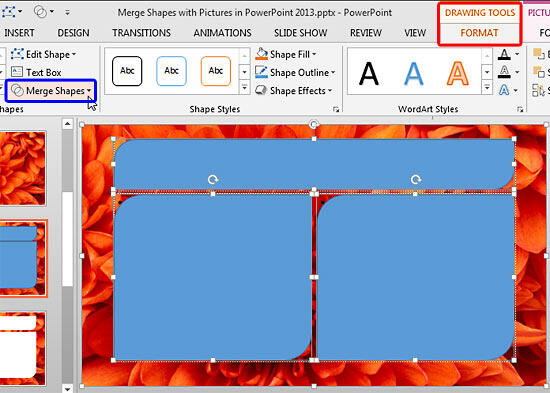
- Now, select the picture first and then all the three shapes. It's important that you select the picture
first -- or else this technique will not work. Once your selections are done, access the Drawing Tools
Format contextual tab of the
Ribbon (highlighted in
red within Figure 5), and click the Merge Shapes
button (highlighted in blue within Figure 5).
Figure 5: Merge Shapes button
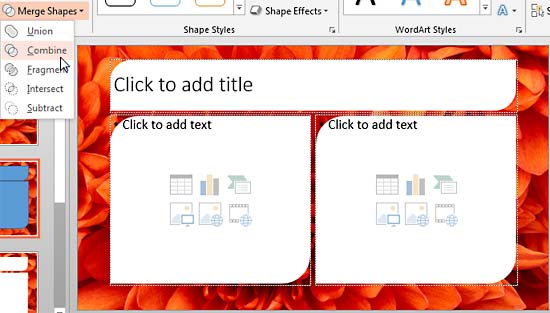
- This brings up Merge Shapes drop-down gallery, as shown in Figure 6.
Within the Merge Shapes drop-down gallery hover the cursor over Combine option
to see a live preview, as shown
in Figure 6. Click the Combine option to create a
cookie cutter graphic from the picture.
Figure 6: Combine option to be selected
Tip: Learn more about the Combine option in our Shape Combine Command in PowerPoint 2013 tutorial.
- Type your title text within the Title placeholder, and then you can insert anything within the two
Content placeholders, including text. We inserted a Table and a Chart in the two placeholders, as shown in
Figure 7. Note that when you insert any slide object within the placeholder you may have
to reorder it and send it backwards so that the cutout picture stays on top.
Figure 7: Table and Chart inserted within the slide
- Make sure you save your presentation often.
Cookie Cutter Shapes in PowerPoint 2010 for Windows
Cookie Cutter Shapes in PowerPoint 2011 for Mac
See Also: Merge Shapes with Pictures in PowerPoint 2016 for Windows
PowerPoint Keyboard Shortcuts and Sequences:
PowerPoint 2013, 2011, 2010, 2007 and 2003
Have your ever used keyboard shortcuts and sequences in PowerPoint? Or are you a complete keyboard aficionado? Do you want to learn about some new shortcuts? Or do you want to know if your favorite keyboard shortcuts are documented?
Go and get a copy of our PowerPoint Keyboard Shortcuts and Sequences E-Book.
PowerPoint Keyboard Shortcuts and Sequences E-book