There is this
video clip that Bruce Gabrielle posted on his blog, which shows how you can create a triangular table in PowerPoint by either creating a picture of the table itself (which makes the table non-editable) or by creating a picture of the table with just empty cells so that you can place a transparent table with figures or words over it. While both techniques are amazing, we wanted to use a process whereby not only is the table editable, but the ending shape need not be limited to just a triangle. So we are going to use two PowerPoint techniques to achieve this trick. Here are links to individual tutorial pages for both of these techniques:
- Combine Shapes
- Slide Background Fills
Shapes you create using the Combine option can be used in all PowerPoint versions. We call these shapes "Cookie Cutters" because they let you cut parts of the slide almost the same way as cookie cutters cut parts of your cookie dough. We know that was too much information, so let us make it easier for you to follow this process step-by-step:
- Launch PowerPoint 2013 for Windows. Within the
Presentation Gallery, select the Blank Presentation option. PowerPoint will open a new slide. You can change the slide layout to Blank by selecting the Home tab | Layout | Blank option.
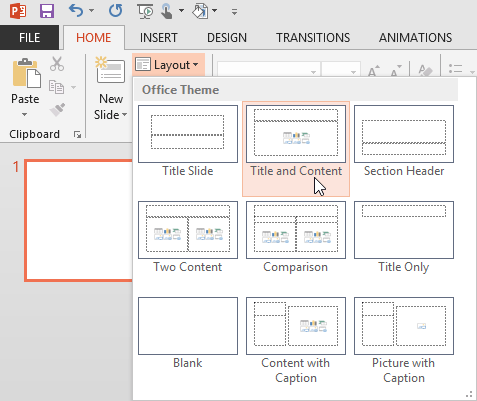
Figure 1: Title and Content layout selected in Layout gallery - This places a content placeholder on your slide that has six buttons, as shown in Figure 2. Click the Insert Table button (highlighted in red within Figure 2).
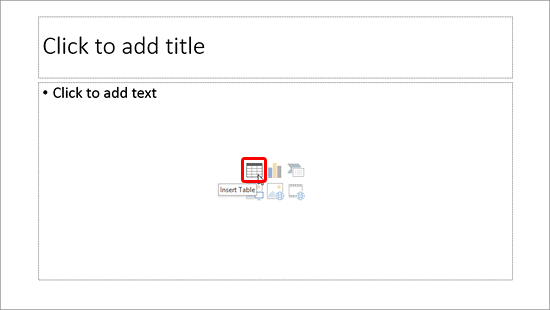
Figure 2: Slide with Title and Content layout - This brings up the Insert Table dialog box as shown in Figure 3. Create a fairly small table. We opted for just 1 column and 5 rows. Click the OK button.
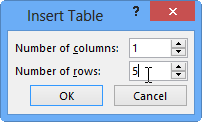
Figure 3: Insert Table dialog box - Type some text within your table and select all the text in the table. Press Ctrl + E to center align all the text. You might end up with a table as shown in Figure 4.
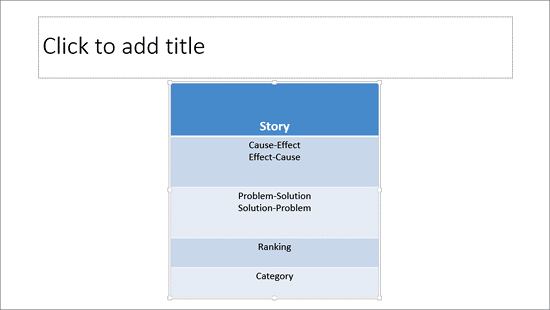
Figure 4: Slide with a table - Now, insert a shape to cover the table. In this example, we are placing a triangle shape right over the table. Note we resized the triangle so that it covers all the text in this table, as shown in Figure 5. Yes, you cannot see any text now, and that's a good thing!
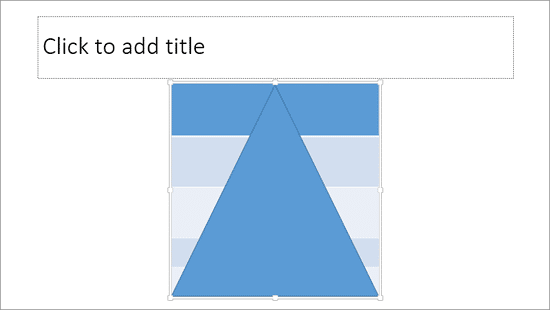
Figure 5: Triangle placed on the table - Insert another shape. This time a rectangle that covers the entire slide area, as shown in Figure 6 . Note that nothing within the slide is now visible.

Figure 6: Rectangle placed to cover the entire slide - Right-click the rectangle and choose Send to Back | Send Backward as shown in Figure 7.
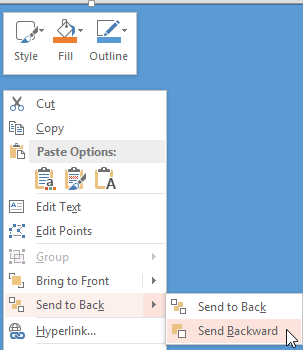
Figure 7: Send Backward option selected for the rectangle - This places your rectangle one layer back and this also brings the triangle right in front, as shown in Figure 8.
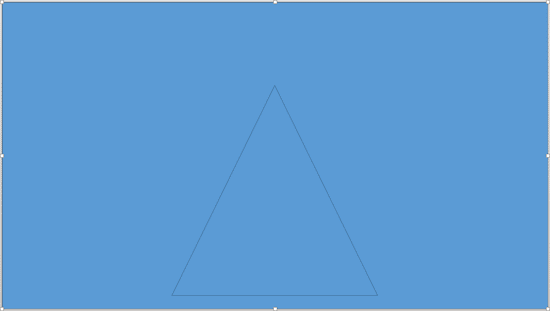
Figure 8: Rectangle sent backward - Now, first select the rectangle, then Shift-click on the triangle so that both are selected. Now, within the Drawing Tools Format contextual tab of the Ribbon, click the Merge Shapes button to bring up a drop-down menu shown in Figure 9. Within this drop-down menu, select the Combine option (highlighted in red within Figure 9).
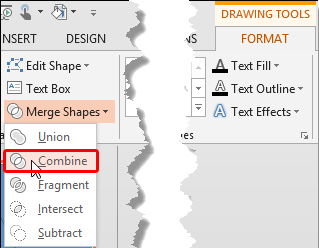
Figure 9: Shape Combine option selected for triangle and rectangle shapes Tip: Unlike in older PowerPoint versions, PowerPoint 2013 has grouped all of the shape combine commands (
Union,
Combine,
Fragment,
Intersect, and
Subtract) into one single category named
Merge Shapes.
- This creates a triangle window within your rectangle. Note that your table is visible through this window, as shown in Figure 10. Yes, the triangle is the cookie that the cutter removed! Now, apply the No Outline attribute to remove outline from this combined shape.
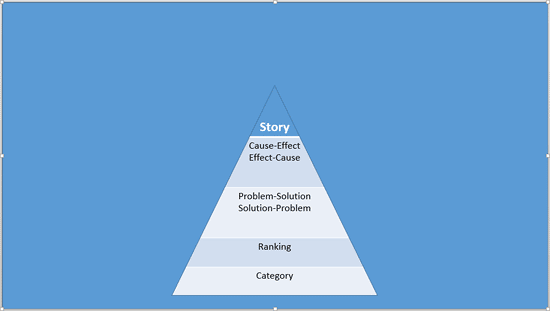
Figure 10: Triangle windowed rectangle - Note that your triangle-windowed-rectangle is covering everything else, even the slide title! So reorder the objects on your slide so that:
- The table is placed right at the bottom of all objects.
- The triangle-windowed-rectangle is placed above the table.
- All other objects are over these two objects.
- Look at Figure 11 to understand this relationship.
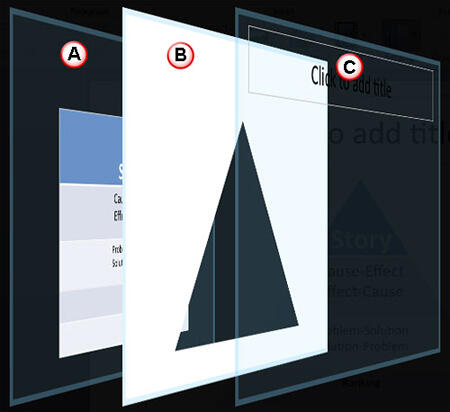
Figure 11: Correct order of shapes in a cookie cutter - Finally, select your triangle-windowed-rectangle, and change its fill to Slide Background fill. Your cookie cutter shape is ready as shown in Figure 12 below.
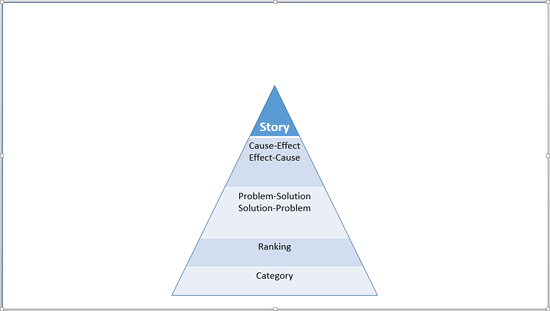
Figure 12: Triangle Cookie Cutter shape - This cookie cutter shape will continue to work even if you change your slide background or even if you apply a new Theme. Look at Figure 13, which is the same slide shown in Figure 12, but with a new Theme applied.
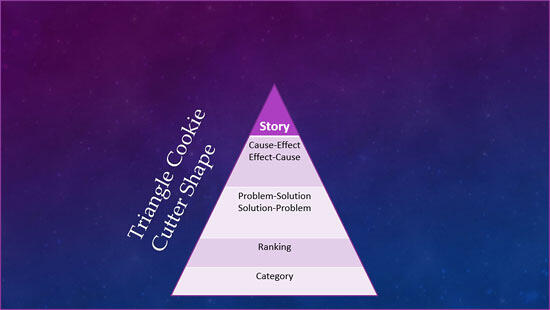
Figure 13: Triangle Cookie Cutter shape with new Theme applied - Do remember though that your slide title will end up behind your table and combined cookie-cutter shape when a new Theme is applied. So, you will need to again reorder your slide objects, as explained in step 11.
Tip: You can also build a pyramid using
SmartArt but that technique is limited to the triangular pyramid. The technique on this page can be applied to any shape such as a circle, a hexagon, a star, etc. In addition, cookie cutter shapes created using this technique are not limited to be placed over a table – you can place it over a movie clip, a picture, a chart, etc.


