Learn how you can combine shapes in PowerPoint 2013 for Windows. The Shape Combine command combines non-overlapping areas while removing overlapping areas of shapes.
Author: Geetesh Bajaj
Product/Version: PowerPoint 2013 for Windows
OS: Microsoft Windows 7 and higher
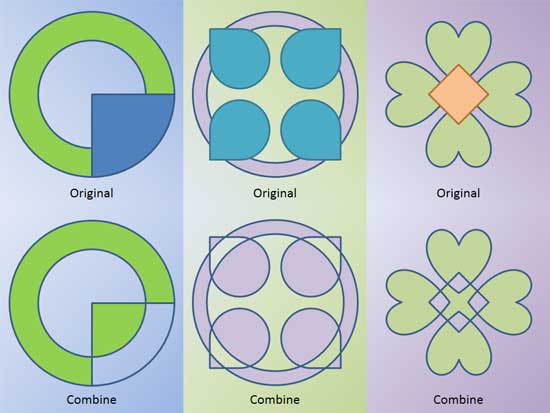
There are so many shapes available within PowerPoint 2013 for Windows, and that's good because that means so many more possibilities to create your own unique shapes by using any of the Merge Shapes commands. One of the amazing options within Merge Shapes is Combine. This retains areas where the shapes do not overlap while removing the overlapping areas; think of Combine as an amazing cutout option! You can see examples of the Combine option in play within Figure 1, below—the three examples on the top area of the slide are separate shapes placed over each other. The shapes that you see at the bottom of the slide are the same shapes with the Combine option applied. Resulting in a cutout, remnant shape.

Figure 1: Sample showing use of the Combine command
Once you finish reading this tutorial, do view the sample presentations embedded on the bottom of this page to see more samples of shapes that use the Combine command.
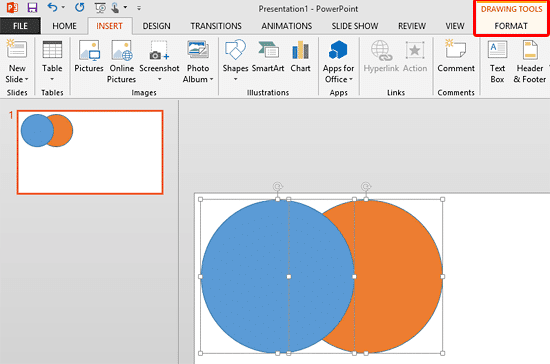
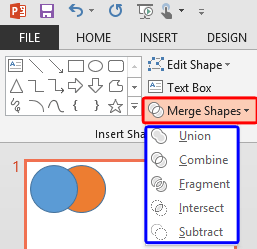
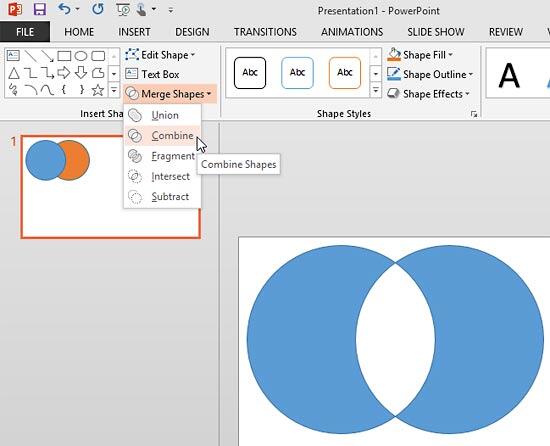
Follow these steps to learn more:


Do remember these guidelines for any tasks that involve the usage of this command. The Combine command:
You will see these guidelines in use within the embedded presentations below (scroll down this page).
Click below to view this presentation on SlideShare
Click below to view this presentation on YouTube
See Also:
Merge Shapes: Shape Combine Command in PowerPoint (Index Page)
Shape Combine Command in PowerPoint 2016 for WindowsYou May Also Like: PowerPoint Data Rules or Conditional Formatting with DataPoint | Animals - G PowerPoint Templates


Microsoft and the Office logo are trademarks or registered trademarks of Microsoft Corporation in the United States and/or other countries.