Enabling guides for your presentation slides helps ensure that your objects are easily aligned, and also in the same relative position in successive slides. However, enabling guides is more like getting started. There’s so much more you can do, such as customizing the guides themselves using hierarchical options.
We have already explored the guides in PowerPoint 2016 for Mac, and the options were limited to guides on your actual slides. PowerPoint 2016 also lets you work with guides on a higher hierarchical level within the Slide Master and individual Slide Layouts. Depending on whether you added guides within the Slide Master, an individual Slide Layout, or even a normal slide, your guides are color-coded for easy identification.
Follow these steps to explore the hierarchy for guides in PowerPoint 2016 for Mac:
- Launch PowerPoint, and make sure that your guides are not enabled. To do so, access the View tab of the Ribbon, and make sure that the Guides check-box is not selected, as shown highlighted in red within Figure 1, below.

Figure 1: Guides check-box not selected- Now, access the View tab of the Ribbon, and click the Slide Master button, as shown highlighted in red within Figure 2, below.

Figure 2: Slide Master button- Doing so brings up Slide Master view, as shown in Figure 3, below. Here select the Slide Master (the larger thumbnail) within the pane on the right side, as shown highlighted in red within Figure 3.

Figure 3: Slide Master selected- Now, access the View tab and select the guides check-box, as shown highlighted in red within Figure 4, below.
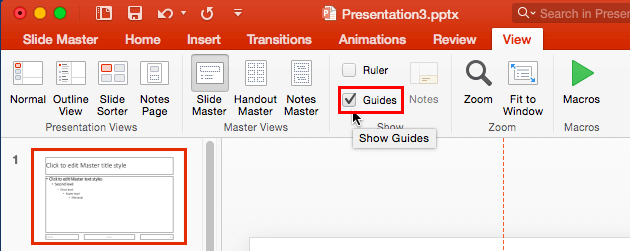
Figure 4: Guides check-box selected- This action makes the default guides visible on the Slide Master, as shown in Figure 5, below. Note that these guides are red in color.
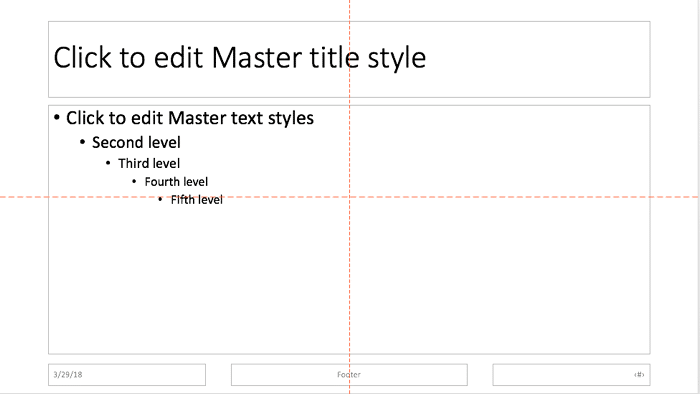
Figure 5: Guides within Slide Master
Slide Master Changes Influence All Slides
- Selecting the Slide Master and making the guides visible will influence all Slide Layouts. and individual slides within the particular Slide Master.
- Now, select any individual Slide Layout within the Slides pane, as shown highlighted in blue within Figure 3, previously on this page. Doing so will show the selected Slide Layout in the Slide Area. Now, right-click anywhere on the empty Slide Area to bring up a contextual menu, as shown in Figure 6, below. Within the contextual menu, select the Grid and Guides | Add Vertical Guide option, as shown in Figure 6.
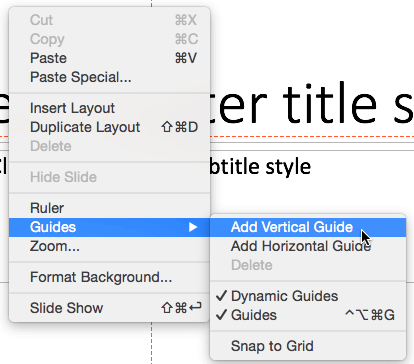
Figure 6: Add Vertical Guide option to be selected- This step adds an orange-colored vertical guide right above the previous red-colored vertical guide, as shown zoomed in Figure 7, below.
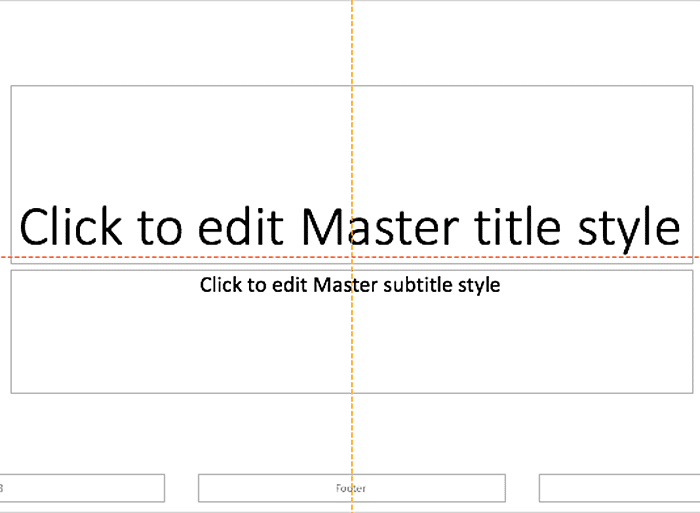
Figure 7: Zoomed in view of the Orange Vertical Guide overlapping the Red Vertical Guide- How do we know that this orange guide is overlapping the red guide? That's easy. Just drag the added orange vertical guide anywhere towards left or right to see the red guide beneath it, as shown in the zoomed view in Figure 8, below.
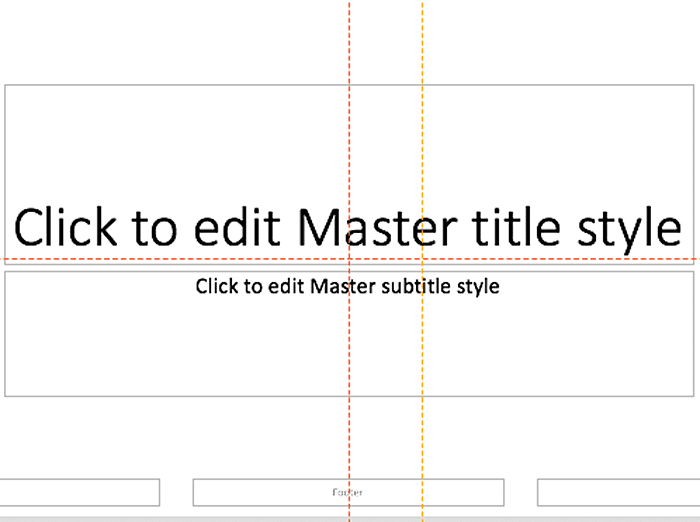
Figure 8: Orange Guide being dragged- Now, go back to Normal view. Here, you will see red colored horizontal and vertical guides, and one orange-colored vertical guide, as shown in Figure 9, below.
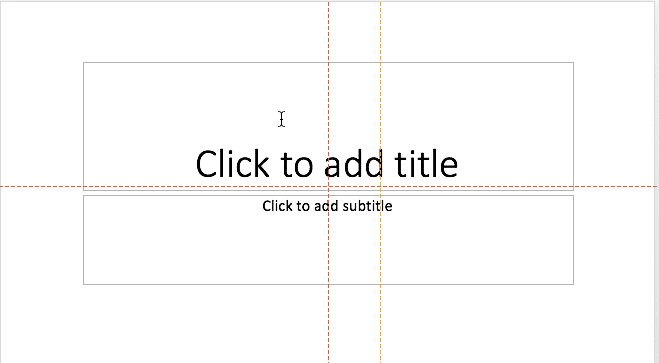
Figure 9: Guides within Normal view- Now, within the Normal view, right-click on the slide to bring up a contextual menu, as shown in Figure 10, below. In this contextual menu, select the Guides | Add Vertical Guide option, as shown in Figure 10.
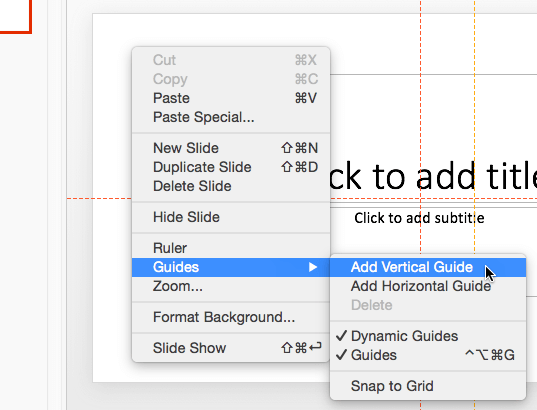
Figure 10: Guides | Add Vertical Guide option- You will see that grey colored vertical guide gets added over the red colored vertical guide, as shown in Figure 11, below. What happened to the red guide added to the Slide Master? Let's find out next.
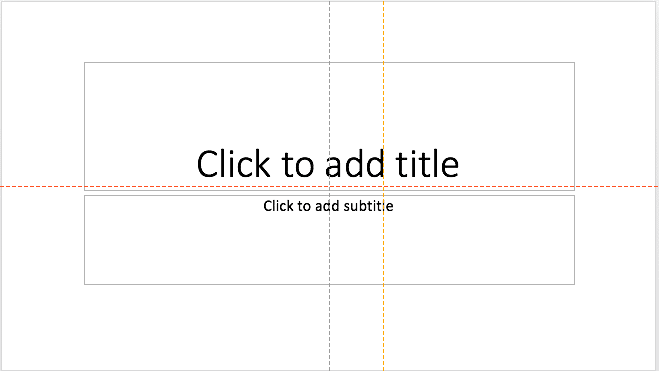
Figure 11: Vertical Guide added in Normal view- If you drag the grey guide away from its default position, you will see the red-colored guide below, as shown zoomed in Figure 12, below. In their default position, the red guides from the Slide Master (and orange guides from Slide Layout) are always hidden beneath the grey guides!
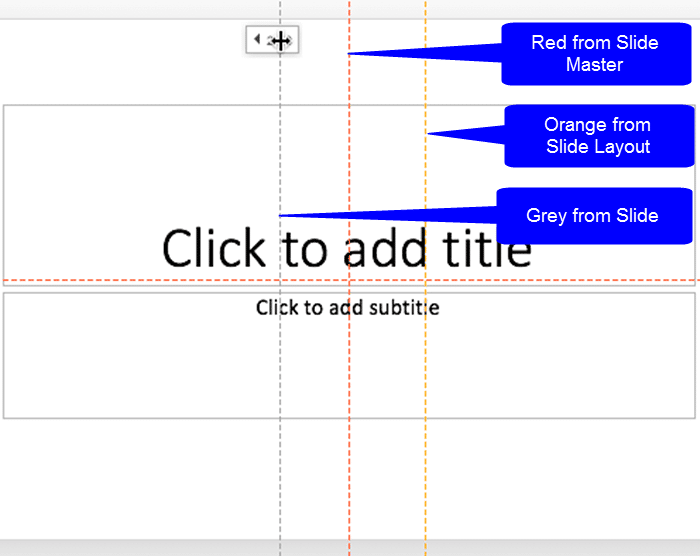
Figure 12: Guides of all three colors visible on the slide- To paraphrase, let us remember:
- Red colored guides are from Slide Master and are placed at the bottom of the grey and orange guides.
- Orange colored guides are from Slide Layouts and are placed between the red and the grey guides.
- Grey colored guides are for the Slides themselves and are always placed atop the red and orange guides.
Why Cannot I Select a Guide?
- You cannot select guides placed within the Slide Master or the Slide Layouts within the Slides in Normal view. You can also not select guides placed within the Slide Layout on your Slides in Normal view. However, all guides will allow snapping and positioning of slide objects.
- You can add more guides anywhere you want based on your requirement by dragging existing guides.


