Learn about the Share tab of Backstage view in PowerPoint 2013 for Windows. You can share via OneDrive, as a PDF, or as an email attachment.
Author: Geetesh Bajaj
Product/Version: PowerPoint 2013 for Windows
OS: Microsoft Windows 7 and higher
Among the tabs within Backstage view, we have already explored the Open, New, and Save tabs. In this tutorial, we will explore the Share tab that has options to share the current presentation through the cloud via OneDrive or to present online using the Office Presentation Service. You can also email the presentation as an attachment, a link, a PDF or XPS file, or fax it! Finally, you can publish slides to a SharePoint site.
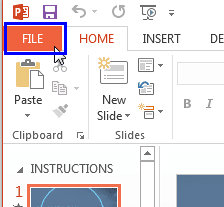
Follow these steps to learn more about Share options within Backstage view in PowerPoint 2013 for Windows:
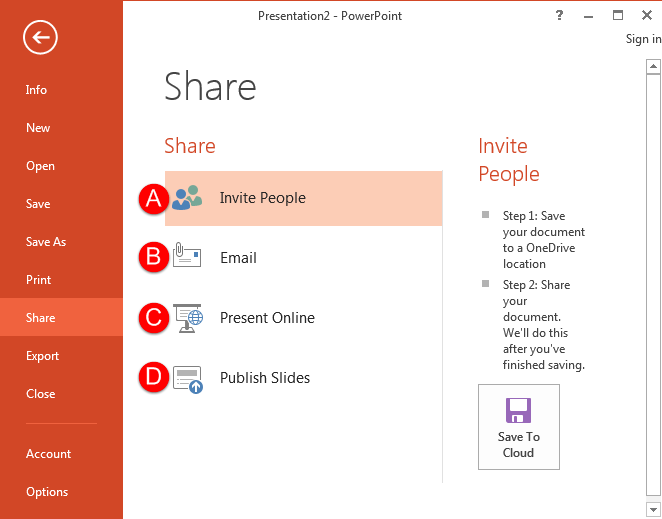
This is the default option within the Share pane, as shown in Figure 2, above. To work with this option, you first need to upload your presentation to OneDrive, which you can do from right within PowerPoint. Then you need to invite people to share the presentation, as explained in Point A within our Share PowerPoint Presentations on Social Sites (Facebook, Twitter, and LinkedIn) using OneDrive tutorial.
There are five options to email your presentation, as shown in Figure 3, below.
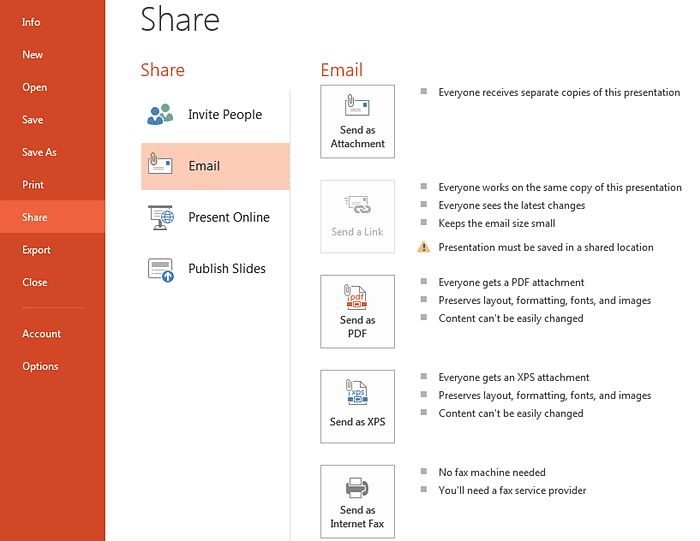
Figure 3: Email options
Selecting this option opens a new email in your default mail application, with a copy of the PowerPoint file attached.
Your presentation must be saved in a shared location, such as OneDrive to make this option active. To learn how to generate a link, explore Point B in our Share PowerPoint Presentations on Social Sites (Facebook, Twitter, and LinkedIn) using OneDrive tutorial.
Exports your presentation as a PDF file that attaches to a new email in your default mail application.
Exports your presentation as an XPS file that attaches to a new email in your default mail application.
Send your slides via fax. You don’t need a conventional fax machine to send if you have signed up with an internet-based fax service provider. If you haven’t signed up for internet fax, PowerPoint will open a web page that lists some options for you.
To present online, you need a Microsoft account. Select this option as shown in Figure 4, and click the Present Online button, as shown highlighted in red.
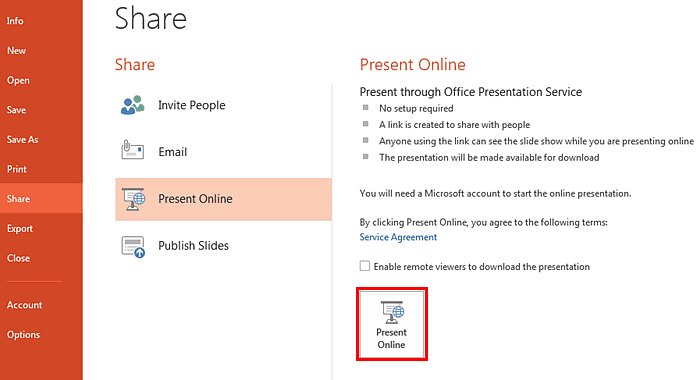
Figure 4: Present Online
This will connect to the Office Presentation Service and allow you to start an online presentation. For others to view your presentation, you can send them the unique link that will be generated. Learn more about presenting online with PowerPoint in our Present Online in PowerPoint 2013 for Windows tutorial.
Using this option, you can publish slides of the active presentation to a slide library or a SharePoint site. Select this option and click the Publish Slides button, as shown highlighted in red within Figure 5, below.
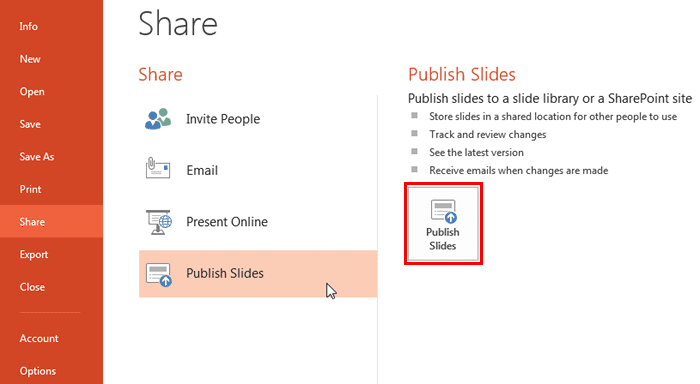
Figure 5: Publish Slides
Doing so opens the Publish Slides dialog box, as shown in Figure 6, below. Within this dialog box, select the slides that you want to publish, select a location to publish those slides, and click the Publish button.
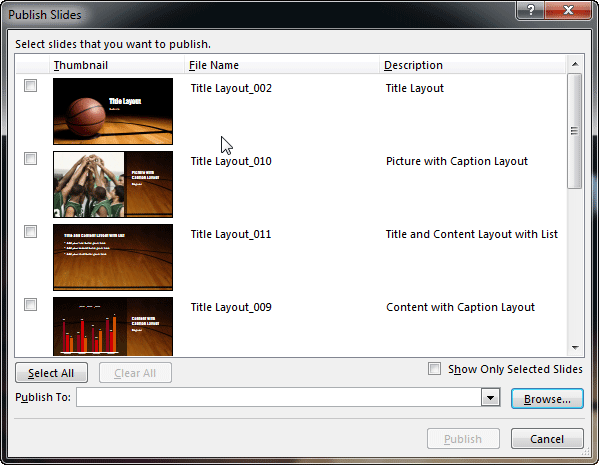
Figure 6: Publish Slides dialog box
01 08 11 - File Types, File Menu, and Backstage View: Share Tab of Backstage View in PowerPoint (Glossary Page)
Share Tab of Backstage View in PowerPoint 365 for Windows
Share Tab of Backstage View in PowerPoint 365 for Mac
Share Tab of Backstage View in PowerPoint 2019 for Windows
Share Tab of Backstage View in PowerPoint 2019 for Mac
Share Tab of Backstage View in PowerPoint 2016 for Windows
Share Tab of Backstage View in PowerPoint 2016 for Mac
You May Also Like: Someone’s Sabotaged Santa’s Sleigh 2: Conversation with Tom Howell | Haiti Flags and Maps PowerPoint Templates


Microsoft and the Office logo are trademarks or registered trademarks of Microsoft Corporation in the United States and/or other countries.