Archived Content
Content on this page is not recent and has been retained for historical reasons.
Microsoft has some amazing options for sharing Office documents online. We have explored sharing PowerPoint presentations using the Microsoft Office Web Viewer and OneDrive. There is a third option also on OneDrive that lets you share presentations on social sites such as Facebook, Twitter, and LinkedIn. You share these presentations via a link with your friends, colleagues, and family.
Linked Services from your Microsoft Account
Your Microsoft account needs to be linked to the social sites (services) you want to share on. These services can be easily added within any Office application, and also from within OneDrive. Added services are available on all Microsoft service-aware programs you work with. You can also add services within PowerPoint 2013 for Windows.
Follow these steps to learn how to share PowerPoint presentations on social sites:
- Open the PPTX file you want to share in PowerPoint for the Web, and click the Share button, as shown highlighted in green within Figure 1, below.
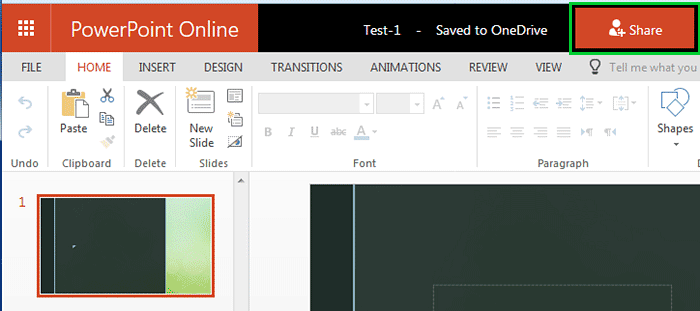
Figure 1: PowerPoint file selected on OneDrive- In the resultant screen, you'll see Share options, as shown in Figure 2, below.
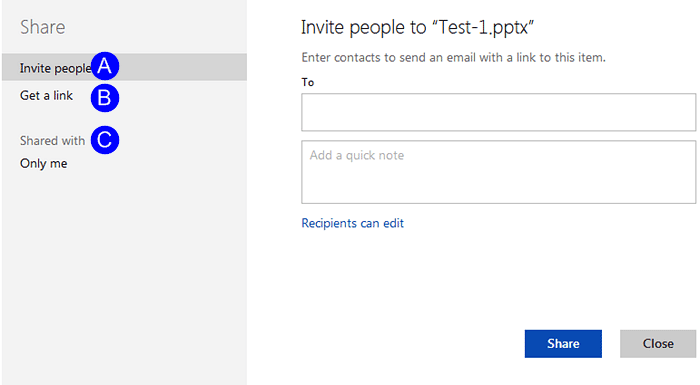
Figure 2: Share options- All Share options are explained below, as marked in Figure 2, above.
A. Invite people
- Choose this option if you want to give specific individuals or groups permission for an item. This lets you remove permission for specific individuals or groups later if you need to. Another benefit of sharing an item this way is that recipients can quickly access it from their Shared view.
- On the right side of the Share screen, enter the email addresses or contact names within the To box, as shown highlighted in red within Figure 3, below. When you begin to enter info in the box, you can also choose a contact from the list that appears. You can also add a note for recipients if you want, as shown highlighted in blue within Figure 3.
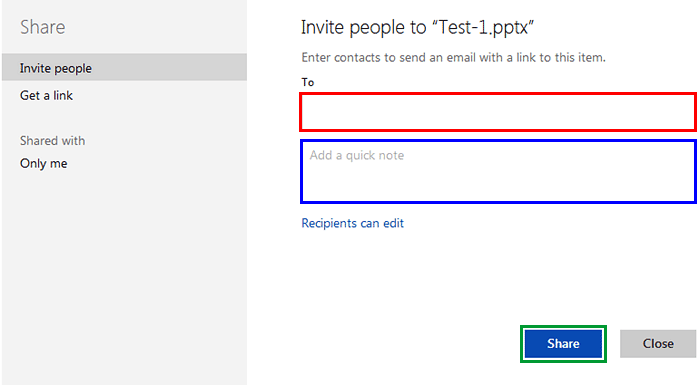
Figure 3: Invite people option- To change the permission level, click the Recipients can edit hyperlink. Doing so brings up two selection boxes, as shown in Figure 4, below.
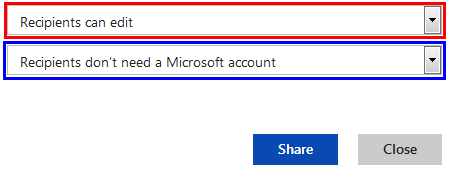
Figure 4: Permission options- The top selection box, as shown highlighted in red within Figure 4, above, provides you with two options, as shown in Figure 5, below.

Figure 5: Permission to editRecipients can edit
- Here recipients can use Office Online to edit Office documents without signing in. To make other changes (like adding or deleting files in a folder), recipients need to sign in with a Microsoft account. If you pick Recipients can edit and a recipient forwards the message, anyone who receives it will also be able to edit the item you're sharing.
Recipients can only view
- Choose this option to enable the selected item for viewing only.
- Make your selections and click the Share button, as shown highlighted in green within Figure 3, below. If you want recipients to sign in with a Microsoft account (to even view the item you're sharing), choose the Recipients need to sign in with a Microsoft account option within the second selection box.
B. Get a link
- Choose this option to share the item with a group of people. For example, you can post the link to Facebook, Twitter, or LinkedIn. You can also use them to share in email or IM. Note that you won't have as much control over individual permissions. Click the Choose an option, as shown highlighted in blue within Figure 6, below.
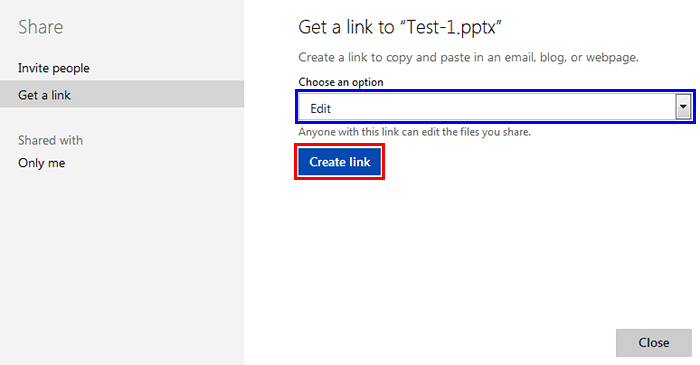
Figure 6: Get a link option- Doing so brings up a drop-down menu, as shown in Figure 7, below.
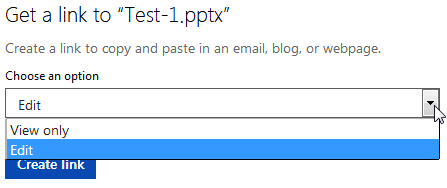
Figure 7: Choose an option drop-down menu- Within the drop-down menu you'll find two options:
View only
- When this type of link is selected, one can view items without signing in to a Microsoft Account. The link can also be forwarded to other people.
Edit
- Sharing items with this type of link, one can view shared items and use Office Online to edit Office documents, all without signing in. For other edits, such as adding or deleting files in a folder, one needs to sign in with a Microsoft Account. This link can be edited and forwarded to other people, and anyone who receives the ink will also be able to edit the items.
- Make the choice and click the Create link button, highlighted in red within Figure 6, previously shown on this page. Once the link is created, you can post the link on a social network.
C. Shared with
- Here you can see the list of people with whom the presentation is shared. In Figure 8, below, you can see that a recipient is added compare with Figure 2, shown previously on this page.
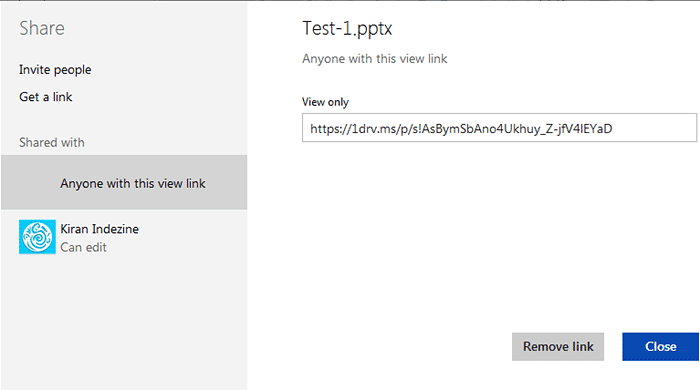
Figure 8: List of people with whom the presentation is shared


