Add pattern fills to shapes in PowerPoint 2010 for Windows. Pattern fills are great for accessibility reasons, and also when you need to print in grayscale.
Author: Geetesh Bajaj
Product/Version: PowerPoint 2010 for Windows
OS: Microsoft Windows XP and higher
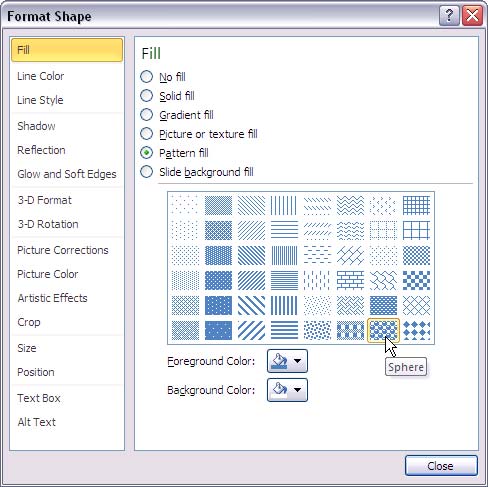
In this series on fills for shapes, we have already explored solid fills, gradient fills, picture fills, and texture fills for shapes in PowerPoint 2010 for Windows. Now we show how you can use the Pattern fill option. If you are a PowerPoint old-timer, you will remember that Microsoft removed this option in PowerPoint 2007 although it existed in PowerPoint 2003 and previous versions. With PowerPoint 2010, they bring back this option but they have buried it in a dialog box rather than including it within the Shape Fill gallery. In this tutorial, we'll show you how you can access this fill option, but first, let us talk about what patterns are.
Patterns in PowerPoint are two-color designs comprising lines, dots, dashes and checks. PowerPoint includes 48 such patterns with names like plaid, weaves, shingle and zig zag. If you want to see a sample presentation showing pattern fills in PowerPoint, scroll down to the bottom of this page.
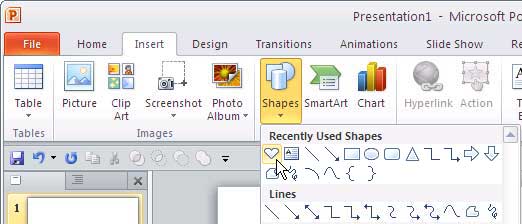
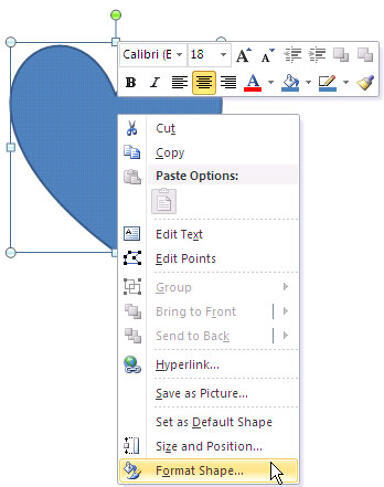
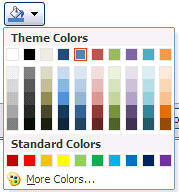
Follow these steps to change or apply a pattern fill to a shape:
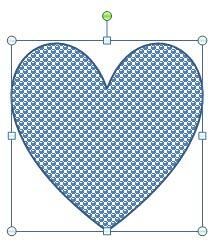
Sample Presentation of Pattern Fill in Shape:
Click below to view this presentation on SlideShare
Click below to view this presentation on YouTube
See Also:
Fills for Shapes: Add Pattern Fills to Shapes (Glossary Page)
Add Pattern Fills to Shapes in PowerPoint 2016 for Windows
Add Pattern Fills to Shapes in PowerPoint 2016 for Mac
Add Pattern Fills to Shapes in PowerPoint 2013 for Windows
Add Pattern Fills to Shapes in PowerPoint 2011 for Mac
Add Pattern Fills to Shapes in PowerPoint 2003 and 2002 for Windows
You May Also Like: SignageTube: Conversation with Kurt Dupont | Elephant PowerPoint Templates


Microsoft and the Office logo are trademarks or registered trademarks of Microsoft Corporation in the United States and/or other countries.