
This is the print version of this page. All content is copyright Indezine.com 2000-2026.
Learn how to add, move, hide, and remove guides in PowerPoint 365 for Windows.
Author: Geetesh Bajaj
Product/Version: PowerPoint 365 for Windows
OS: Microsoft Windows 10 and higher
In this tutorial, you will learn how to add, position, move, and remove guides in PowerPoint 365 for Windows. These guide techniques are perfect for structured layouts, dashboards, and multi column designs.
Let us learn better with an analogy? Have you watched an expert tailor at work? They start by marking the pattern on the fabric. They don't just slap down one chalk mark on the fabric and call it a day. There's one chalk mark for the hem, another for the waist, and yet another for the sleeve length. Every single mark earns its place on that fabric. PowerPoint hands you the design equivalent of that very first chalk mark: one horizontal guide, one vertical guide, crossing politely at dead center of your slide. That works well for simple layouts, but more complex designs call for a more complete guide structure. Just like the tailor who can add chalk marks as needed, you can add more guides to create a proper visual structure for your slides.
Taking Stock
Enable Guides
Adding Guides
Removing and Moving Guides
Hiding Guides
Conclusion
Quick Quiz: Adding More Guides in PowerPoint

Before we proceed, note that this section covers guides on regular slides only. Guides within the Slide Master and Slide Layouts are covered in our Hierarchical Guide Options in PowerPoint tutorial.
Adding more guides isn't some hidden power-user secret locked behind menus and dialog boxes. It's just a Ctrl-drag away. On this page, you'll learn how to spawn brand-new guides, line them up like a pro using the Ruler, and use them to give your slides the kind of structure and consistency that would make any tailor proud.
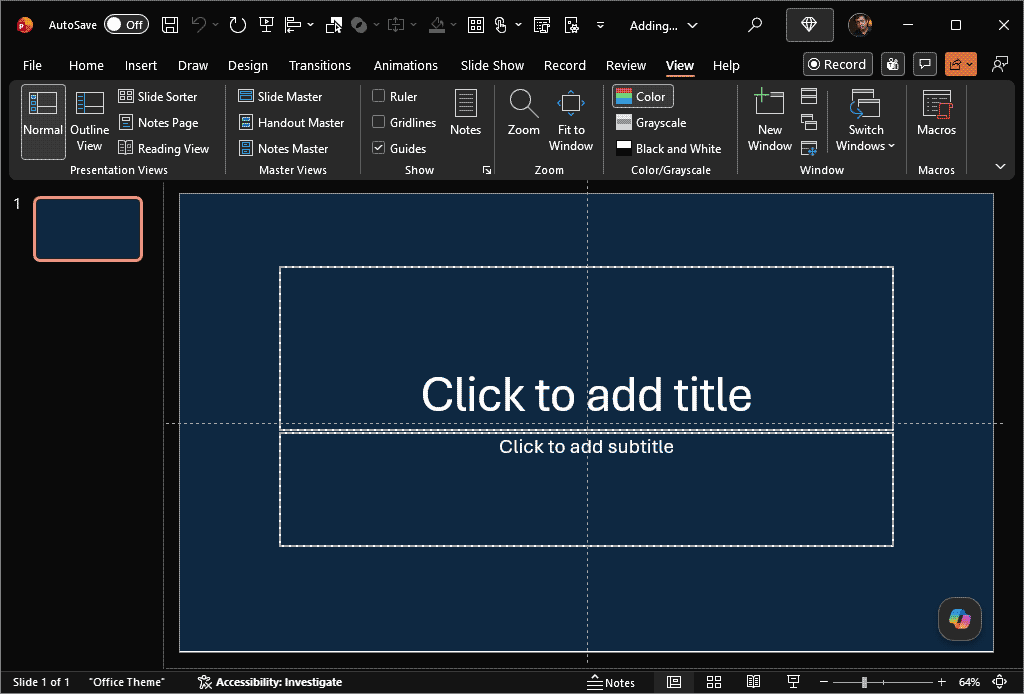
BackGuides may not be visible at all in most cases. You need to enable them to be visible on your slide. They will then appear at the same position across every slide in the presentation. The default setup includes two guides, one horizontal and one vertical, intersecting at the center of the slide, as shown in Figure 1, below. This works well for straightforward layouts, but additional guides can be added when more precise object positioning is needed across successive slides.

Figure 1: Default guides on a PowerPoint slide
Adding guides in PowerPoint works a bit like pulling fresh tape from a dispenser: one clean drag, and a new guide appears exactly where you need it. This drag-to-spawn method is the quickest route, and the one covered in detail on this page. If you prefer a more deliberate approach, Guide options in PowerPoint let you specify exact positions numerically, useful when you know precisely where a guide needs to land.
Follow these steps to spawn new guides in PowerPoint 365 for Windows:
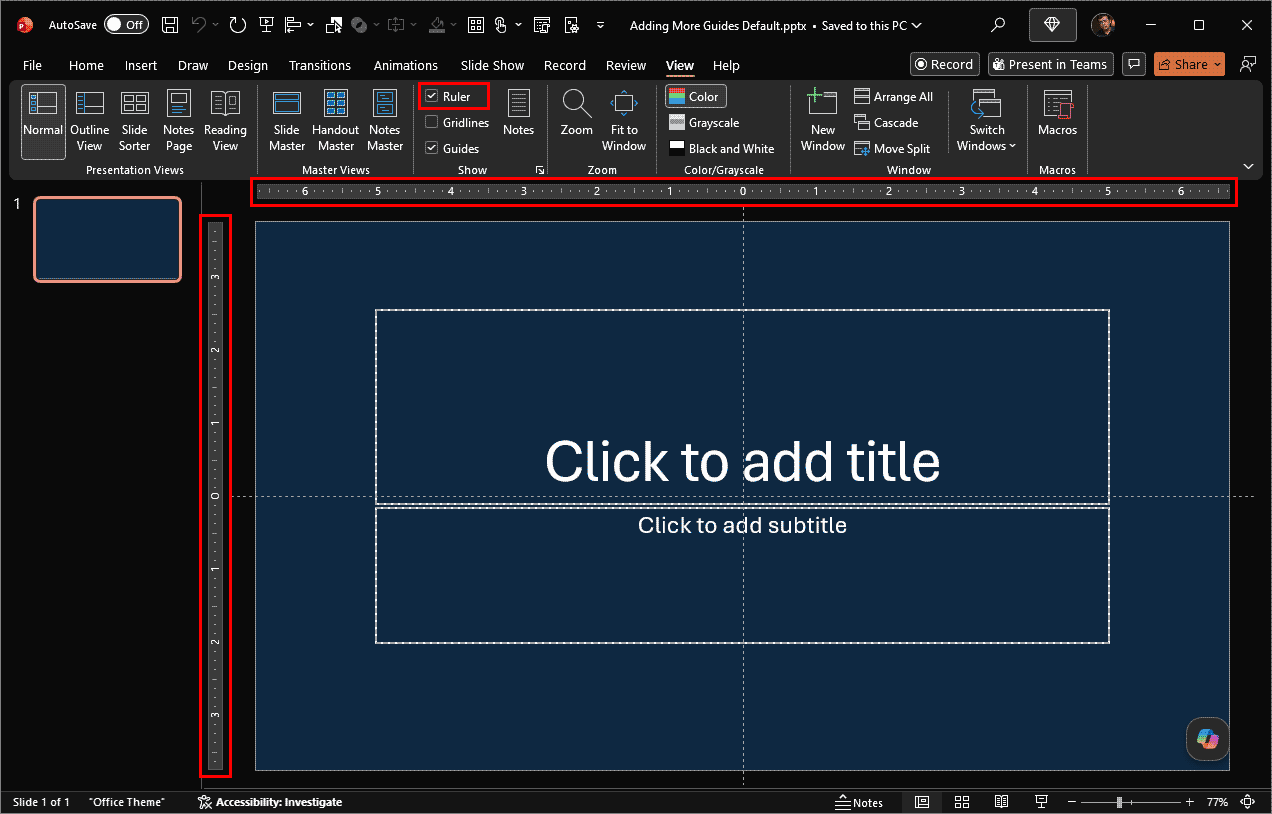
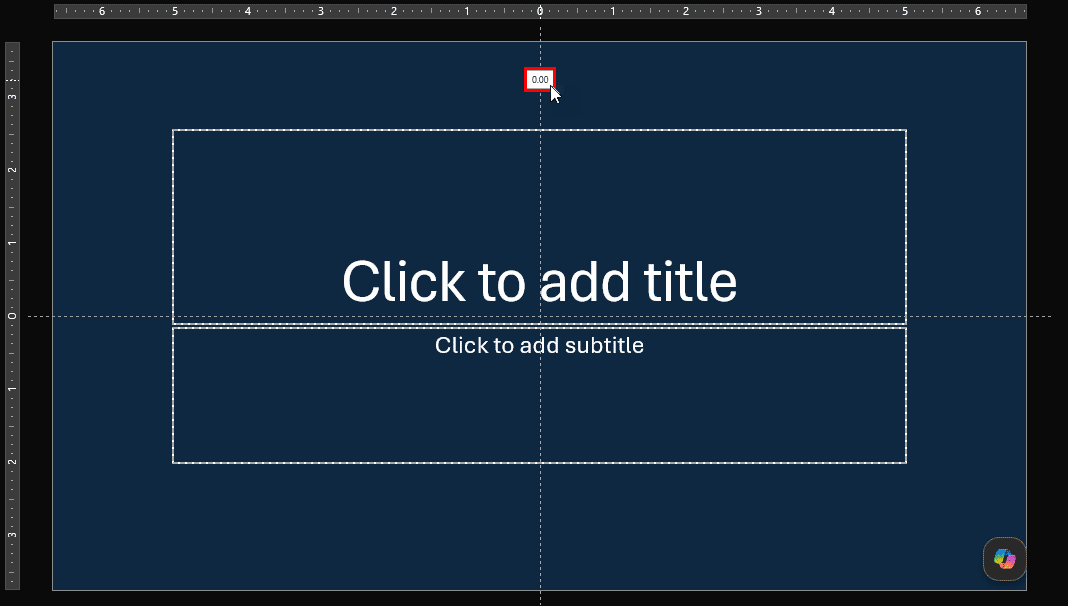
On a slide with multiple objects, clicking near a guide may accidentally select an object instead. If this happens, click the guide in the area just outside the Slide Area, where no objects are present, as highlighted in red within Figure 5, below. Then, continue with the remaining steps.

Figure 5: Click outside the slide area
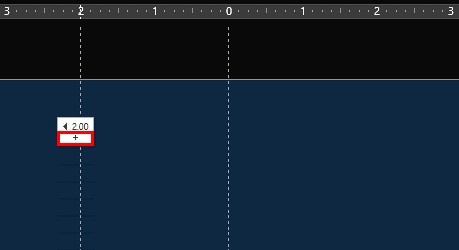
The unit of measurement displayed on guides, inches or centimeters, matches whatever unit the Ruler is set to and cannot be changed within PowerPoint itself. This setting is controlled at the Windows level. Here are instructions to access these settings in different versions of Windows.
Adding guides is only half the process. Much like scaffolding is removed once a wall no longer needs it, knowing how to remove guides helps keep your slide free of clutter after they've served their purpose. The process is quick and requires no menus or delete keys, and applies equally to horizontal and vertical guides, including the two default ones PowerPoint provides.
One detail worth knowing: guides, unlike shapes or text boxes, cannot be removed with the Delete key. Dragging is one option primarily used to both create and remove them, a consistent approach that PowerPoint applies throughout.
If a guide simply needs to move rather than being removed entirely, editing is the answer. Either way, follow these steps to move or remove an existing guide:
One limitation worth keeping in mind: guide modifications, whether adding, moving, or removing a guide, are not tracked by PowerPoint's Undo command. Pressing Ctrl+Z after adjusting a guide will undo other recent actions, but not the guide change itself. Unlike shapes or text, where a stray edit is one Ctrl+Z away from being reversed, guides require manual correction if positioned incorrectly. This makes it worth double-checking a guide's placement before moving on to the next task, since there's no quick undo to fall back on if it turns out to be off.
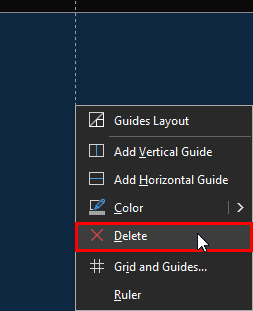
Repeat these steps for any additional guides that need to be moved or removed.
BackThat said, guides don't always need to be removed. To keep them out of sight without losing the positioning already in place, hiding is the more practical choice, much like putting scaffolding into storage instead of taking it apart. A quick toggle keeps guides hidden while retaining their exact positions, so they're available again whenever required. Use the Alt + F9 keyboard shortcut to show or hide Guides instantly. Pressing the shortcut once makes the Guides visible, and pressing it again hides them. In other words, it works as a toggle switch. Learn more in our Guides in PowerPoint 365 for Windows page.

Do you want more keyboard shortcuts?
Explore our PowerPoint Keyboard Shortcuts and Sequences Ebook that is updated for all PowerPoint versions.
Older versions, such as PowerPoint 2003 and earlier limited users to 8 vertical and 8 horizontal guides. This restriction was removed starting with PowerPoint 2007, and there is now no cap on the number of guides that can be created.
Guides may be simple lines on a slide, but they quietly shape the foundation of every well structured PowerPoint layout. Once enabled, they give you a consistent visual framework across all slides, and with just a quick Ctrl drag, you can add as many new guides as your design requires. Adding more guides isn't some hidden power-user secret locked behind menus and dialog boxes. It's just a Ctrl -drag away.... Whether you’re aligning objects with precision using the Ruler or removing guides once they’ve served their purpose.
Much like scaffolding is removed once a wall no longer needs it, knowing how to remove guides helps keep your slide free..., the process stays intuitive and hands on. Even hiding guides is just a simple Alt + F9 toggle, letting you clear visual clutter without losing your carefully planned structure.
Much like a tailor marking fabric with care, every guide you add earns its place on the slide, helping you build layouts that are cleaner, more consistent, and more intentional. With these techniques, you’re equipped to create designs that look polished, balanced, and ready for any presentation scenario.
BackEnsure Guides are enabled in the View tab before attempting to add more.
Add guides when designing structured layouts, dashboards, or multi-column slide designs.
No. Guides must be added one at a time.
01 09 16 - Working with Slides: Adding More Guides in PowerPoint (Glossary Page)
Adding More Guides in PowerPoint 2016 for Windows
Adding More Guides in PowerPoint 2016 for Mac
Adding More Guides in PowerPoint 2013 for Windows
Adding More Guides in PowerPoint 2011 for Mac
Adding More Guides in PowerPoint 2010 for Windows
You May Also Like: Business Storytelling: Conversation with Gavin McMahon | PowerPoint Data Rules or Conditional Formatting with DataPoint



Microsoft and the Office logo are trademarks or registered trademarks of Microsoft Corporation in the United States and/or other countries.
