Indezine Logo


Adding More Guides in PowerPoint 2013 for Windows

Learn how to add more guides in PowerPoint 2013 for Windows.


Author:

Product/Version: PowerPoint 2013 for Windows

OS: Microsoft Windows 7 and higher


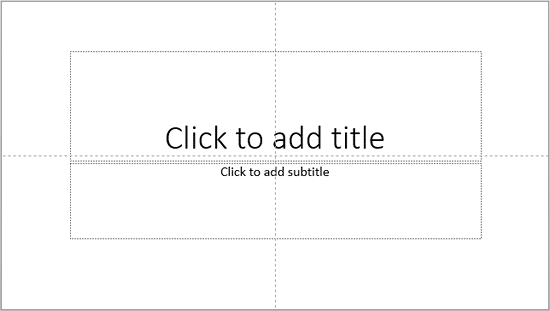
Once you have made guides visible on your PowerPoint slide, they show up in the same position on all other slides within the presentation. You'll find that only two guides, one horizontal and one vertical are visible at first, and these two guides intersect at the center of the slide, as shown in Figure 1, below. Most of the time, this guide layout might work for you. However, you can add more guides to help in positioning slide objects better across successive slides.
Guides on the PowerPoint slide
Figure 1: Guides on the PowerPoint slide

You typically add more guides in PowerPoint using the drag and spawn process that we explain on this page. Additionally, you can also use the techniques explained in our Guide options in PowerPoint 2013 page to add new guides.

Follow these steps to spawn new guides in PowerPoint 2013 for Windows:
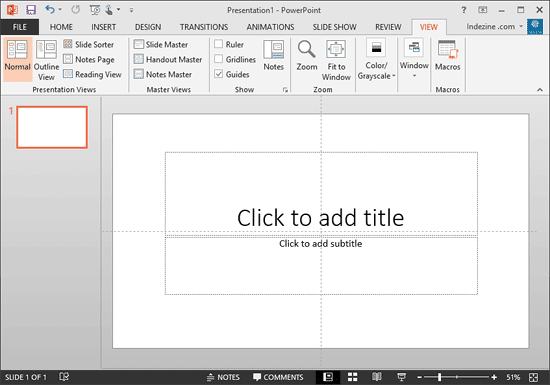
  1. Launch PowerPoint, and make sure that the guides are visible. In Figure 2, below, you can see an empty slide with default guides visible.
  2. PowerPoint slide with default Guides
    Figure 2: PowerPoint slide with default guides
  3. It's a good idea to make the Ruler visible in your presentation, as shown highlighted in red within Figure 3, below. Making the rulers visible gives you a better idea of how you want to position the new guides.
  4. Rulers made visible in PowerPoint
    Figure 3: Rulers made visible in PowerPoint
  5. Place your cursor over any of the guides (we placed the cursor over a vertical guide) and click it so that it is selected. Don't let go of your mouse click yet. If the guide shows digits defining its position in the cursor, as shown highlighted in red within Figure 4, below. you can be assured that it has been selected.
  6. Digits shown on the cursor
    Figure 4: Digits shown on the cursor
  7. With your hold on the cursor still active so that the guide remains selected, press the Ctrl key on the keyboard and drag the mouse towards right or left of the slide to create a new guide. You'll see a live indicator of the position of this new guide as you move through the digits indicator, along with a distinct plus sign in the cursor, as shown in Figure 5, below.
  8. New Guide being added
    Figure 5: New guide being added
  9. Once you have placed the new guide in the required position, first release the mouse button and then the Ctrl key to place it as a new guide. If you release the Ctrl key first, you will end up moving the selected guide to the new position.
  10. As shown in Figure 4, above, a new guide has been created 2.00 inches left of the default vertical guide. The default vertical guide is located at 0.00, which places it right in the center. You can create new guides towards both the left and right of this default guide.

    Inches or Centimeters?

    Does your new guide show its position indicator in inches or centimeters? The unit of measurement shown for guides is based on whatever unit your ruler shows and cannot be changed within PowerPoint. This setting is influenced by whatever you choose in your Windows Control Panel. Here are instructions to access these settings in different versions of Windows:

    Change the Unit of Measurement in Windows 8
    Change the Unit of Measurement in Windows 7

  11. You can add as many guides as you want, both horizontally and vertically. And if you want to delete the guide, just select it and drag it out of the Slide Area.

Guide Limitations?

PowerPoint old timers will recollect that you could create a maximum of 8 vertical and 8 horizontal guides in PowerPoint 2003 and earlier versions. Since PowerPoint 2007, Microsoft has removed that limitation. You can now create more than 8 vertical and 8 horizontal guides.


See Also:

01 09 16 - Working with Slides: Adding More Guides in PowerPoint (Glossary Page)

Adding More Guides in PowerPoint 365 for Windows
Adding More Guides in PowerPoint 2016 for Windows
Adding More Guides in PowerPoint 2016 for Mac
Adding More Guides in PowerPoint 2011 for Mac
Adding More Guides in PowerPoint 2010 for Windows

You May Also Like: Someone’s Sabotaged Santa’s Sleigh 2: Conversation with Tom Howell | Stand Out with a Direct and Dramatic Opening


Popular Posts

Paste in Place in PowerPoint
How can you place a copied or duplicated slide object right on top of the original object in PowerPoint?

Formatting Arrows (Arrowheads) in PowerPoint 2013 for Windows
Learn how to format arrowheads for lines in PowerPoint 2013 for Windows.

Changing Location of Slide Numbers in PowerPoint 2010
Learn how to change location of slide numbers in PowerPoint 2010.

Text Alignment within Table Cells in PowerPoint 2013 for Windows
Learn about the options for text alignment within Table cells in PowerPoint 2013 for Windows.


Feature List 01 (Layout with Tabs)

The Feature List Layout comprises three sample PowerPoint presentations: one each to create a visual list for 4 features, 5 features, and 6 features. These work great when you have too much information to fit within one slide. This solution lets you use multiple slides, but the visual result is still that of one single slide!

Buy and Download Feature List 01 (Layout with Tabs) for $4.99+ (671 kb)


Microsoft and the Office logo are trademarks or registered trademarks of Microsoft Corporation in the United States and/or other countries.

Home | PowerPoint | Photoshop | PowerPoint Templates | PowerPoint Tutorials | Blog | Notes | Ezine | Media Kit | Feedback | Site Map | About Us | Contact Us

Link to Us | Privacy | Testimonials

PowerPoint Backgrounds | Christian PowerPoint Backgrounds | Business PowerPoint Presentation Templates

Plagiarism will be detected by Copyscape

©2000-2026, . All rights reserved.