
This is the print version of this page. All content is copyright Indezine.com 2000-2026.
Explore options to use Guides more effectively in PowerPoint 365 for Windows. One of these options lets you choose colors for guides.
Author: Geetesh Bajaj
Product/Version: PowerPoint 365 for Windows
OS: Microsoft Windows 10 and higher
Guides help you line up objects on your slides. Most of us use them in a basic way and never look further.
This page covers Guide Options in PowerPoint 365 for Windows. You can add guides through the right-click menu, place them exactly where you want, and even change their color to mark different areas of a slide.
These options make it easier to build layouts, manage busy slides, and keep elements consistent across a deck. If you've only used the default guides so far, this walkthrough shows you what else is possible.
Forgotten Guide Options?
Adding More Guides
Conclusion
Quick Quiz
Meet Priya. She's been putting together slide decks for her marketing team for three years now, and she's good at it, fast, tidy layouts, always on brand. She owns a proper Swiss Army knife too, the kind her dad gave her before a camping trip. In all these years, she's used exactly two blades on it: the main knife and the bottle opener. The rest, the scissors, the toothpick, the mysterious little hook thing, might as well not exist for all she knows.
Her PowerPoint habits look suspiciously similar. Priya knows guides. She drags them onto her slides constantly, lining up logos, aligning text boxes, keeping her layouts neat. But that's it, that's her whole toolkit. She has no idea guides can be added through a right-click menu, spawned at a precise offset, or recolored from the default grey into any of ten available shades.
If Priya sounds a little familiar, you're in good company. Most PowerPoint users, whether by habit or simply because nobody ever mentioned it, are running the two-blade version of guides. This page opens up the rest of that knife.
Here are some other Guide options:
All features listed here except the last are covered on this page. For more on guide hierarchy, see our Hierarchical Guide Options in PowerPoint tutorial.
When guides are made visible, two guides appear by default, as shown in Figure 1, below. Additional guides can be added as needed, either by dragging existing guides to create new ones, or through the right-click contextual menu.
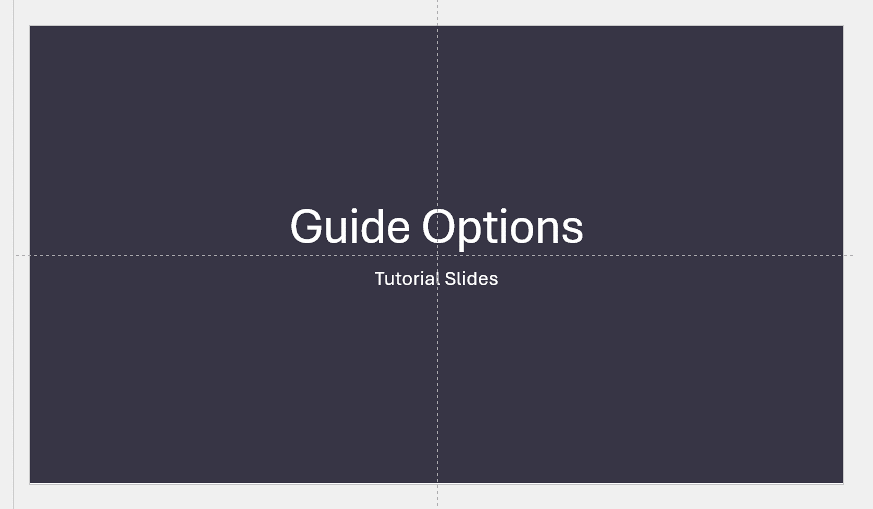
Figure 1: Default Guides for PowerPoint slides
If that sounds like your own PowerPoint habits, here's how to access guide options through the right-click contextual menu in PowerPoint 365 for Windows:
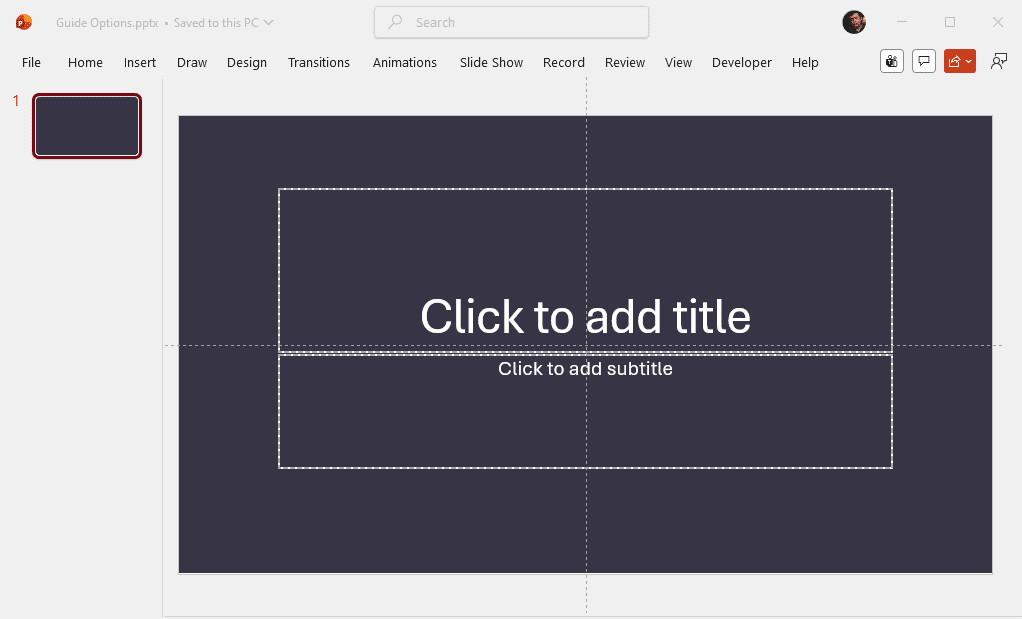
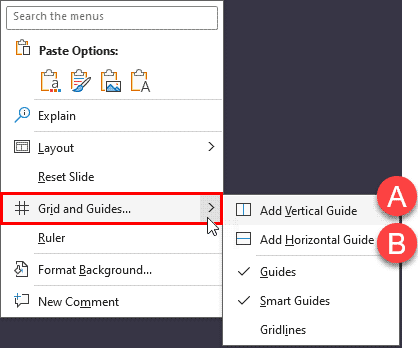

It goes without saying that guides need to be visible on your slide before you try any of these options. The Add Vertical Guide option adds a new guide on the vertical plane of the slide. Where your new guide shows up depends upon where you summoned the right-click menu:
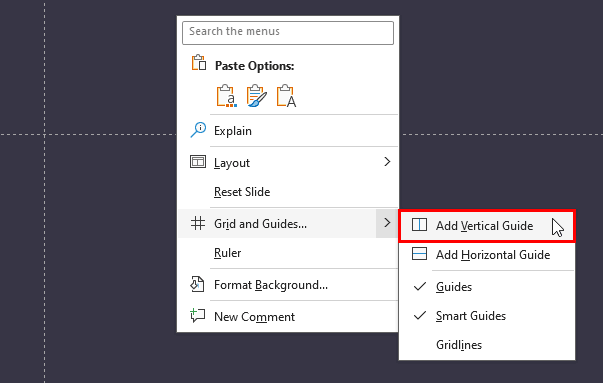

What if your slide had no Vertical Guide to begin with? In that case, where will the new guide be added?
In that case, PowerPoint will add a new Vertical Guide right at the center of the slide, almost like restoring the default Guide.
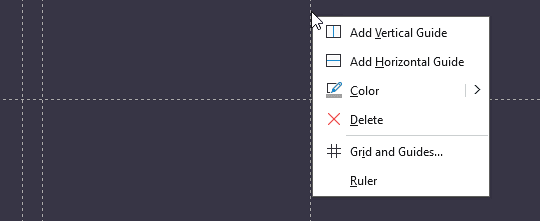

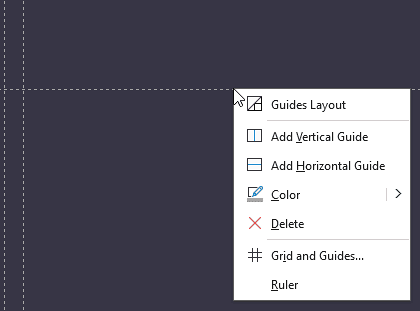

Adding a horizontal guide works exactly like adding a vertical one. Think of this as a mirror image and use the same three techniques. Whatever method felt natural for vertical guides, dragging to spawn, right-clicking on the slide, or right-clicking an existing guide, applies here without a single new step to learn. Yes, you can also click on an existing vertical guide and choose the Add Horizontal Guide option to add a new guide at that exact spot.
Do you know that this symmetry isn't an accident. PowerPoint's guide system was built so that horizontal and vertical guides share identical logic under the hood, a rare case of software design mirroring the elegance of a well-balanced seesaw, equal weight, equal rules, on either side.
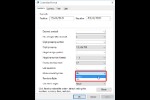
Diego, the university lecturer who color-codes everything from his lecture notes to his grocery list, discovers this one almost by accident. This Color option only shows up when you right-click an existing guide, as shown in Figure 4, previously on this page. Ten colors wait in the flyout menu, shown in Figure 11, below, a small painter's palette tucked inside a menu he never once thought to check, until now.
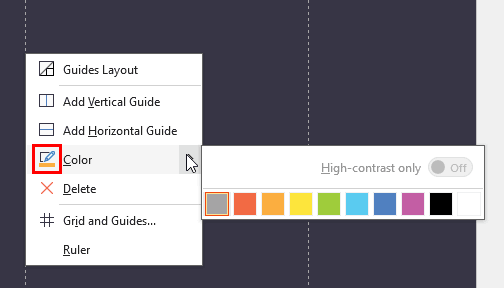
Figure 11: Recolor your Guides
There's a neat shortcut buried here too. The last color used doesn't require reopening that flyout menu each time. It sits right there in the main right-click menu itself, highlighted in red in Figure 11, above, ready to reapply with a single click, much like a painter who leaves their most-used brush sitting out on the easel instead of putting it back in the box after every stroke.
This convenience of remembering your last pick isn't unique to guides. PowerPoint applies the same "last used" logic to several other color pickers across the app, including font color and highlight color, a small but consistent touch of memory built into the software.
Meet Aisha, freelance presentation designer, who has to design five client decks a week. Worse, she has zero patience for wasted motion. For years, deleting a guide meant grabbing it and dragging it clean off the slide, a tiny chore she repeated so often it practically became muscle memory. Then she found the shortcut hiding in plain sight.
Right-click the guide you want gone, and there it is: a Delete option, shown in Figure 4, previously on this page. It’s sitting right in the menu. Click it, and the guide vanishes, no dragging, no aiming for the slide's edge, no chance of accidentally shoving it two pixels too far and nudging something else out of place.
Did you know that this Delete option is a relatively recent addition to PowerPoint's guide toolkit. For years, dragging was the only way out, which means an awful lot of longtime PowerPoint users, Aisha included, spent a small eternity doing the long way round without ever knowing a shortcut existed.
Here's one worth remembering: guides don't get a safety net. Unlike shapes, text, or nearly anything else on a slide, there's no Ctrl + Z waiting in the wings if a guide gets deleted by mistake. It's a bit like erasing a pencil mark on a map with a permanent marker instead, once it's gone, it's gone, and you're redrawing it from scratch.
This is one of the rare corners of PowerPoint where Undo simply doesn't apply, no matter how many times you press Ctrl + Z afterward, it'll happily undo something else entirely, just not the guide. Worth a pause before that Delete click.
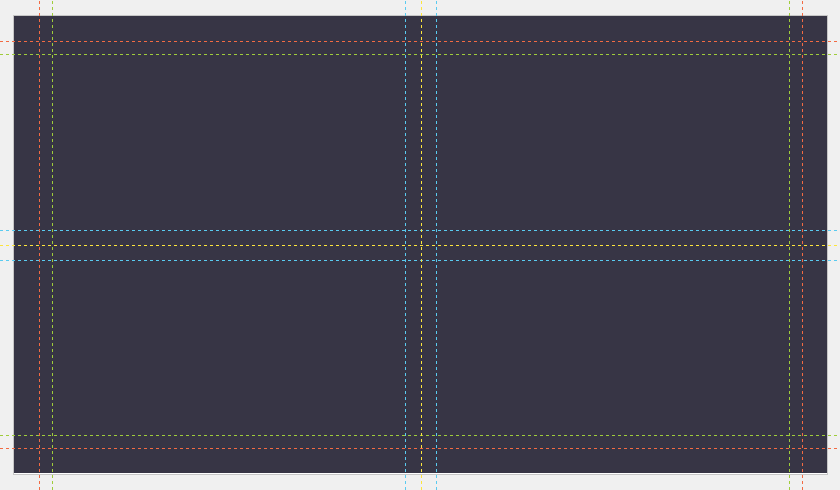
Guides may have started out as a simple pair of crossing lines, but as Priya, Marcus, and Diego, and Aisha each discovered, there's a lot more waiting behind that right-click menu than most of us ever bother to explore. Adding guides precisely, spawning them offset from existing ones, coloring them to mark different areas of a slide, and removing them cleanly are all small conveniences on their own. Together, they turn guides from a background alignment tool into a genuine layout system, one that rewards a little curiosity with a lot less manual fuss. The next time you're squinting at a busy slide trying to line things up by eye, remember there's likely a shortcut sitting one right-click away.
BackNo. Guides do not affect slide size or formatting.
Ensure Guides are enabled in the View tab, and you’re using a supported desktop version.
Absolutely. Add vertical guides to define clear columns for structured content.
01 09 17 - Working with Slides: Guide Options in PowerPoint (Glossary Page)
Guide Options in PowerPoint 2016 for Windows
Guide Options in PowerPoint 2013 for Windows
You May Also Like: The Importance of Screen Calibration | Obama Gets Back on Message



Microsoft and the Office logo are trademarks or registered trademarks of Microsoft Corporation in the United States and/or other countries.
