The Ribbon that you see within the PowerPoint 2016 for Mac user interface was designed to make all options easily accessible. To make more options available, you can add more tabs, rename them, and populate them with even more commands, as we will explore within this tutorial.
All commands on the Ribbon are placed within separate Tabs, and each Tab has groups with a few buttons. We explained these basics in our Ribbon and Tabs tutorial. Customization of the Ribbon involves four areas:
- Adding and Renaming Ribbon Tabs: We cover this topic on this page. Other techniques are covered in these separate, linked tutorials:
- Reordering and Removing Ribbon Tabs
- Working with Custom Groups in Ribbon Tabs
- Adding Commands to Custom Groups
Follow these steps to learn more:
- To add or rename Ribbon tabs, you need to bring up the Ribbon & Toolbar dialog box. There are two ways to access this dialog box. The easier way is to click the down arrow on the Quick Access Toolbar and to choose the More Commands option from the resultant menu, as shown highlighted in red within Figure 1, below.
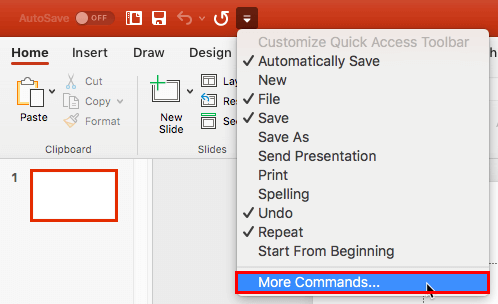
Figure 1: More Commands option - Alternatively, choose the PowerPoint | Preferences menu option, as shown in Figure 2, below.
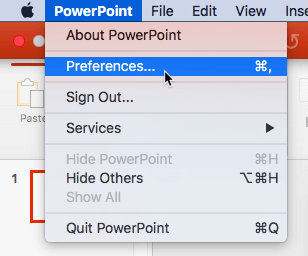
Figure 2: Access PowerPoint Preferences - Doing so opens the PowerPoint Preferences dialog box, as shown in Figure 3, below. Within this dialog box, select the Ribbon & Toolbar option, as shown highlighted in red within Figure 3.
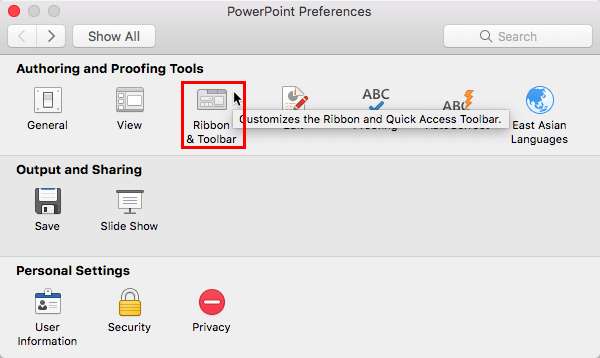
Figure 3: Ribbon & Toolbar option - Either way, you end up with the Ribbon & Toolbar dialog box, as shown in Figure 4, below. Make sure that the Ribbon tab is selected, as shown in Figure 4. Since you want to create a new tab, within the Main tabs list, select the tab after which you want to add the new tab, and click on the + button, as shown highlighted in red within Figure 4.
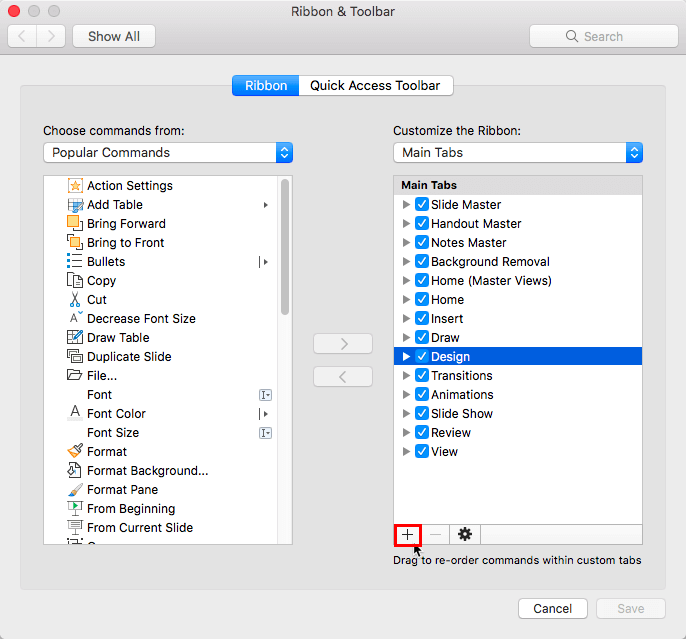
Figure 4: Ribbon & Toolbar dialog box- Doing so opens a small menu with two options, as shown in Figure 5, below. Select the New tab option.
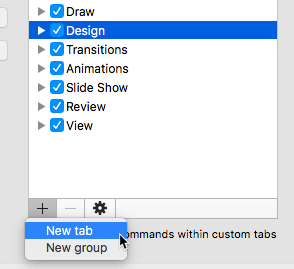
Figure 5: New tab option - PowerPoint adds New Tab (Custom) option within the Main Tabs list, as shown highlighted in red within Figure 6, below.
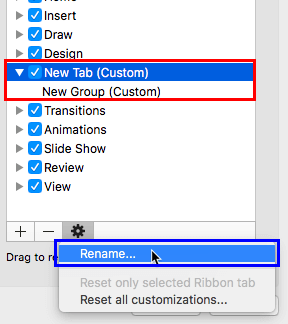
Figure 6: New custom tab added - Note that when New Tab (Custom) is added, a default New Group (Custom) is also added. This is because all your commands within a tab need to reside in a group.
- You should now rename your custom tab. Select the newly added New Tab (Custom), and click the Settings button. Doing so brings up a small menu, as shown in Figure 6, above. Within this menu, select the Rename option, as shown highlighted in blue within Figure 6. This action opens a new window, as shown in Figure 7, below. Within this window, provide a name for the new tab and click the Save button.

Figure 7: Rename the new tab - You can rename the new group the same way you did for New Tab (Custom). Make sure that you select New Group (Custom) or renaming, as shown in Figure 8, below. We explain more about customizing groups in our Working with Custom Groups in Ribbon Tabs tutorial.
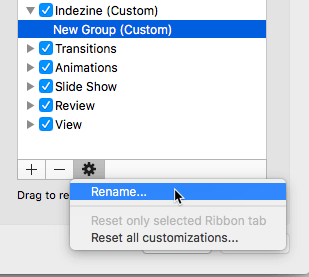
Figure 8: Rename the new group - When done, click the Save button within the Ribbon & Toolbar dialog box to get back to PowerPoint interface. Figure 9, below, shows the new custom tab within the Ribbon with the default custom group.
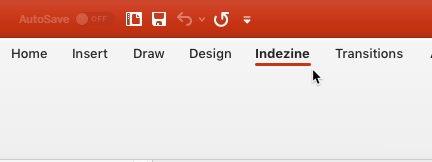
Figure 9: New custom tab with custom group added to the Ribbon
New Group Not Visible?
- Can't see the new group added within the new tab, as shown in Figure 9, above? You can see the new group only after adding commands to the new groups.
- Save your presentation often.


