Explore the interface for PowerPoint 365 for Windows. Each interface element has a purpose and a reason.
Author: Geetesh Bajaj
Product/Version: PowerPoint 365 for Windows
OS: Microsoft Windows 10 and higher
Here's a quick walkthrough of the PowerPoint 365 for Windows interface. You will notice that the PowerPoint 365 interface is quite similar to the one in PowerPoint 2019 for Windows.
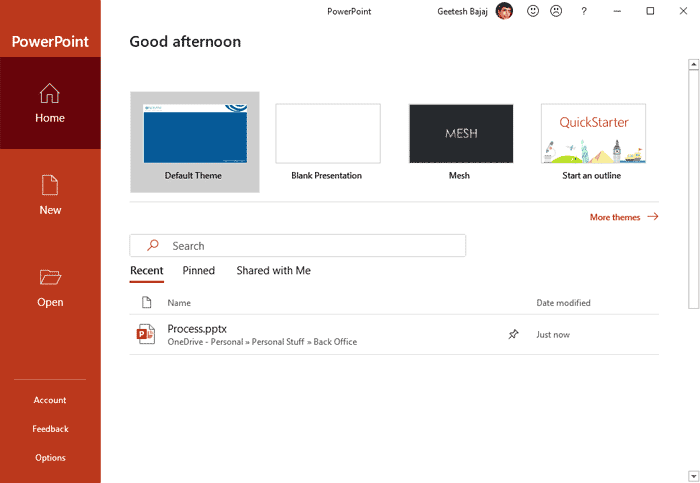
PowerPoint 365 for Windows opens with Backstage view, as shown in Figure 1. This view provides several ways to create your next presentation using a template or Theme. You can even open an existing file. Once you make choices in this view, you see the actual PowerPoint interface.

Figure 1: PowerPoint 365 for Windows Backstage view
Figure 2 shows a screenshot of the PowerPoint 365 for Windows interface, each part of the interface is explained later in this page.

Figure 2: PowerPoint 365 for Windows interface
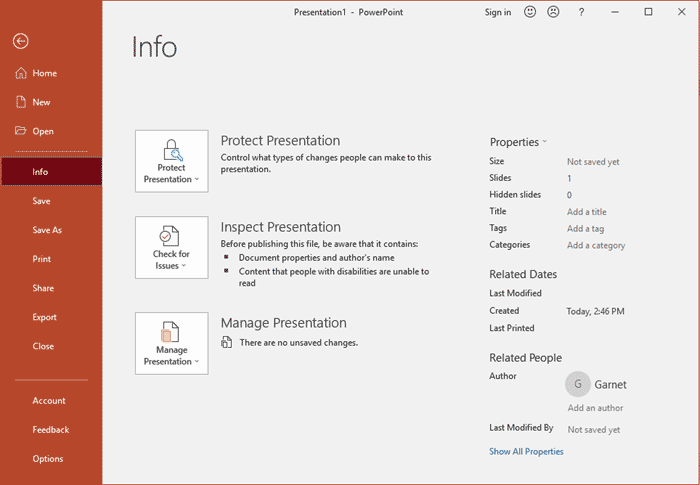
When you click the File menu, you see the Backstage view that contains all the creation, save, share, and print options for your presentations, as shown in Figure 3.

Figure 3: File Menu leads to the Backstage View
The QAT is a customizable toolbar placed by default above the Ribbon. Here, you can add icons for your often used commands. The QAT can also be placed below the Ribbon.
The Ribbon has tabs which in turn contain groups of buttons for various options, some groups also contain galleries (for example galleries for Themes and Theme Colors).
Located on the left side of the interface, the Slides Pane shows thumbnails of all the slides in the open presentation.
Displays the active slide. To learn more, visit our Slide Area in PowerPoint page.
The Task Pane contains more options and appears when you choose an option in one of the Ribbon tabs. For example, if you click the Format Background button within the Design tab of the Ribbon, the Format Background Task Pane opens (refer to Figure 1, shown earlier on this page).
The Status Bar is a horizontal strip that provides information about the opened presentation like slide number, applied Theme, etc. It also includes the view and zoom options.
The Notes Pane is located right below the active slide. This is where the speaker notes are written for the current slide. Note that none of this content is visible on the actual slide while presenting, although it is visible in both Notes Page view and Presenter view.
Essentially there are three view buttons on the Status Bar displayed towards the left of the zoom-in and zoom-out options:
If you are in some other view such as Slide Sorter view, click the Normal button on the Status Bar to switch to Normal view. Shift + clicking this button gets you to Slide Master view.
Click this button to switch from any other view to Slide Sorter view. The Slide Sorter view displays zoom-able thumbnails of every slide in the open presentation. Shift + clicking this button gets you to Handout Master view.
Click this button to switch from any other view to Reading view.
Show the presentation as a full-screen slide show from the currently selected slide. Shift + clicking this button brings up the Set Up Show dialog box.
This toolbar is not shown in Figure 3, shown earlier on this page; it's a semitransparent floating toolbar that spawns right next to selected text. Hover the cursor upon it, and you can see the Mini Toolbar, as shown in Figure 4. And, it is also available instantly with a right-click.

Figure 4: Mini Toolbar
The PowerPoint interface has key areas: the Ribbon (your toolbar at the top), the Slides Pane (see all your slides on the left), the Slide Area (where you edit the current slide), and the Notes Pane (add speaker notes). It’s easy to navigate once you know these parts.
Make PowerPoint yours! Right-click the Ribbon or Quick Access Toolbar and choose Customize. Add, remove, or rearrange commands. You can use View | Zoom or switch to Reading View for more comfort. Don’t forget: File | Options lets you tweak even more settings!
If something’s off—Ribbon collapsed or options missing—click the tiny arrow at the top-right to expand the Ribbon. Go to View | Normal to reset your layout. If needed, use File | Options | Customize Ribbon | Reset to restore PowerPoint to its default interface. Do note that using Reset will remove all your existing customizations.
01 05 01 - Interface Overview: Interface in PowerPoint (Glossary Page)
Interface in PowerPoint 365 for Mac
Interface in PowerPoint 2019 for Windows
Interface in PowerPoint 2016 for Windows
Interface in PowerPoint 2016 for Mac
Interface in PowerPoint 2013 for Windows
Interface in PowerPoint 2011 for Mac
Interface in PowerPoint 2010 for Windows
Interface in PowerPoint 2007 for Windows
Interface in PowerPoint 2003 and 2002 for Windows
Interface in PowerPoint for the Web
You May Also Like: First Impressions Last, by Jerry Weissman | Metaphors PowerPoint Templates


Microsoft and the Office logo are trademarks or registered trademarks of Microsoft Corporation in the United States and/or other countries.