Indezine Logo


Removing Sections in PowerPoint 2013 for Windows

Learn how to remove sections in PowerPoint 2013 for Windows. You can remove slides within the section, or move them to another section.


Author:

Product/Version: PowerPoint 2013 for Windows

OS: Microsoft Windows 7 and higher


Learn PowerPoint

Learn why data labels show [CELLRANGE] rather than the expected value or number in PowerPoint charts.


If you want to logically categorize your presentation slides so that they can be easily managed, then you should use the Sections option. You are not just limited to adding and renaming sections. You can also move slides from one section to another, or change the order of sections, or collapse/expand sections etc. Other than these activities, you can also remove a section, as explained in the steps below.

Follow these steps to remove sections in PowerPoint 2013 for Windows:

  1. Open your presentation in PowerPoint, within which you have already added sections. Change to Slide Sorter view, as shown in Figure 1, below, so that you can easily access the sections in your presentation.
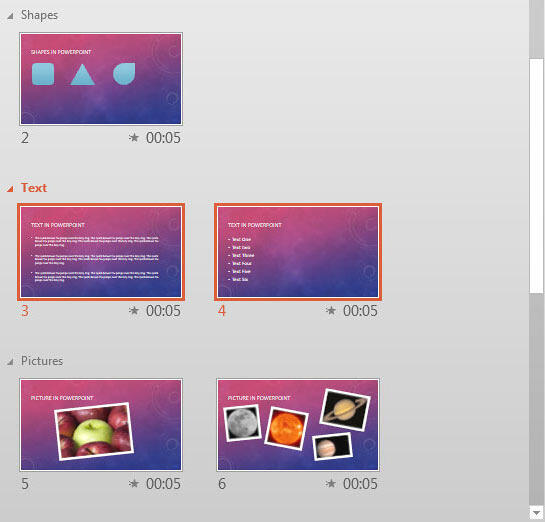
  2. Presentation opened within the Slide Sorter view
    Figure 1: Presentation opened within the Slide Sorter view
  3. Right-click on the name of the section to be removed. In Figure 2, below, you can see that we chose the section named Text for removal. Within the contextual menu that appears, you will find three options for removing the section, as marked in Figure 2.
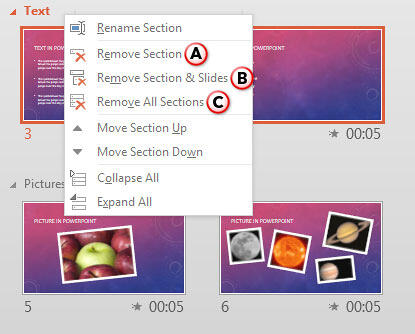
  4. Options to remove the selected Section
    Figure 2: Options to remove the selected section
  5. Are Some Options for Sections Greyed Out?

  6. Is the Remove Section option greyed out, as shown highlighted in red within Figure 3, below? This is possible if you have selected the first section in a presentation with multiple sections.
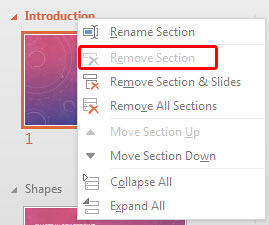
  7. Remove Section option greyed out
    Figure 3: Remove Section option greyed out
  8. However, if there is only one section in the presentation, then the Remove Section option will be available within the first and only section of your presentation, as shown highlighted in red within Figure 4, below.
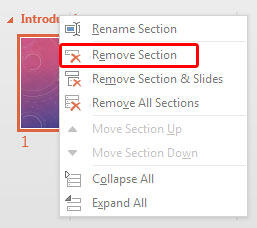
  9. Remove Section option not greyed out
    Figure 4: Remove Section option not greyed out
  10. Let us explore all three options for removing the Section, as marked in Figure 2, shown previously on this page:
  11. A. Remove Section

  12. This option removes the selected section. All slides from the section are not deleted though; they are added to the section above the removed section, as shown in Figure 5, below. Compare with Figure 1, shown previously on this page.
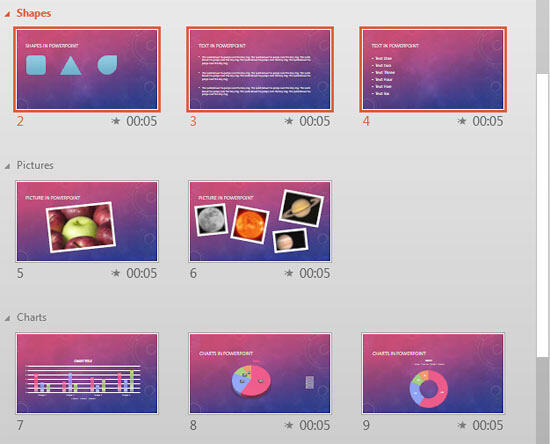
  13. Result of selecting Remove Section option
    Figure 5: Result of selecting Remove Section option
  14. B. Remove Section and Slides

  15. This option removes the selected section along with all the slides contained within, as shown in Figure 6, below. Yes, everything will be deleted, so do be careful!
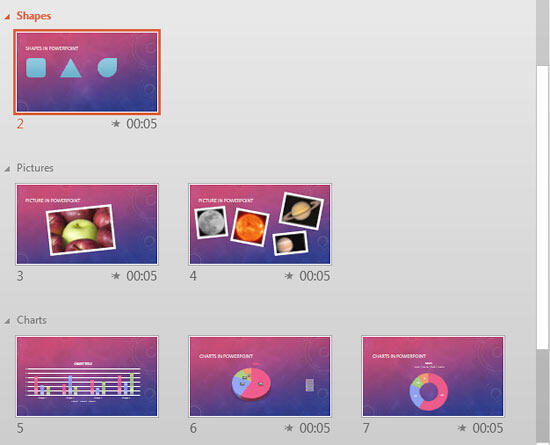
  16. Result of selecting Remove Section and Slides option
    Figure 6: Result of selecting Remove Section and Slides option
  17. C. Remove All Sections

  18. This option removes not only the selected section, but all sections in the presentation, resulting in all slides with no sections, as shown in Figure 7, below.
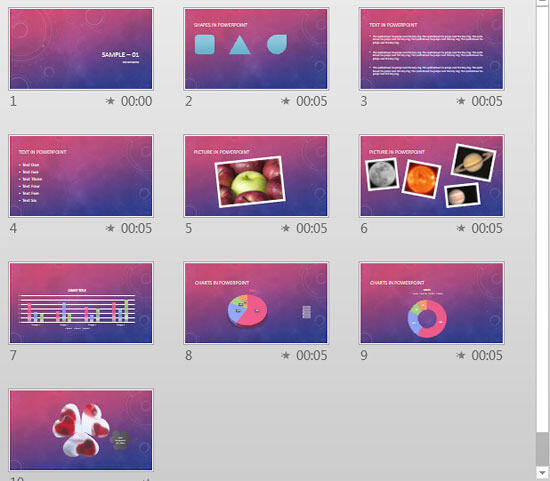
  19. Result of selecting Remove All Sections option
    Figure 7: Result of selecting Remove All Sections option
  20. Select any option to remove section(s) as required.
  21. Save your presentation often.

See Also:

01 12 04 - Sections: Removing Sections in PowerPoint (Glossary Page)

Removing Sections in PowerPoint 2016 for Windows
Removing Sections in PowerPoint 2011 for Mac
Removing Sections in PowerPoint 2010 for Windows

You May Also Like: Presentation Industry Standards: Conversation with Simon Morton | Denmark Flags and Maps PowerPoint Templates


Popular Posts

Shapes
Shapes
Learn how you can create and manipulate shapes in PowerPoint -- knowledge of working with shapes is significant because they are the building blocks of creativity in PowerPoint.

Insert Picture from the Office ClipArt Collection in PowerPoint 2013
Learn how to insert picture using Office ClipArt in PowerPoint 2013.

Snow Effect in PowerPoint
Create a snow fall effect inside PowerPoint using animation techniques.

PowerPoint Transitions: Curtains
Explore the Curtains transition effect in PowerPoint.


Feature List 01 (Layout with Tabs)

The Feature List Layout comprises three sample PowerPoint presentations: one each to create a visual list for 4 features, 5 features, and 6 features. These work great when you have too much information to fit within one slide. This solution lets you use multiple slides, but the visual result is still that of one single slide!

Buy and Download Feature List 01 (Layout with Tabs) for $4.99+ (671 kb)


Microsoft and the Office logo are trademarks or registered trademarks of Microsoft Corporation in the United States and/or other countries.

Home | PowerPoint | Photoshop | PowerPoint Templates | PowerPoint Tutorials | Blog | Notes | Ezine | Media Kit | Feedback | Site Map | About Us | Contact Us

Link to Us | Privacy | Testimonials

PowerPoint Backgrounds | Christian PowerPoint Backgrounds | Business PowerPoint Presentation Templates

Plagiarism will be detected by Copyscape

©2000-2025, . All rights reserved.