For your bulleted paragraphs in PowerPoint, you can always choose any of the default PowerPoint
bullet styles. Additionally, you can
also customize the bullet size and
color as required. And you can also use any picture as a bullet. Of course, for picture bullets to work, your picture needs
to be small, no larger than a medium-sized dot. And it helps if it has transparent areas. If all this talk about the size and
transparency of a picture bullet makes you dizzy, don't worry because PowerPoint has number of picture bullets built within the
program!
So what does a picture bullet look like? Look at Figure 1, where the first bullet uses PowerPoint's default
bullet style. The second and third bullets use picture bullets.

Figure 1: Picture bullets in PowerPoint
To use pictures as bullets, follow these steps:
- Open your PowerPoint presentation and navigate to the slide where you want to add picture bullets. Select the bulleted
paragraph:
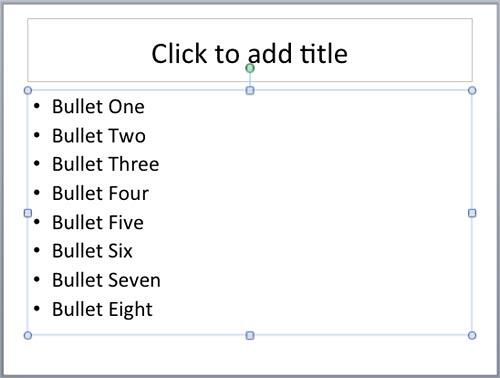
- Figure 2: Slide with bulleted paragraph selected
- a. If you want to make changes to just one bullet in the
text placeholder (or text box), and
select that individual line.
- b. If you want to make these changes to all the bullets in the
text placeholder (or text box), you
can select the entire text
placeholder by clicking on the edge of the placeholder (see Figure 2).
- Access the Home tab of the
Ribbon. Within the Paragraph group,
click the arrow beside the Bulleted List button (highlighted in blue within
Figure 3). This brings up the Bulleted List gallery, as shown in Figure 3.
Within this gallery, choose the Define New Bullet option (highlighted in red
within Figure 3).
-
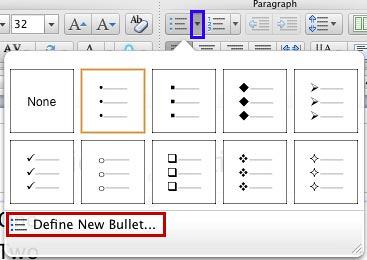
Figure 3: Bulleted List gallery
- This will open the Format Text dialog box with Bullets and Numbering option
selected within the sidebar, as shown in Figure 4. Make sure that the Bullets tab of this dialog
box is selected. In this tab, click the button displaying up and down arrows (highlighted in red
within Figure 4) within the Custom bullet section.
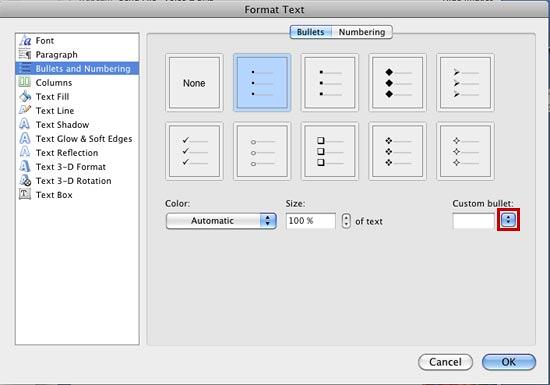
Figure 4: Bullet options within the Format Text dialog box- This opens the Custom bullet drop-down list as show in Figure 5. Select the
Picture option, the last option in this list.
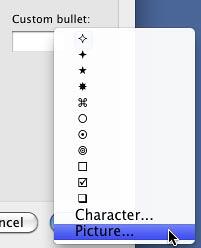
Figure 5: Picture option within the Custom bullet drop-down list- This brings up the Choose a Picture dialog box, as shown in Figure 6. Here you
can see PowerPoint's built-in picture bullets collection. You can also navigate to the folder where you have stored more picture
bullets. If you want to learn more about how to save a picture to be used as a bullet, refer to our
Create Your Own Picture Bullets
in PowerPoint 2011 for Mac tutorial. For now, choose a picture of your choice within the Choose a Picture
dialog box by clicking on it, as shown in Figure 6. Then click the Insert button (highlighted
in red within Figure 6).
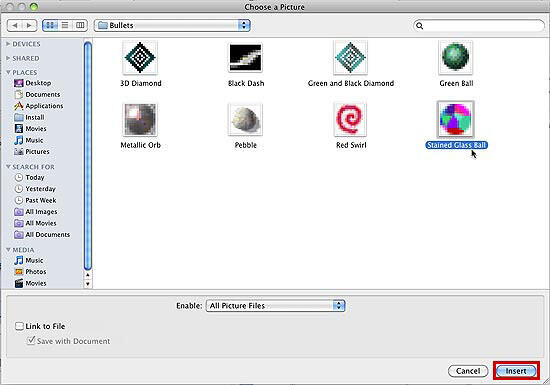
Figure 6: Choose a Picture dialog box- This will take you back to the Format Text dialog box. Here click the OK button
to get back to the slide where the default bullets for the selected text are now changed to new picture as shown in
Figure 7. Compare Figures 2 and 7 to see the difference.
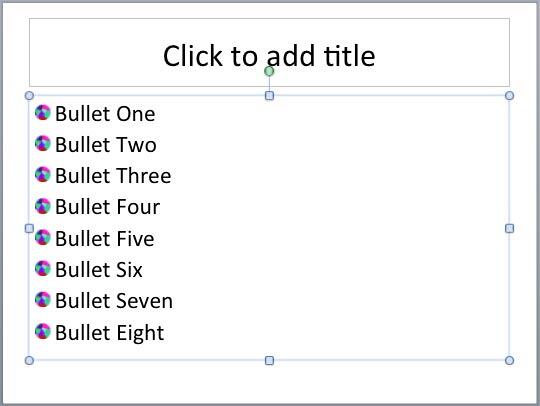
Figure 7: Bullets changed to pictures
Tip: Do you want the picture bullet to be applied to all slides? You can quickly make that customization
by working within
Slide Master View.


