Text outline, the border that spans the perimeter of the
font characters, is mainly used to make the slide titles or other text appear prominent. Taking this concept little further, you can make these
outlines look fancier by using an attribute that's rarely associated with text outlines but can provide a surprisingly different look, especially
when applied to the text with thicker outlines as shown in Figure 1, below. This is the Gradient Outline, and is not accessible
from within the Text Outline gallery, but has been included
within the Format Text Effects dialog box that we will explore later in this page.
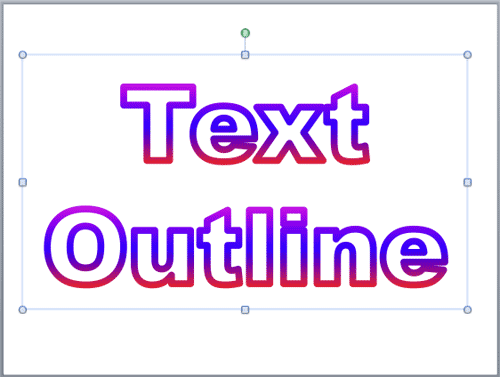
Figure 1: Gradient outline applied to the text without any fill
Follow these steps to apply gradient outlines to text:
- Select the text to which you want to apply the
gradient outline.
- Alternatively, if you just want to follow this tutorial step-by-step, launch
PowerPoint 2011 for Mac. You will see the
Presentation Gallery which allows you to set
all attributes of your new presentation, such as a preset Theme or template. Make selections or just click Cancel in this gallery
to open a blank presentation with a new slide. PowerPoint 2011 users can
change the slide layout of this slide to
Blank by selecting the Layout | Blank option within the Home tab of the
Ribbon.
- Insert a text box and type some text in it. You can
also change the text font to something
"blocky", such as Arial Black. For this tutorial, we used large
sized text (150 point) with an outline that has been
applied with a weight of 10 pt. so that
the gradient outline is thick enough to stand out (see Figure 2). Then, select the text, or
select the entire text placeholder.
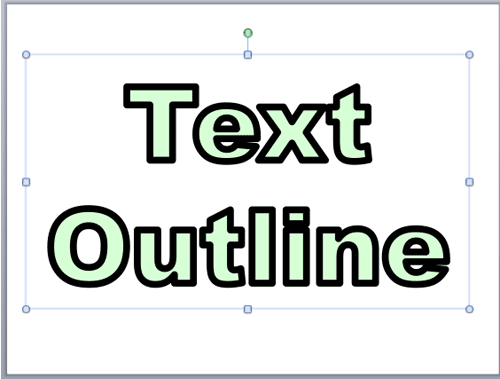
Figure 2: Text with large font size and thick outline- Make sure that you select the entire text for which you want to apply the gradient outline (not the text container). Then right-click (or
Ctrl+click) to bring up a context menu that you can see in Figure 3. In this context menu select the
Format Text option (see Figure 3 again).
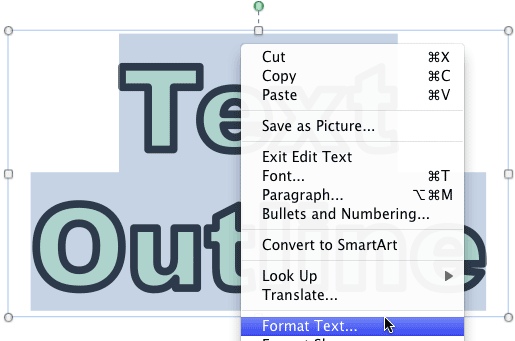
Figure 3: Format Text option to be selected- This opens the Format Text dialog box, as shown in Figure 4. Select the Text Line option
in the sidebar (highlighted in red within Figure 4), and select the Gradient tab
(highlighted in blue within Figure 4) to reveal the Gradient line options.
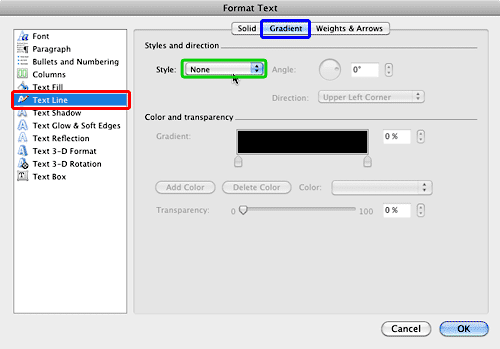
Figure 4: Format Text dialog box with Gradient text line options greyed out- As you can see in Figure 4, there are number of options to set the gradient outline for the selected text, but they
are all greyedout. This is because Gradient Style has been set to None (highlighted in green
within Figure 4).
- Select any Gradient Style for your text and you will see that all Gradient line options are activated now as shown in
Figure 5. All of these Gradient line options for text outline work in the same way as the Gradient line options work for shape
outlines. So, to learn more about how to use these Gradient line options, you can refer to our
Gradient Lines in PowerPoint 2011 for Mac tutorial.
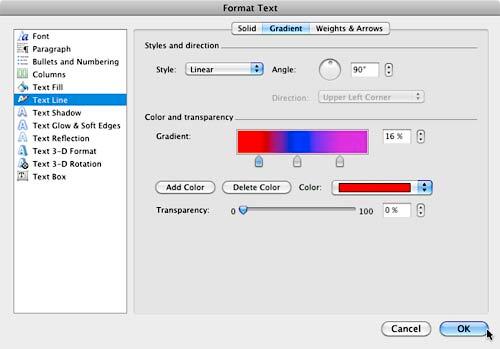
Figure 5: Format Text dialog box with Gradient text line options activated- Apply and edit the Gradient options as required. Once done, click the OK button to close the Format Text
dialog box to get back to your slide. In Figure 6 you can see the gradient outline applied to the text selected earlier (compare
with Figure 2).
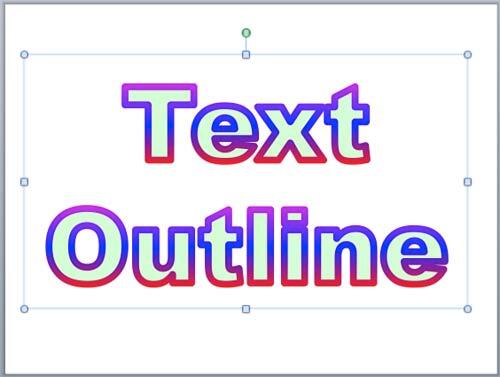
Figure 6: Gradient outline applied to the selected text- If you use a gradient outline on the text that has no fill, you will attain a simple look that will make the actual text fill area transparent,
thus resting the entire focus to the gradient line (see Figure 1, earlier on this page). To learn how to remove the fill from a
text, refer to point 4-A in our Text Fills in
PowerPoint 2011 for Mac tutorial.
- Save your presentation often.
Note: Do you want the gradient outline to be applied to the text in entire presentation? you can access the
Slide Master view and apply the gradient outline there. This way
you will be making changes just once and every slide will be effected.


