Create PDFs from your presentation slides in PowerPoint 2013 for Windows. Using options available, you can convert some or all slides to a PDF.
Author: Geetesh Bajaj
Product/Version: PowerPoint 2013 for Windows
OS: Microsoft Windows 7 and higher
Saving a PowerPoint presentation as a PDF has its pros and cons. The biggest advantage is that recipients won't be able to edit, and you can embed fonts easily. An even better advantage is that you may use PDFs as a substitute for printing drafts or finished slides, save so much paper.
Disadvantages include that you cannot be entirely multimedia-friendly. Whatever your thoughts may be, PowerPoint makes it very easy to create PDFs.
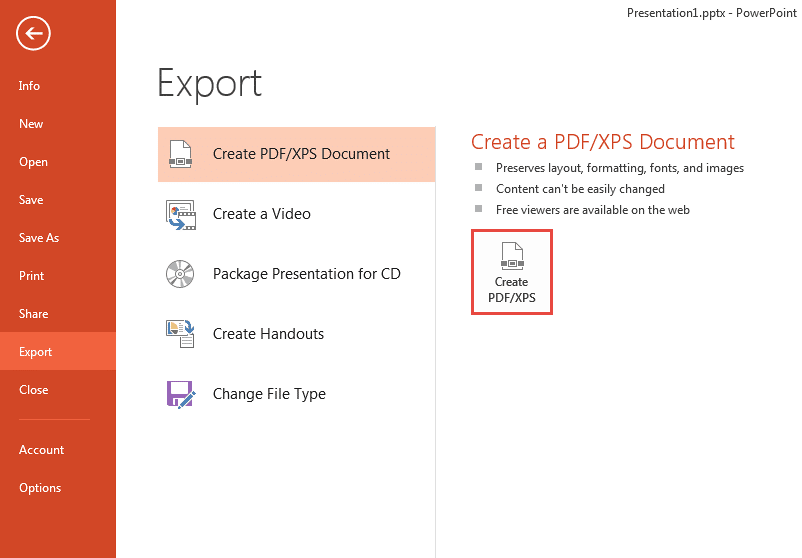
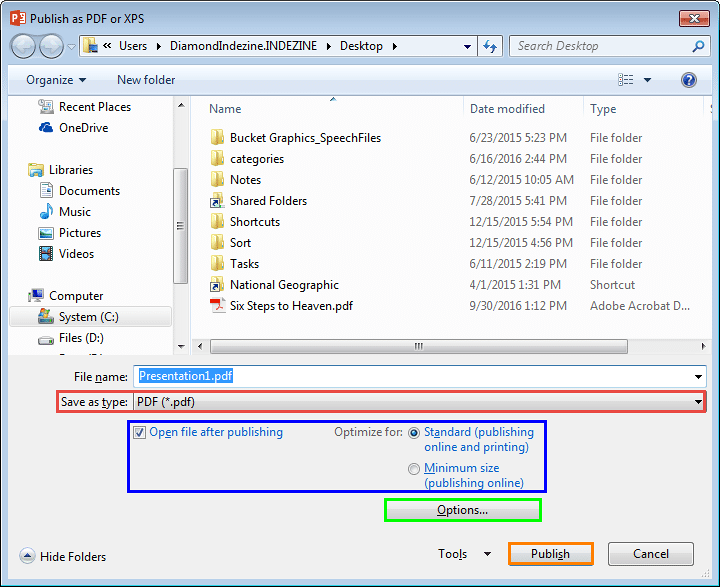
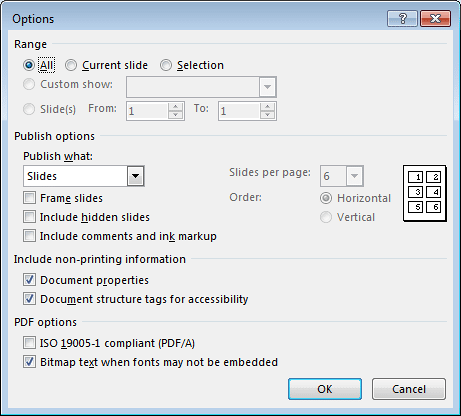
Follow these steps to create a PDF in PowerPoint 2013 for Windows:

Do you want more keyboard shortcuts?
Explore our PowerPoint Keyboard Shortcuts and Sequences Ebook that is updated for all PowerPoint versions.


16 04 04 - Views: Save as PDF in PowerPoint (Glossary Page)
Save as PDF in PowerPoint 365 for Windows
Save as PDF in PowerPoint 2016 for Windows
Save as PDF in PowerPoint 2011 for Mac
Save as PDF in PowerPoint 2010 for Windows
Save as PDF in PowerPoint 2007 for Windows
You May Also Like: Xara Photo & Graphic Designer 365: Conversation with Nova Fisher | Abstract PowerPoint Templates


Microsoft and the Office logo are trademarks or registered trademarks of Microsoft Corporation in the United States and/or other countries.