The terms Header and Footer typically come from word processing programs. These denote repeated elements that show at the top and bottom of every page. Headers and Footers work similarly on PowerPoint slides: the Footer is a line of text that usually appears at the bottom of a slide, as shown highlighted in red within Figure 1, below.

Figure 1: Footer in PowerPoint
Typically, the Footer area includes three placeholders:
- Date
- Footer (You add a message, a company name, or anything you want to be visible on all slides here)
- Slide number
By default, the footer with one or more of these three placeholders appears on every slide in a presentation, but you can change that as required. You can also move the content within the Footer area to the top of your slide, as shown highlighted in red within Figure 2, below. By doing so, you change a Footer to a Header!

Figure 2: Footer moved to the top of the slide
In this tutorial, we'll learn how to make Footers or Headers visible on your slides in PowerPoint 365 for Mac:
- Open the presentation where you want to add a Header or Footer. Access the Insert tab of the Ribbon, as shown highlighted in blue within Figure 3, below.
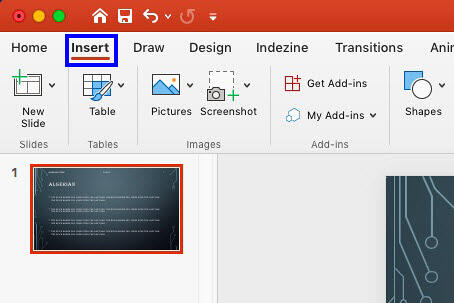
Figure 3: Insert tab of the Ribbon- Within the Insert tab, click the Header & Footer button, as shown highlighted in red within Figure 4, below.
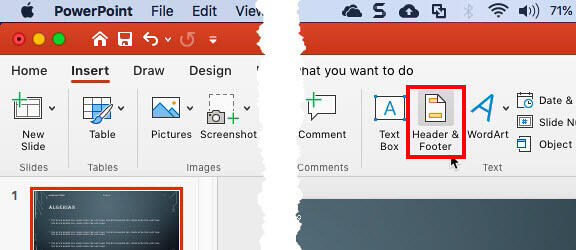
Figure 4: Header & Footer button
Alternate Options
- You can also click either the Date & Time or Slide Number buttons. They all end up summoning the same Header and Footer dialog box!
- You'll see the Header and Footer dialog box, as shown in Figure 5, below.
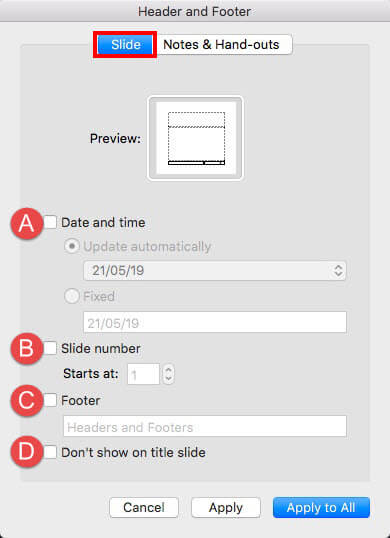
Figure 5: Slide tab within Header and Footer dialog box- Within the Header and Footer dialog box, make sure that the Slide tab, as shown highlighted in red within Figure 5, above, is selected, so that the options you select or deselect will only affect the slides you see onscreen rather than your printed handouts. Options within the Slide tab of Header and Footer dialog box are explained below, as marked in Figure 5, above:
A. Date and time
- Select this check-box to make the date appear on your slide(s). Then, choose whether you want the Date and time to Update Automatically, or set them to Fixed, to achieve any of the results explained below:
Update Automatically
- Select this radio button and then open the drop-down list, as shown in Figure 6, below, to choose a date (or date and time) format.
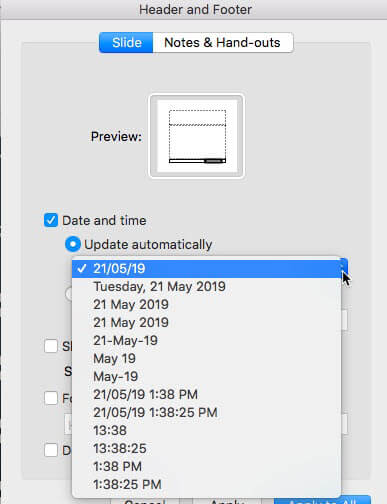
Figure 6: Date (or date and time) format drop-down listFixed
- Select this radio button and enter a date in the box, as shown highlighted in red within Figure 7, below. By default, this uses the current date. Also, the date remains the same no matter when or where you edit or deliver your presentation.
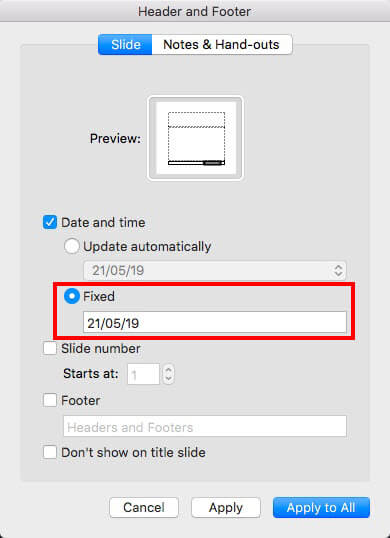
Figure 7: Fixed radio button selected
'Fixed' Can be Anything
- If you choose the Fixed option, you can actually add anything else, even if it is not a date! Type whatever you want to appear within the Date placeholder.
B. Slide number
- Select this check-box to enable the slide number to be visible on your slide(s). Learn more in our Working with Slide Numbers in PowerPoint 365 for Mac tutorial.
C. Footer
- This check-box, when selected, makes the Footer visible on all the slides of your presentation. Also, when this check-box is selected, the box below gets activated where you can enter the content of the footer, as shown highlighted in red within Figure 8, below. Typically, users like to type in stuff like Confidential, Draft, etc. in this area, or even copyright notices.
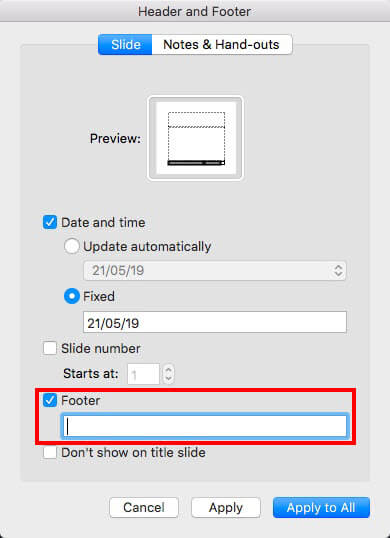
Figure 8: Add footer textD. Don't show on title slide
- This check-box will enable selected options on all slides except the Title slide.
- You can similarly add and edit Headers and Footers in your Notes and Handout pages. Look at our Add Headers and Footers to Notes and Handout pages in PowerPoint 365 for Mac tutorial to learn more.
- Now, you need to apply the choices you made. To do so, you have two options within the Header and Footer dialog box, as explained below:
- Click the Apply to All button to apply the Header or Footer to all slides in your presentation.
- Click the Apply button to apply the Header or Footer to just the active slide in your presentation.
- Save your presentation often.


