Learn about Smart Dynamic Guides in PowerPoint 2016 for Windows. These guides are dynamic and snap as you move slide objects around.
Author: Geetesh Bajaj
Product/Version: PowerPoint 2016 for Windows
OS: Microsoft Windows 7 and higher
Do you notice that any object you move, resize, or align in PowerPoint snaps easily? Move it a little closer, resize a wee bit, or even try spacing slide objects and the screen shows all sorts of helpful indicators in the form of dotted lines, as shown in Figure 1, below.

Figure 1: Smart guides appear while repositioning
The red, dotted lines that show up and then disappear are Smart Guides. These made their debut in PowerPoint 2010 for Windows and allowed you to position objects easily. More improvements were added in PowerPoint 2013 for Windows that enabled you to see how much further you need to drag, so that one object on the slide is as wide as another adjacent object. In fact, you can also evenly space out objects without accessing any Ribbon tabs or typing a number within a dialog box!
By default, these Smart Guides are turned on. However, in case you don't find these working for you, or if you may have turned them off inadvertently, follow these steps to turn them on again in PowerPoint 2016 for Windows. Incidentally, you reverse the same steps to turn them off; deselect options that enabled them.
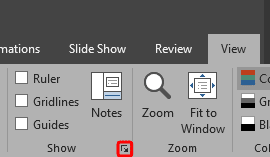
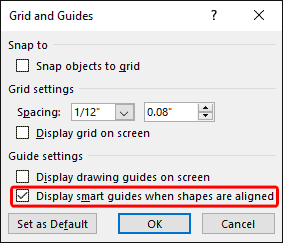
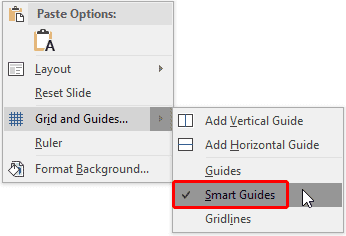
Once you turn on these options, your Smart Guides start helping you reposition, resize, and align/distribute. Let's start with the shapes, as shown in Figure 5, below. We will manipulate these shapes to show you how various options influenced by Smart Guides work.
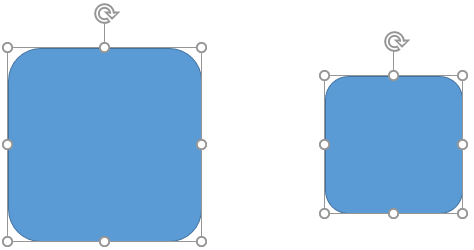
See the example shown in Figure 5 above. What if you need to reposition so that the top of both the squares match?
To do so, drag the small square upwards until you see the Smart guides (red, dashed lines). In Figure 6, below, you can see that the Smart Guides have appeared once the top positions match.
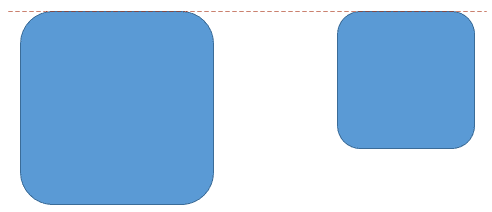
Figure 6: Repositioning the shapes
Press the Shift key on your keyboard while moving the shape upwards to move it in a straight line.

Do you want more keyboard shortcuts?
Explore our PowerPoint Keyboard Shortcuts and Sequences Ebook that is updated for all PowerPoint versions.
Smart Guides can help you resize your shapes as well. Let us continue with the example, as shown in Figure 6, above.
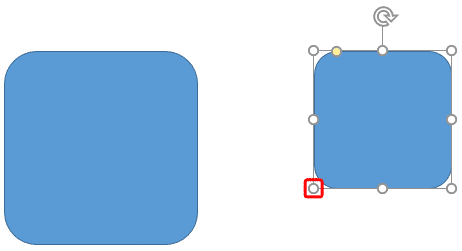
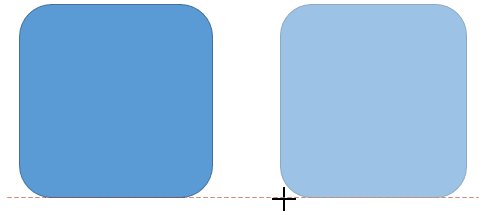
In the preceding sections, you learned how to reposition and resize shapes. Such resizing even aligns the top and bottom (or even the left and right) edges of your shapes. Other than direct alignment, you can also use Smart Guides to influence consistent distribution (spacing) between shapes. However, for distribution to work, you need at least three or more shapes.
When you try to space three or more shapes to be equally apart, small arrows will appear to indicate when the spacing is identical, as shown in Figure 9, below.
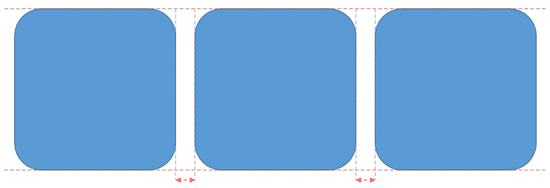
Using Smart Guides is a matter or practice. The more you use them, the more intuitive you will feel working with them. Remember that you will feel the "snap" when shapes resize, position, or align identically to adjacent shapes.
They detect alignment with nearby objects and display visual indicators for spacing and positioning.
Smart Guides appear automatically; regular guides are manually added and persistent.
They may be disabled or objects aren’t near alignment thresholds.
01 09 15 - Working with Slides: Smart Dynamic Guides in PowerPoint (Glossary Page)
Smart Dynamic Guides in PowerPoint 2016 for Mac
Smart Dynamic Guides in PowerPoint 2013 for Windows
Smart Dynamic Guides in PowerPoint 2010 for Windows
You May Also Like: Prepare Your Presentation: TJ Walker with Geetesh Bajaj | Commonwealth of Independent States (CIS) PowerPoint Templates


Microsoft and the Office logo are trademarks or registered trademarks of Microsoft Corporation in the United States and/or other countries.