Learn how to customize the Quick Access Toolbar in PowerPoint 2010 for Windows. You can quickly populate the QAT with your favorite commands.
Author: Geetesh Bajaj
Product/Version: PowerPoint 2010 for Windows
OS: Microsoft Windows XP and higher
The Quick Access Toolbar or QAT is the only toolbar available for customization in PowerPoint. Within the QAT, you can place your most used commands so that they are accessible to you with just a single click. We already explored how you can change the location of the QAT and other tricks in our Quick Access Toolbar in PowerPoint 2010 for Windows tutorial.
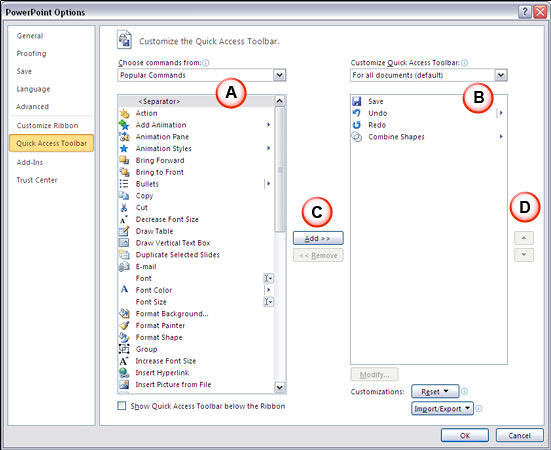
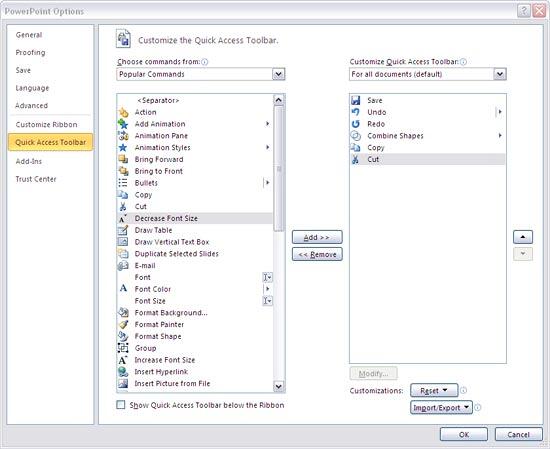
In this tutorial, we will explore how you can further customize the QAT in PowerPoint 2010 for Windows.
Follow these steps to learn more:


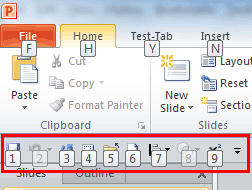
Each command you add to the QAT has its own keyboard shortcut. To view these shortcuts, just press the Alt key and each QAT command will show an overlaid Tool tip with a number, as shown highlighted in red within Figure 6, below. If the number reads 6, then the keyboard shortcut for that command is Alt + 6. Similarly, if the number reads 09, then the keyboard shortcut for that command is Alt + 9. You'll need to be quick with pressing your keys if you have a double-character shortcut key!

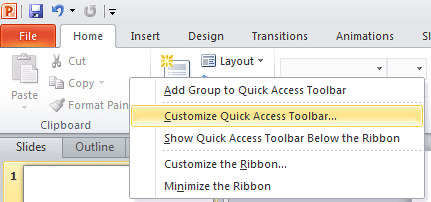
If you want to relocate the QAT under the Ribbon, just right-click anywhere over the QAT or the Ribbon, and select the Show Quick Access Toolbar below the Ribbon option, as shown in Figure 2, previously on this page.
01 06 01 - Working with QAT and Ribbon: Customize Quick Access Toolbar in PowerPoint (Glossary Page)
Customize Quick Access Toolbar in PowerPoint 365 for Windows
Customize Quick Access Toolbar in PowerPoint 365 for Mac
Customize Quick Access Toolbar in PowerPoint 2019 for Windows
Customize Quick Access Toolbar in PowerPoint 2016 for Windows
Customize Quick Access Toolbar in PowerPoint 2016 for Mac
Customize Quick Access Toolbar in PowerPoint 2013 for Windows
You May Also Like: In Praise of Analogies | Panda PowerPoint Templates


Microsoft and the Office logo are trademarks or registered trademarks of Microsoft Corporation in the United States and/or other countries.