Archived Content
Content on this page is not recent and has been retained for historical reasons.
You already learned how you can join SlideBoom and upload your presentations as part of this SlideBoom series. In this tutorial, we'll go beyond the basics and show you how you can share your uploaded presentations with others:
- First, make sure that you sign into your SlideBoom account.
- Click the My Account button from the navigation to load up your account, as shown in Figure 1, below.

Figure 1: My Account button- On this page, you can see all the presentations which you have uploaded, as shown in Figure 2, below. Note that as of now, there is only one file uploaded in our account.

Figure 2: My Presentations- Click on the presentation that you want to share, as shown in Figure 3, below.

Figure 3: Select the presentation to share- Doing so opens the presentation page URL on SlideBoom, as shown in Figure 4, below.

Figure 4: SlideBoom Presentation- Note the area towards the right side of the presentation window, a zoomed-in view, as shown in Figure 5, below. The URL option, allows you to copy the actual SlideBoom URL of the presentation for sharing, as shown highlighted in red within Figure 5.
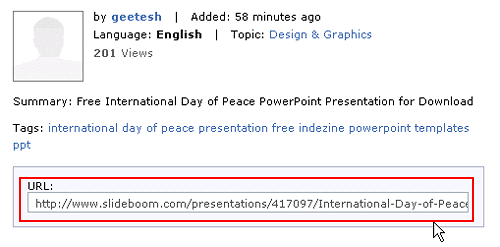
Figure 5: Presentation URL- We'll explain all the options, as shown in Figure 6 below:

Figure 6: Options to share your presentationShare with Group
- This is the sharing option where we can share our presentation with groups which we have created in our account by selecting the group name and we can send a message too, as shown in Figure 7, below.
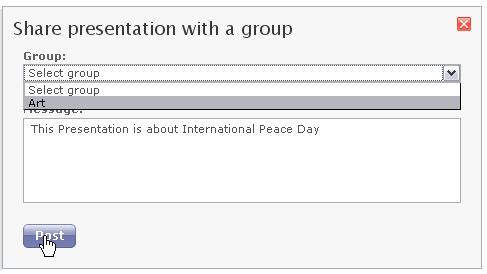
Figure 7: Share with GroupEmbed
- This is an amazing option where we can embed SlideBoom presentation directly into a website, blog, or even in PowerPoint presentation. SlideBoom provides two types of embed codes ie; HTML and XHTML. To do this just we need to copy the embed code and paste it. The Embed into WordPress option provides code that lets you add SlideBoom presentations to your WordPress blog. See Figure 8, below, where Embed codes are highlighted in red.
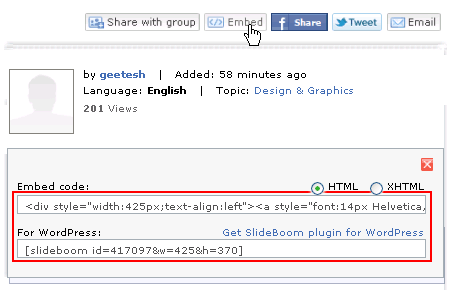
Figure 8: Embed codesFacebook Share
- SlideBoom also offers a social networking giant Facebook share option, by clicking on this link directly we can post the presentation into our Facebook wall which shows the presentation slide by slide.
Twitter
- Another social networking and micro-blogging site which posts the URL of the presentation page directly to our Twitter account.
Email
- Finally, the Email option opens the Email a Friend window, as shown in Figure 9, below. Add an email address, your name, and message, and click the Send button.
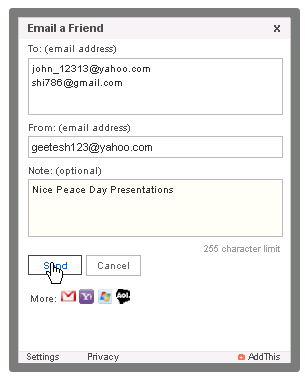
Figure 9: Email a Friend
In the next tutorial, we'll show you how you can make changes to your SlideBoom profile.


