If you have many shapes and other slide objects placed one above the other on your PowerPoint slide, you'll find that some shapes or slide objects may be hidden or overlapped. In this scenario, you can use options within the Arrange gallery to bring shapes or slide objects right on top of all others, or even send them behind everything else on your slide.
To access order options, select the Home tab of the Ribbon. Within the Format group, click the Arrange button to summon the Arrange gallery, as shown in Figure 1, below. All order options can be seen in the area highlighted in red within Figure 1.
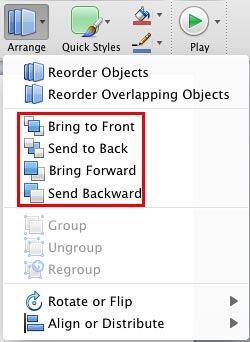
Figure 1: Order options let you send shapes and other slide objects back or forward
Alternatively, you can right-click a shape to access order options from the contextual menu, as shown in Figure 3, further below.
Follow these guidelines to use Order options in PowerPoint 2011 for Mac:
Bring to Front
- Open your PowerPoint presentation and navigate to the slide which contains the shapes you want to reorder. Make sure you have the shapes appropriately placed before using the order options. As you can see Figure 2, below, the triangle shape is placed behind all other shapes.
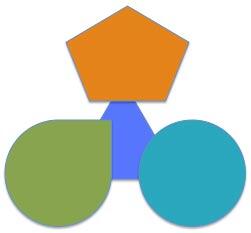
Figure 2: Triangle shape is placed behind all other shapes- Select the shape you want to change the order for (we selected the triangle shape). Then, carefully right-click the shape to bring up the contextual menu, as shown in Figure 3, below, or access the same option from the Home tab of the Ribbon, as shown in Figure 1, previously on this page. From either of the menus, choose the Arrange | Bring to Front option, as shown in Figure 3.
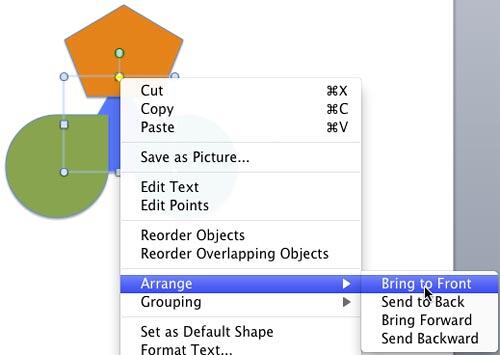
Figure 3: Bring to Front places the selected object right above all other shapes- This action will place the selected triangle shape on top of all the slide objects on the slide, as shown in Figure 4, below. Compare with Figure 2, shown previously on this page.
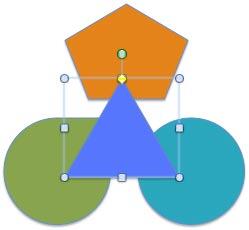
Figure 4: Triangle brought on top
Bring Forward
This option works just like the Bring to Front option explained in the preceding section. The main difference is that this brings the selected shape one layer above its present order, rather than all the way to the top of the layer stack.
- Select the shape you want to bring forward. Use the right-click contextual menu, as shown in Figure 5, below, or Arrange gallery from the Home tab of the Ribbon, as shown in Figure 1, above. From the resultant menu, choose the Arrange | Bring Forward option, as shown in Figure 5.
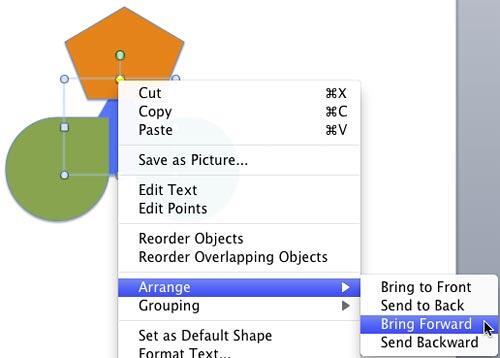
Figure 5: Bring Forward option to be selected to bring the selected shape one layer above- This moves the selected shape one layer up, as shown in Figure 6, below. Now, the triangle is moved in front of the Pentagon shape. Repeat this process to place your selected object one layer above.
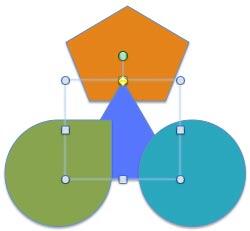
Figure 6: Triangle shape moved one layer up
Send to Back
This option moves the selected shape to behind all other slide objects on the slide.
- Select the shape that you want to send back, as shown in Figure 7, below.
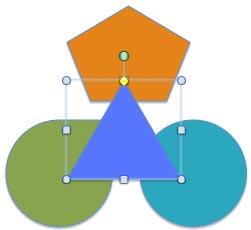
Figure 7: Shape to be sent back selected- Access the right-click contextual menu, as shown in Figure 8, below, or the Arrange gallery within the Home tab of the Ribbon, as shown in Figure 1, above. Choose the Arrange | Send to Back option, as shown in Figure 8.
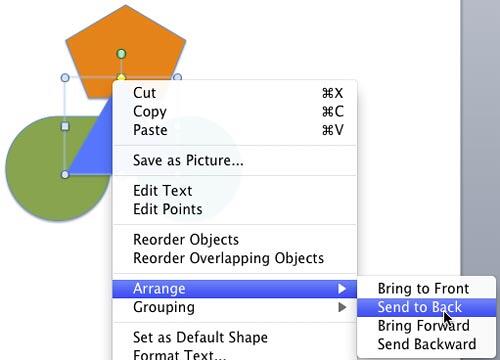
Figure 8: Send to Back option sends selected shapes behind all other overlapping slide objects- This action will move the selected triangle shape behind all the other slide objects on the slide, as shown in Figure 9. Compare it with Figure 7, shown previously on this page, to see the difference.

Figure 9: Triangle moved behind all other slide objects
Send Backward
This option sends any selected shape one layer backwards (or below its existing position).
- Select the shape you want to reorder. Right-click to access the contextual menu, as shown in Figure 10, below. Or, access the Arrange gallery from the Home tab of the Ribbon, as shown in Figure 1, above. Choose the Arrange | Send Backward option, as shown in Figure 10.
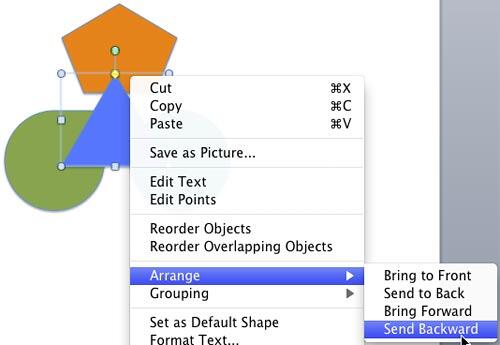
Figure 10: Send Backward option sends the selected shape one layer below- This action moves the selected triangle shape one layer below within the stack, as shown in Figure 11, below. Compare with Figure 7, shown previously on this page, to see the difference.
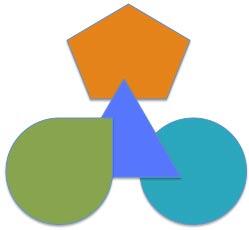
Figure 11: Triangle shape moved one step back- Save your presentation often.


