PowerPoint enables you to use its repertoire of Shapes to create some amazing artwork. Further, the
Merge Shape commands allow you to create complex shapes by merging several
simple shapes. Additionally, these options also let you convert your text to shapes so that you can see the text even on a computer that does not have a
particular font installed.
We already showed you how you can convert an entire text
box to one shape using the Intersect command. If you start with a conventional text box, as shown on the top of the slide in Figure 1,
you will end up creating a single shape from your entire text box, as shown in the middle. However, if you want your resultant shapes to be individual for
each character, as shown at the bottom of the slide shown in Figure 1, then you will need to use the Fragment option, as
explained in this tutorial.
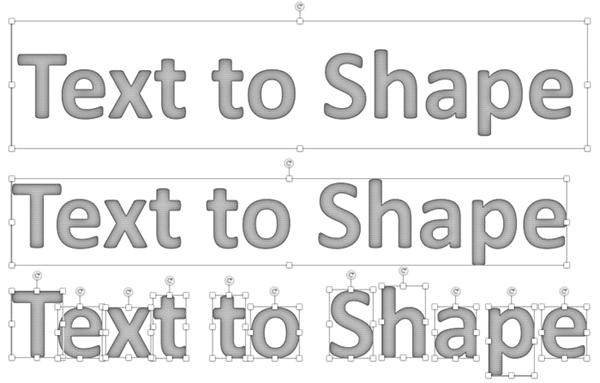
Figure 1: Intersect or Fragment your text to make shapes
Follow these steps to learn how to convert text into individual editable shapes through fragmenting in
PowerPoint 2016 for Mac:
- Insert a new text box on your slide and type in some text.
Change the font type and font size, the
font color, and any
other attributes. Alternatively, select any existing text box on your
slide, as shown in Figure 2, below.
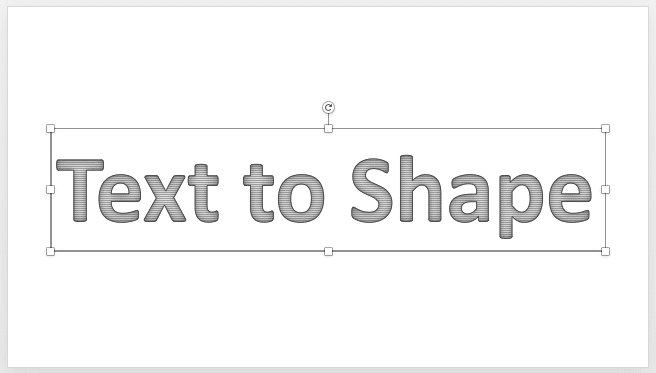
Figure 2: Text box selected on a slide
Note: This technique only works with text boxes and not text placeholders. Do not know the difference? Explore our
Text Placeholders vs. Text Boxes in PowerPoint 2016 for Mac
article. If your source text is within a text placeholder, there's an easy solution. Select your text placeholder and copy it. Then paste immediately within
the same slide. The pasted copy is now a text box. Select this text box, and follow the remaining steps of this tutorial. You might want to delete your original
text placeholder because it might get in the way while selecting the text box, but that’s entirely optional.
- Insert a shape (we choose a Rectangle) on your slide. Make
sure that it overlaps your text box in a way that covers it completely, as shown in Figure 3.
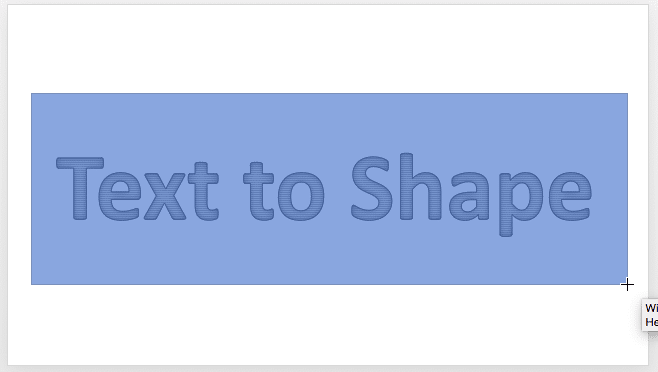
Figure 3: Rectangle shape being drawn over the text box- Once the Rectangle shape is placed, reorder the Rectangle shape by
sending it behind the existing text box, as shown in Figure 4.
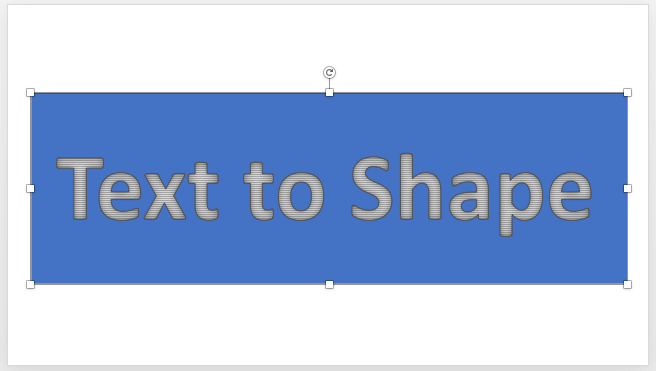
Figure 4: Text Box above Rectangle shape- Now, carefully select the text box and then select the Rectangle shape. It's important that you select the text box first since the
output shape will take the format of whatever is selected first.
- Once your selections are done, access the Shape Format contextual tab of the
Ribbon as shown in Figure 5, and click
the Merge Shapes button (highlighted in blue within Figure 5). This brings up the
Merge Shapes drop-down gallery, as shown in Figure 5. Within the Merge Shapes drop-down gallery click the
Fragment option.
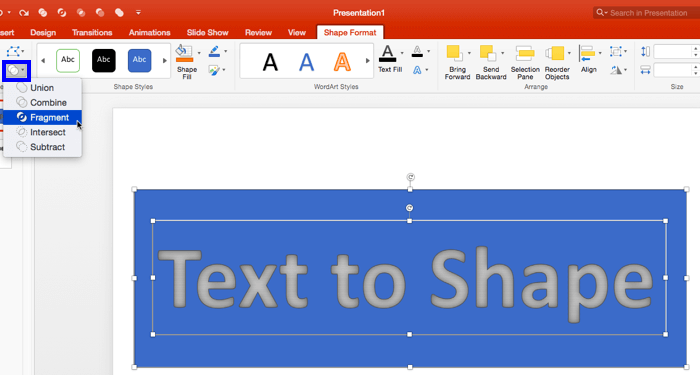
Figure 5: Merge Shapes button- Once the Fragment option is applied, select all shapes by pressing ⌘ + A
to see multiple, small shapes, as you can see in Figure 6.
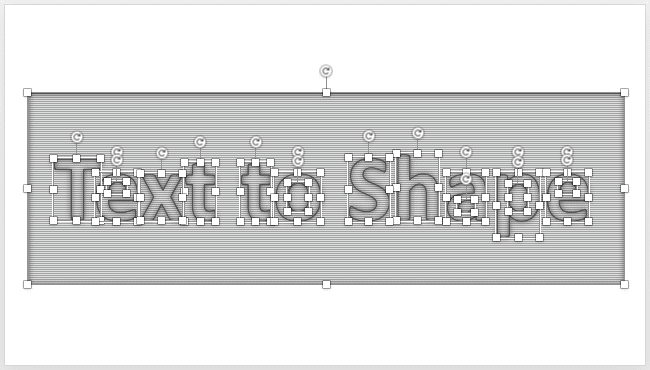
Figure 6: Result after applying the Fragment option
Note: Do note that with characters that have disconnected shape elements such as the extra dots over i or j, or even the accents and other signs
in foreign language text—these will end up as two shapes.
- Now, select the extra shapes individually such as the outer box and small circles within characters such as g, o, a, etc. You can see that
the "o", as shown in Figure 7 has a circle within itself.
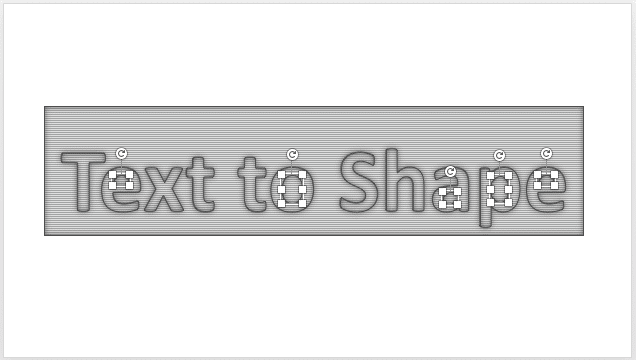
Figure 7: Extra shapes selected- Delete these extra shapes to end up with individual shapes for each character, as shown in Figure 8.
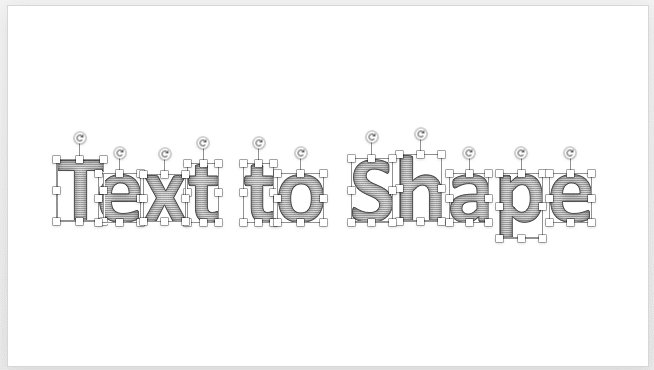
Figure 8: Converted individual shapes- To determine that these are indeed individual shapes that can be edited, select any one of the shapes. Right-click (or Ctrl
+ click) to bring up the context menu that you can see in Figure 9, below.
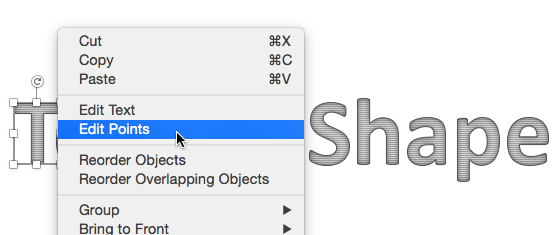
Figure 9: Edit Points option to be selected- Now, within this menu, choose the Edit Points option so that you
see all the points (vertexes) on the converted character, as shown in Figure 10.

Figure 10: Edit Points reassures you that individual characters have indeed been converted to shapes- Make sure you save your presentation often.


