Type text within PowerPoint, and the font type and size are decided for you, based on the
Theme applied to your presentation. For example, if you use PowerPoint's default
Office Theme, then all your typed text will sport the Calibri typeface. You can quickly change
the Theme Fonts set altogether for your presentation, and all text instances will switch to the default typefaces of the new
Theme or Theme Fonts set. However, there may be times when you want to override these defaults and choose a typeface that is
different, or even a different font size. In this tutorial, we use the terms typeface and font type interchangeably. Let us now
explore how you can choose different font types and change the font size of the selected text on the slide in
PowerPoint 2016 for Mac:
-
Create a new presentation and type some text in the placeholder, as shown in Figure 1.
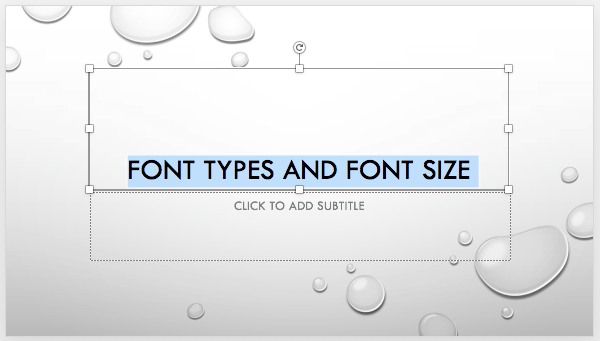
Figure 1: Text selected on the slide
- Select the text which you want to format
(refer to Figure 1, above). Now, navigate to the Home tab of the
Ribbon and locate the Font group,
as shown highlighted in blue within Figure 2.
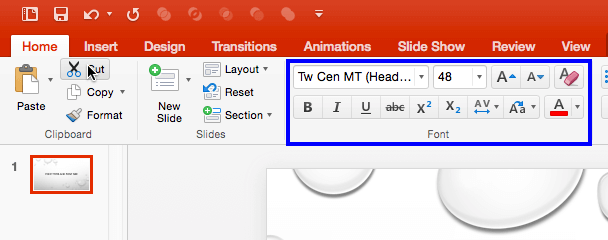
Figure 2: Font group within the Home tab of the Ribbon
- Within the Font group, click the down-arrow located next to Font option, as shown
highlighted in red within Figure 3. This brings up the Font
drop-down gallery, as shown in Figure 3.
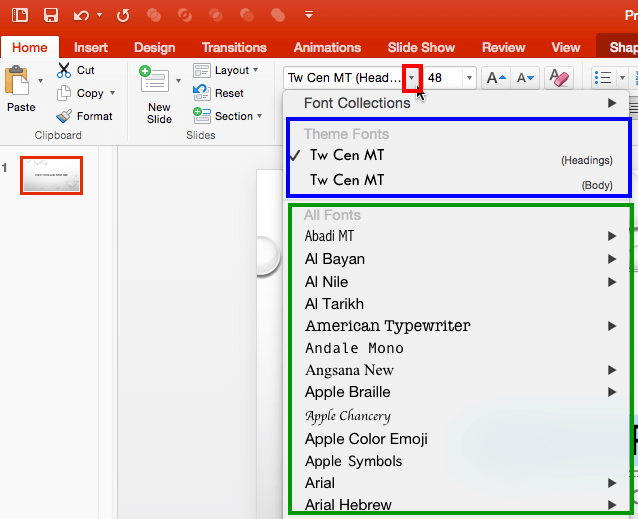
Figure 3: Font drop-down gallery
-
As you can see in Figure 3, above the Font drop-down gallery is divided into two sections:
-
Theme Fonts, highlighted in blue, within Figure 3 above, displays the
active font types of your presentation.
-
All Fonts, displays all fonts installed on the system, highlighted in
green within Figure 3, above.
-
To change the font type from the default Theme Fonts to some other font, first select the text. Thereafter, open the
Font drop-down gallery shown in Figure 3, scroll down and choose any font type from within
the All Fonts section. Figure 4 below shows a different font type, Impact
being selected (highlighted in red within Figure 4). Click on the font type within
the drop-down gallery to apply it to the selected text.
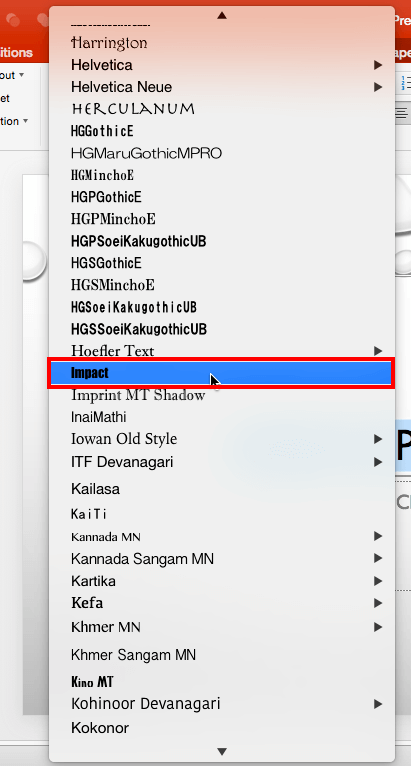
Figure 4: Impact font type being selected
-
Alternatively, you can directly type the name of the font within the Font box, as shown highlighted in
red within Figure 5. Start typing the first few alphabets of the font you want to
use. For example, when we typed Imp, we could locate Impact. Once the font name is active
(see Figure 5), press the Return key to apply the font type to the selected text.
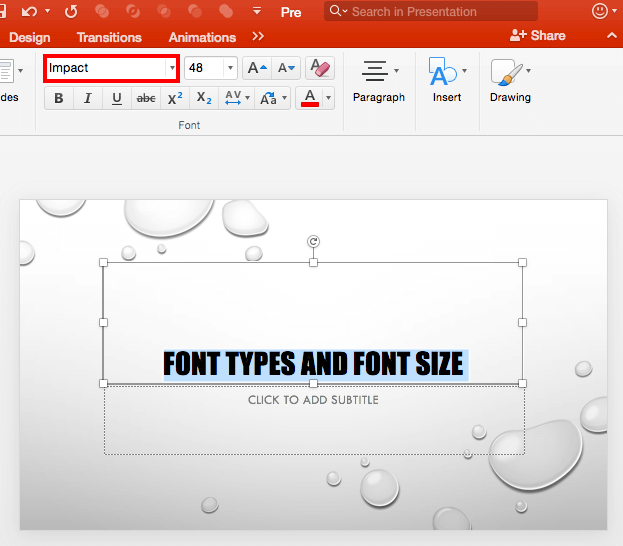
Figure 5: Type font name within the Font box
-
With the text still selected, navigate to the Home tab of the
Ribbon. Within the Font group
click the down-arrow located next to Font Size option, as shown highlighted in red within
Figure 6. This brings up the Font Size drop-down gallery, as shown in
Figure 6.
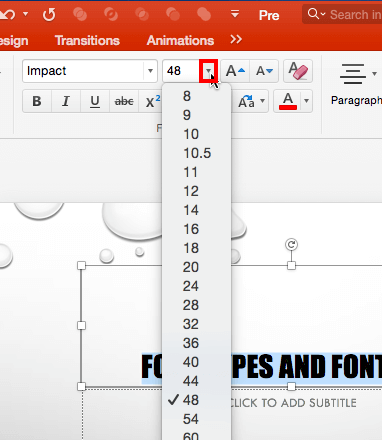
Figure 6: Font Size drop-down gallery
-
Note that the font size with a tick mark is the size of the currently selected text. Now, scroll down the
Font Size gallery to select other font size. Click on another Font size, as shown in Figure 7. Also, you can directly
type in the font size value within the Font Size box.
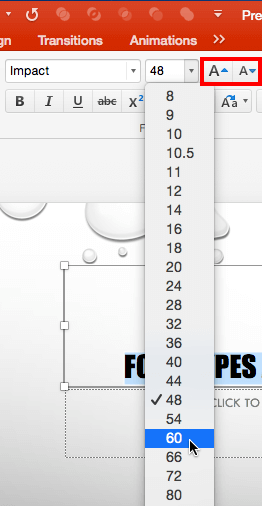
Figure 7: Font Size being changed
-
Alternatively, you can use the Increase Font Size and Decrease Font Size buttons,
highlighted in red within Figure 7 above to change the font size of selected
text.
-
In Figure 8 below, you can see changes we made to the selected text. Compare it with the slide
shown in Figure 1.
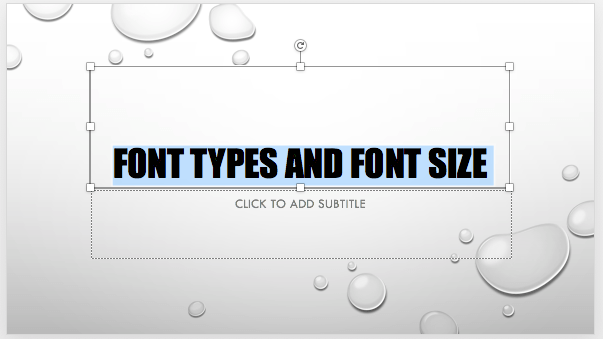
Figure 8: Font type and size changed
-
Save your presentation often.


