Learn how to use the touch floatie within PowerPoint Touch in Office 2013 for Windows.
Author: Geetesh Bajaj
Product/Version: PowerPoint
OS: Microsoft Windows 7 and higher
Most of you are aware of mini toolbars in PowerPoint 2013 for Windows (also in Word and Excel). These show up with several options that let you alter text or shape attributes. However, if you are using Office 2013 on a touch device such as Microsoft Surface, you'll see floaties which are quite similar to the mini toolbars. They are different too because they have fewer options, and are also equipped with larger buttons so that you can tap on them easily.
These touch floaties provide several buttons to format your selected slide object. The buttons or options available within these floaties are dependent upon which slide object you have tapped over. In Figure 1, below, you can see the floatie for a tapped Shape. Similarly, Figure 2, further below, shows a floatie for a tapped Picture.
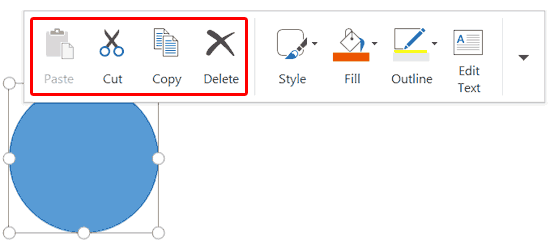
Figure 1: Shape floatie
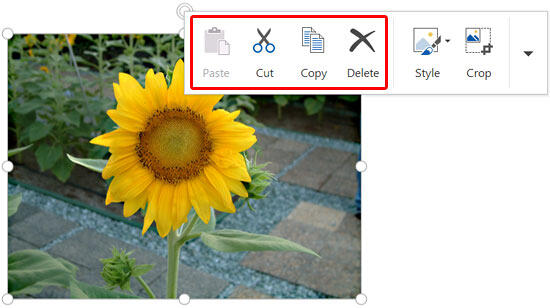
Figure 2: Picture floatie
If you select text, you will see an entirely different floatie, as shown highlighted in red within Figure 3, below. It's a little tricky to bring up the text floatie in a program such as PowerPoint because if you just tap over a text box or placeholder, you might end up bringing up the Shape floatie, shown in Figure 1, above. To counter this, first select the text so that your text appears highlighted, as shown in Figure 3, then tap carefully over the highlighted text.
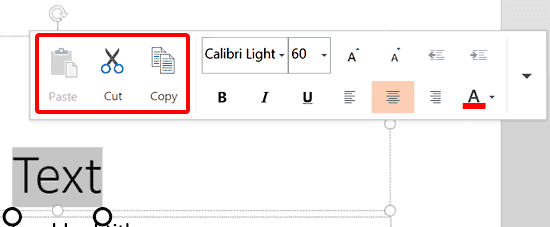
Figure 3: Text floatie
In most cases, the first three options highlighted in red within Figures 1, 2, and 3 are the same. More often there also exits a fourth option: Delete. Let us explore these options. Even before we do so, let us first explore how you can bring up a floatie.
There are two ways to bring up a floatie:
As far as possible, tap roughly in the middle area of your selected object, as shown in Figure 4, below.
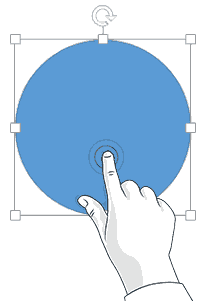
Figure 4: Tap the selected object to access the floatie
The first four options within the floatie, as shown highlighted in red within Figures 1, 2, and 3, are:
Select this option to paste an object on your slide, document, or sheet. Of course, you need something copied to your clipboard for this option to work, as shown in Figures 1, 2, and 3, the Paste option is greyed out indicating that no content is available within the clipboard.
The Paste button is active, as shown highlighted in red within Figure 5, below.
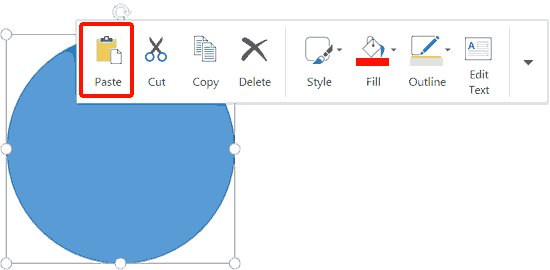
Figure 5: An active Paste button
Select this option to cut selected objects.
Select this option to copy selected objects.
Select this option to delete selected objects.
We will look at other individual options within the Shape Floatie, Picture Floatie, and Text Floatie in separate tutorials.
Ensure you’re in Touch Mode and tap objects correctly; older Office versions may not fully support the Touch Floatie.
The Mini Toolbar works with mouse/keyboard, while the Touch Floatie is optimized for finger and stylus input.
No, the Touch Floatie is mainly available in Office for Windows touch-enabled devices.
23 02 01 - Using Floaties: Touch Floatie within PowerPoint Touch in Office 2013 for Windows (Glossary Page)
You May Also Like: Developing Your Leadership Capabilities | Presentation Management: Why Executives are Starting to Care?


Microsoft and the Office logo are trademarks or registered trademarks of Microsoft Corporation in the United States and/or other countries.