Learn how to use the shape floatie within PowerPoint Touch in Office 2013 for Windows.
Author: Geetesh Bajaj
Product/Version: PowerPoint
OS: Microsoft Windows 7 and higher
Whenever you tap on an object in Word, Excel, or PowerPoint versions of Office 2013 while using a touch device such as the Microsoft Surface, you will see a floatie spawning right there! In our Using the Touch Floatie within PowerPoint Touch in Office 2013 tutorial, we explored how you can bring up floaties with differing options, depending upon the object you tap. The resultant floatie contains all the options required to format the tapped slide object. In this tutorial, we'll explore various options within the Shape floatie, as shown in Figure 1. You access this floatie by tapping a Shape.
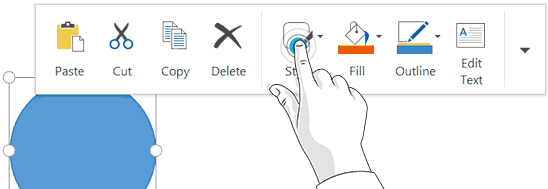
Figure 1: Tap on the required button within the floatie
To activate any of these options, you need to tap the required button on the floatie, as shown in Figure 1, above:
Look again at the Shape floatie, and you will find buttons for formatting the tapped shape, as shown marked in Figure 2, below. The first four buttons (Paste, Cut, Copy, and Delete) have been explained in our Using the Touch Floatie within PowerPoint Touch in Office 2013 tutorial.
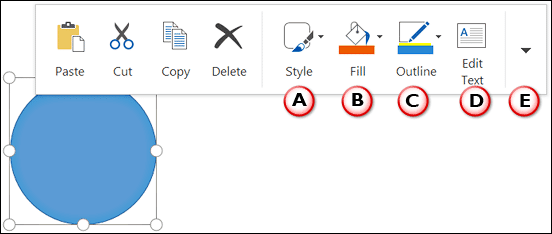
Figure 2: Shape floatie
The remaining buttons are explained below, as marked in Figure 2, above.
Tap on the Style button to bring up the Style drop-down gallery, as shown in Figure 3, below. The Style drop-down gallery contains a collection of prebuilt styles. These styles are all Theme-specific, so if your presentation's Theme is changed, you'll end up with new Styles. Note that within the Style drop-down gallery, you may have to slide from the bottom to reveal more styles, as shown in Figure 3.
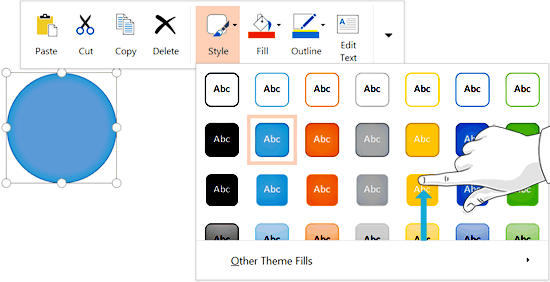
Figure 3: Style drop-down gallery
Tap on any of these Styles to apply it to your selected Shape.
Learn more about Shape Styles in our Shape Styles in PowerPoint 2013 tutorial.
This button, when tapped brings up the Fill drop-down gallery, as shown in Figure 4, below. Within this drop-down gallery, you'll find various shape fill options. You can find Theme Colors, Standard Colors, Picture, Gradient, etc. for the shape. If you cannot see all these options, slide from the bottom to reveal more options, as shown in Figure 4.
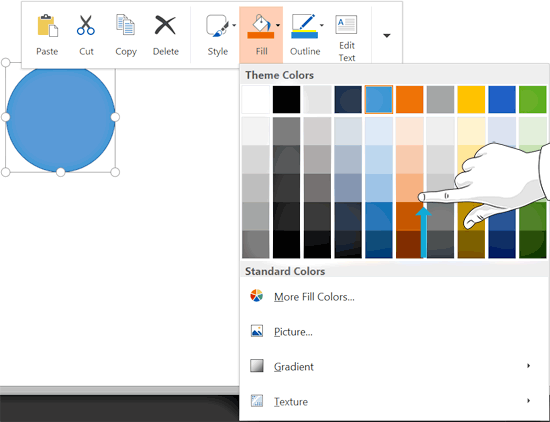
Figure 4: Fill drop-down gallery
Again, tap on any of these fill options to apply it to your selected shape.
To navigate Shape Outline options for your shape, tap the Outline button to bring up the Outline drop-down gallery, as shown in Figure 5, below. Within the Outline drop-down gallery, you'll find Theme Colors, Standard Colors, Weight, and Dashes options. To see all the options within the Outline drop-down gallery, slide from the bottom to reveal more options, as shown in Figure 5.
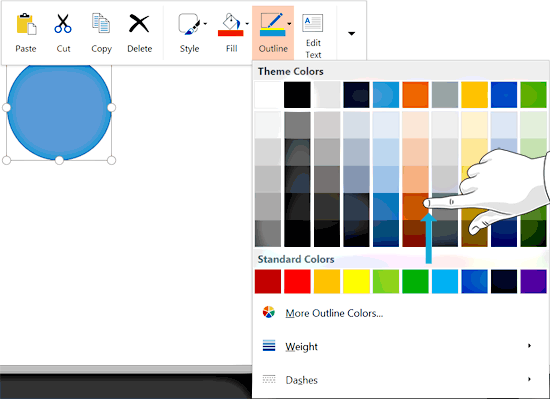
Figure 5: Outline drop-down gallery
Tap on any of these outline options to apply it to your selected shape.
When you tap on this button, you will see an insertion point cursor. Anything you type now shows up as text within the shape, as shown in Figure 6, below.
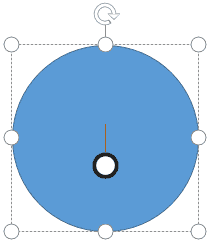
Figure 6: Shape with text insertion cursor
Tap on the down-arrow to bring up a drop-down menu with more formatting options for selected shape, as shown in Figure 7, below.
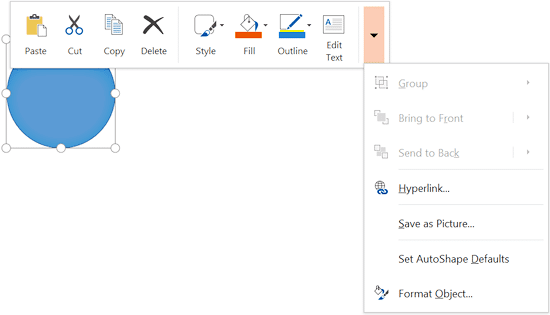
Figure 7: More shape formatting options
Some of these options may be grayed out if you have selected a single shape, or if there's no other object on your slide, document, or sheet.
Save your documents often.
No, it provides quick access for touch editing, while the Ribbon offers full formatting options.
Ensure Touch Mode is enabled, and you’re using a touch-enabled version of Office; older builds may not support the Shape Floatie.
No, the Shape Floatie is primarily available in Office for Windows touch-enabled devices.
23 02 01 - Using Floaties: Shape Floatie within PowerPoint Touch in Office 2013 for Windows (Glossary Page)
You May Also Like: The Power of Story in Speaking | How to Create Value for the Audience When Chairing a Panel Discussion


Microsoft and the Office logo are trademarks or registered trademarks of Microsoft Corporation in the United States and/or other countries.