Although PowerPoint lets you choose almost any color you want, it is often difficult to choose the same color as a picture on the slide! You may want to match the colors of shapes or text on your slides to a picture, or even some other object (maybe a logo or even the slide background) of your PowerPoint presentation to give your slides a cohesive look. PowerPoint 2013 for Windows's new Eyedropper option enables you to pick an exact color from anywhere, sometimes even from somewhere outside PowerPoint! Even better, when you are picking up the color from a source, you get to see the color preview as well as the RGB value of the color you are picking.
In this article, we will explore how you can copy a color from a picture and use it as the fill and outline color of a shape. In the second part of this tutorial, we will explore advanced Eyedropper options such as copying text colors, and also how you can copy color from an object outside PowerPoint.
Follow these steps to learn how to use the Eyedropper option to copy colors for shapes:
- Open or create a slide which already has text or shapes; and at least one picture, as you can see in Figure 1.
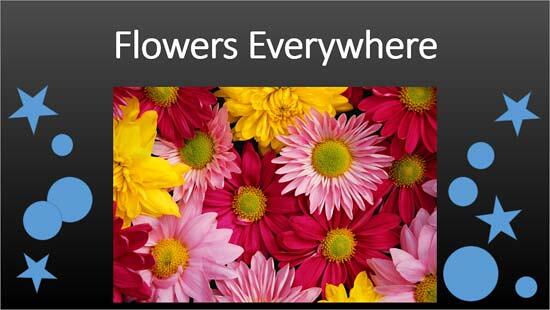
Figure 1: Slide with shapes, text, and picture - Double-click any of the shapes to activate the Drawing Tools Format tab, as shown highlighted in red within Figure 2.
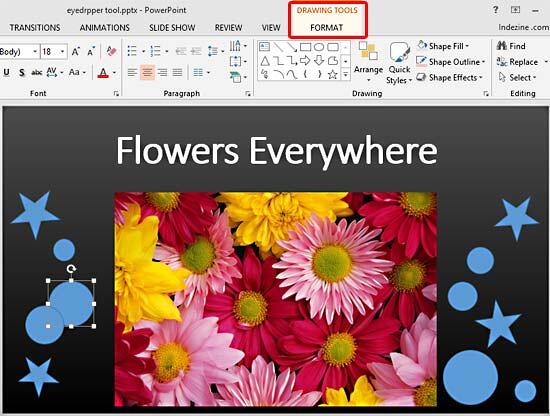
Figure 2: Drawing Tools Format Note: The
Drawing Tools Format tab is a
Contextual tab. Contextual tabs are special tabs in the
Ribbon that are not visible all the time. They make an appearance only when you are working with a particular slide object which can be edited using the options within these tabs.
- Within Drawing Tools Format tab, click the downward pointing arrow on the right side of the Shape Fill button, as shown highlighted in red within Figure 3.

Figure 3: Shape Fill button - This brings up the Shape Fill drop-down gallery, as shown in Figure 4. Within the drop-down gallery, select the Eyedropper option (see Figure 4 again).
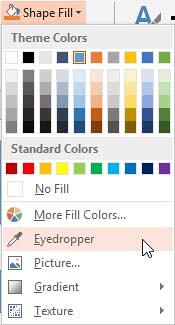
Figure 4: Eyedropper option selected - As soon as the Eyedropper option is selected, the cursor changes to an eyedropper. Place your cursor over the color in the picture which you want to pick as a fill for your shape. As you move your cursor pointer over the color you want to pick you'll see a live preview of the color beneath within a square, as you can see highlighted in blue within Figure 5.
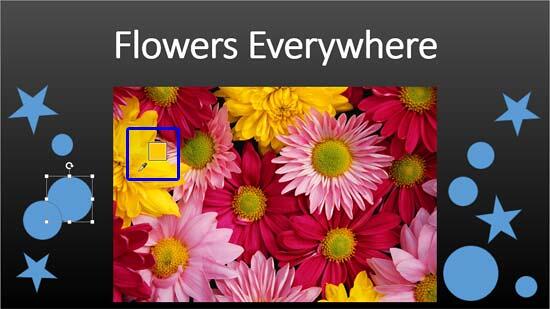
Figure 5: Eyedropper cursor showing live preview of color - Hold your cursor at any position for a while, and you'll see the RGB (Red Green Blue) color coordinates and color name, as shown highlighted in blue within Figure 6.

Figure 6: Eyedropper cursor showing RGB values of selected color - To apply the selected color as a fill for your shape, just click on the color. This applies the color to the selected shape, as you can see in Figure 7.

Figure 7: Color applied to shape from Eyedropper - In the same way, you can change the fill color of other shapes on the slide. Note that you can easily select multiple shapes and then apply the same fill color to all selected shapes. Figure 8, below shows different colors picked from the picture and applied to shapes as fills.

Figure 8: Shapes filled with various colors selected from the picture - Notice that the Shape Fill drop-down gallery now shows all the picked colors under Recent Colors section (highlighted in red within Figure 9). Compare Figures 9 and 4.
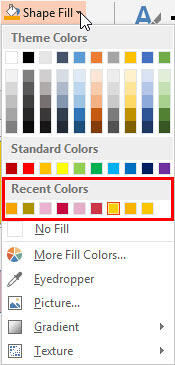
Figure 9: Picked colors under Recent Colors section - Similar to how you apply a fill color, you can also apply an outline color to your shapes. Just click the downward pointing arrow on the right side of Shape Outline button (highlighted in blue within Figure 3, above). This will bring up the drop-down gallery you see in Figure 10, below. Note the Eyedropper option available here.
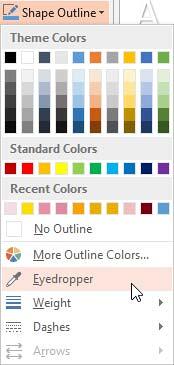
Figure 10: Shape Outline drop-down gallery - Figure 11, below shows the same slide after we picked up colors for shape fills and outlines. All these colors were sourced from the picture on the slide. Compare Figures 1 and 11.
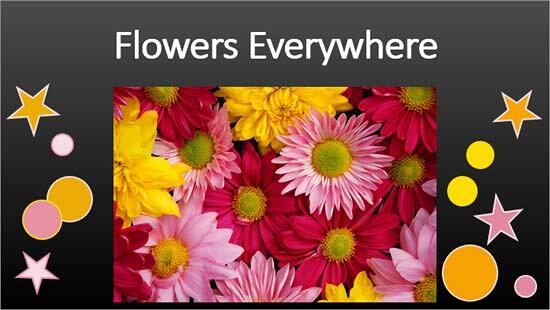
Figure 11: Shape outlines applied with various colors selected from the picture - Make sure to save your presentation.
In the next tutorial of this series, we explore how you can pick colors for text using the Eyedropper option. We also show how you can copy color from outside PowerPoint, such as your desktop, a web site, or anywhere else.
Note: You are not limited to pick colors from the area only within PowerPoint, you can also pick colors anywhere on your screen. To do that after clicking the Eyedropper option, click and hold the mouse button as you drag your mouse to the color you want to pick.


