We already explored how PowerPoint 2016 defaults to widescreen slides in all new presentations. However, you can change your presentation's aspect ratio from Widescreen (16:9) to Standard (4:3), and also do the reverse. PowerPoint has some features up its sleeve that make these changes of aspect ratios easier to understand, and some quirks too! This tutorial will help you understand both scenarios better.
Change from Widescreen to Standard Aspect Ratio
Follow these steps to learn how you can easily change the aspect ratio of your slides from Widescreen to Standard in PowerPoint 2016 for Windows:
- Launch PowerPoint. Doing so opens the Presentation Gallery. Within the Presentation Gallery, chose any Theme. For this tutorial we choose the Facet theme, as shown highlighted in red within Figure 1, below.
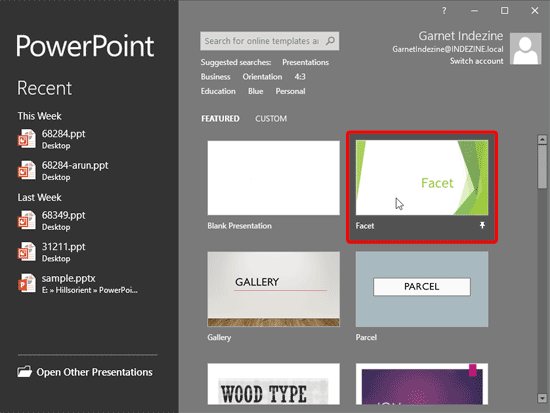
Figure 1: Facet Theme selected within the Presentation gallery - This step creates a new presentation within PowerPoint using the Facet theme, as shown in Figure 2, below. Notice that the Slide Area now displays a Widescreen (16:9) slide, as shown highlighted in blue within Figure 2.
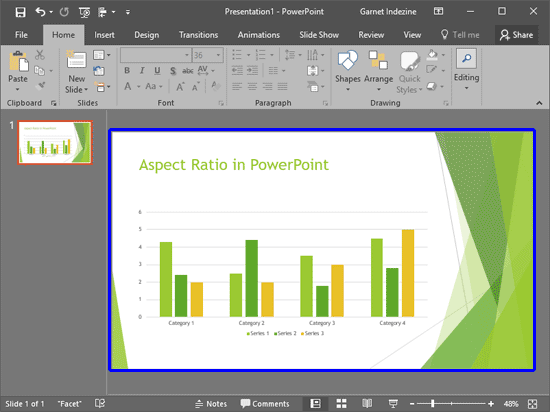
Figure 2: Widescreen slide - Now, access the Design tab of the Ribbon. Within the Customize group, locate the Slide Size button, as shown highlighted in red within Figure 3, below.

Figure 3: Slide Size button within the Design tab of the Ribbon - Click the Slide Size button to bring up a drop-down gallery, as shown in Figure 4, below. Within this gallery, choose the Standard (4:3) slide size for your presentation.
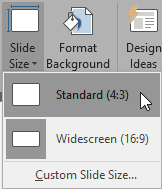
Figure 4: Slide Size drop-down gallery - Doing so brings up the Microsoft PowerPoint window, as shown in Figure 5, below. Note that if you use the Blank Presentation theme, then you may not see this dialog box on changing the aspect ratio of your slides.
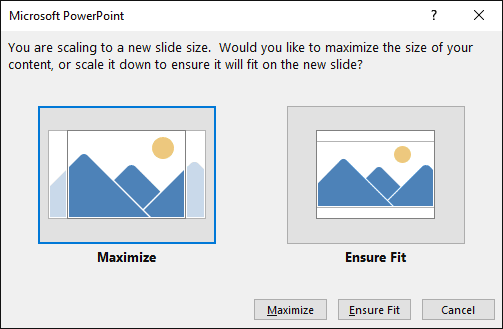
Figure 5: Microsoft PowerPoint window - The above window, as shown in Figure 5, provides two options, explained below:
Maximize
- Select this option to discard content on the sides of your slide. This could make your content appear larger, but you'll lose some content on your slide.
Ensure Fit
- Select this option to retain all slide content, and add more slide real estate on the top and bottom areas of your slide. This could make your content appear smaller, but you'll be able to see all content on your slide.
- Make your choice based on the option works for you. Remember that you can quickly press Ctrl + Z to undo any changes if you are not happy with the results. You can also press the Cancel button to not change the aspect ratio at this time.
- If you choose either of the Maximize or Ensure Fit options in the preceding step, you'll successfully change your presentation's slide aspect ratio, as shown highlighted in blue within Figure 6, below. Figures 6 and 7 show the presentation's aspect ratio changed to 4:3 using both Maximize and Ensure Fit options. Compare both these slides with Figure 2, shown previously on this page.
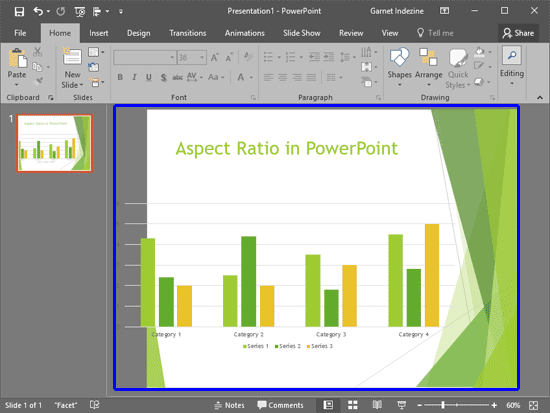
Figure 6: Widescreen slide changed to Standard size with Maximize option selected 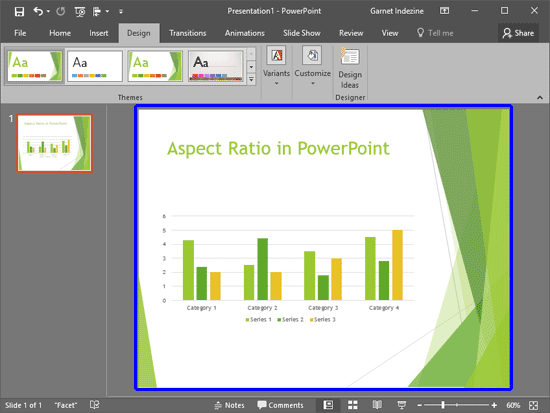
Figure 7: Widescreen slide changed to Standard size with Ensure Fit option selected - Make sure to save your presentation often.
Change from Standard to Widescreen Aspect Ratio
Follow these steps to learn how you can easily change the aspect ratio of your slides from Standard to Widescreen:
- Open a presentation that has the Standard (4:3) aspect ratio, as shown in Figure 8, below.
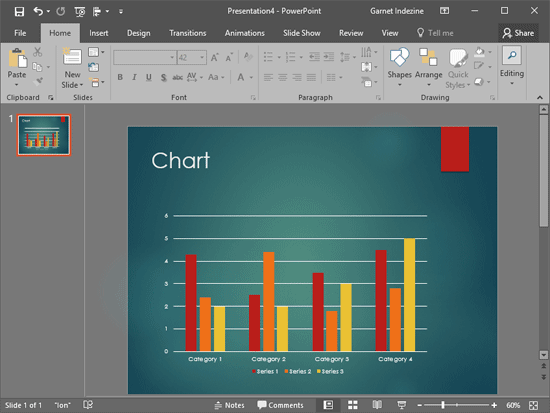
Figure 8: Standard size slide - Now, access the Design tab of the Ribbon. Within the Customize group, locate the Slide Size button, as shown highlighted in red within Figure 3, previously on this page.
- Click the Slide Size button to bring up a drop-down gallery, as shown in Figure 9, below. Within this gallery, choose the Widescreen (16:9) slide size for your presentation.
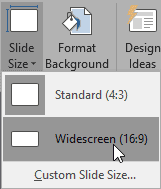
Figure 9: Widescreen (16:9) option within Slide Size drop-down gallery - Figure 10, below, shows the presentation's aspect ratio has now changed to Widescreen (16:9). Compare with Figure 8, shown previously on this page.
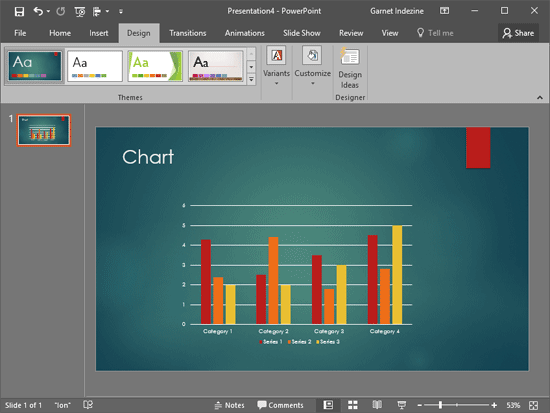
Figure 10: Standard size slide changed to Widescreen size - Make sure to save your presentation often.


