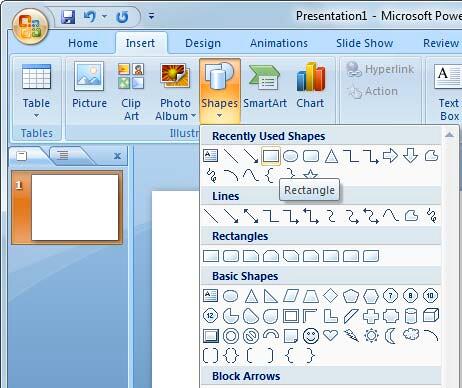
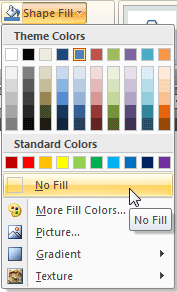
Remove fill from shapes in PowerPoint 2007 for Windows. This option can be helpful if you need a shape with no fill, but just a thin outline.
Author: Geetesh Bajaj
Product/Version: PowerPoint 2007 for Windows
OS: Microsoft Windows XP and higher
Whenever you add a new shape to a PowerPoint slide, it is filled with a solid color by default. Most of the time, you may leave that unaltered, but it's easy to remove any fill so that your shape only has an outline without a fill.
In this tutorial, we'll show you how you can remove the fill from a shape in PowerPoint 2007, a similar tutorial is also available on No Fill in PowerPoint 2003:


See Also:
Fills for Shapes: No Fill for Shapes (Glossary Page)
No Fill for Shapes in PowerPoint 2016 for Windows
No Fill for Shapes in PowerPoint 2016 for Mac
No Fill for Shapes in PowerPoint 2013 for Windows
No Fill for Shapes in PowerPoint 2011 for Mac
No Fill for Shapes in PowerPoint 2010 for Windows
No Fill for Shapes in PowerPoint 2003 for Windows
You May Also Like: New Features in SlideSource: Conversation with Robert Befus | Lion PowerPoint Templates


Microsoft and the Office logo are trademarks or registered trademarks of Microsoft Corporation in the United States and/or other countries.