Explore the edit audio options within Adobe Presenter.
Author: Geetesh Bajaj
Product/Version: PowerPoint
After recording a narration and syncing the audio and animation timings, you may want to edit the recorded narration. Although there are many audio applications with which you can edit the recorded audio file, including Adobe's Audition, you may not have to venture that far for basic edits. Adobe Presenter provided a built-in audio editor which makes your task more easier.
Assuming you are working with your presentation, save it again. Then access the Adobe Presenter tab of the
Ribbon, and click the Edit button (highlighted in
red within Figure 1).
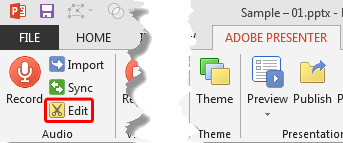
Figure 1: Edit button
This opens the Edit Audio window, as shown in Figure 2, below. Note that a waveform displays the audio -- do note that by default, Adobe Presenter displays one large waveform for sound across multiple slides. You can ascertain which part of the waveform is used for a given slide through the slide number markers placed below the waveform (highlighted in red within Figure 2, below).
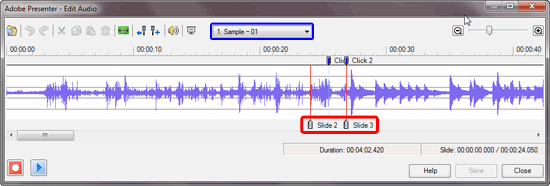
Figure 2: Edit Audio in Adobe Presenter
Also, you can click the Slides button (highlighted in blue within Figure 2, above) to access the
Slides drop-down menu to explore the slides within your presentation, as shown in Figure 3, below. Note that once you click on any
slide within this drop-down menu, the editing bar is placed right before the audio for that slide.

Figure 3: Choose the slide to edit it's audio content
Let us now learn more about the various options within the Edit Audio window, marked in Figure 4, below.
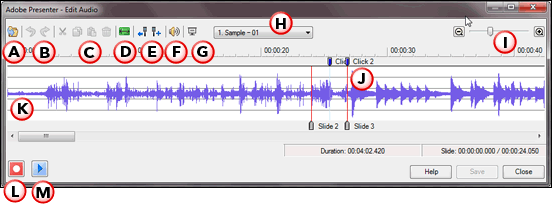
Figure 4: Edit Audio window
Replace the current audio file by importing any other audio file. The option is explained in our Record Audio in Adobe Presenter tutorial.
Undo or Redo previous actions.
Select a portion of the audio file (waveform) and thereafter Cut, Copy, Paste, or Delete it. Remember that to use these options, you must select part of the waveform first.
Adds a period of silence to any audio file. Make sure you click the exact location within an audio file, on the waveform to which you want to add the silent period.
Clicking the button will open the Insert Silence dialog box, as shown in Figure 5. Here you can enter a number specifying the duration
of the silence, in seconds. You can also specify where to add silence: options include Cursor Position (default), Start of Slide,
or End of Slide
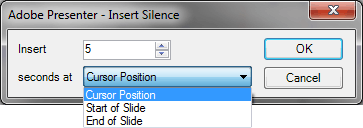
Figure 5: Insert Silence dialog box
Here you get two markers buttons:

Brings up the Adjust Volume dialog box, as shown in Figure 7 -- you'll find a volume slider, plus options to Normalize
sound across all slides. This is helpful if some slides are softer than other louder slides. You can also choose Dynamics to reduce sudden loud areas.
Click the OK button when done.
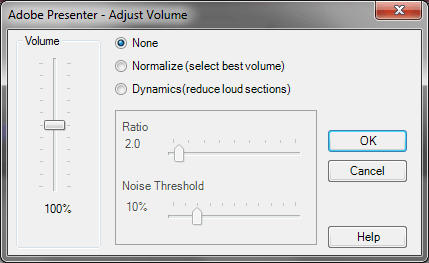
Figure 7: Adjust Volume dialog box
Click this button to preview the presentation from within the Edit Audio dialog box.
Click to bring up a drop-down list, as shown in Figure 3, previously on this page. Thereafter choose the slide you need to work with.
The zoom slider enables you to zoom in on an area of the waveform.
These red lines work as slide dividers.
Adobe Presenter displays any audio files incorporated into the presentation as a waveform.
This opens the Record dialog box, As shown in Figure 8. Here you can record and replace the previous narration.
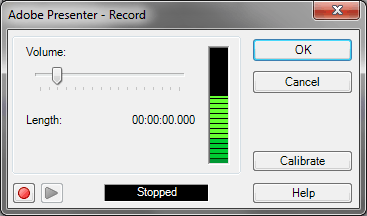
Figure 8: Record dialog box
Click this button to play the audio.
To save the changes you made click the Save button.
You May Also Like: Pig PowerPoint Templates | Instant FX Flash Browser / Transformer


Microsoft and the Office logo are trademarks or registered trademarks of Microsoft Corporation in the United States and/or other countries.