Learn how to recover unsaved, lost presentations in PowerPoint 2010 for Windows. These options work if you enable AutoRecover and AutoSave within PowerPoint.
Author: Geetesh Bajaj
Product/Version: PowerPoint 2010 for Windows
OS: Microsoft Windows XP and higher
After spending an inordinate amount of time to create your PowerPoint presentation, your computer unexpectedly crashes or your computer just shuts off due to a power failure. Or maybe just PowerPoint crashes for any number of reasons. Of course, since you had zero warnings, your files were not saved. You are now left with your last-saved presentation. Well, you may fare better because you can restart PowerPoint, and one of two occurrences might happen:
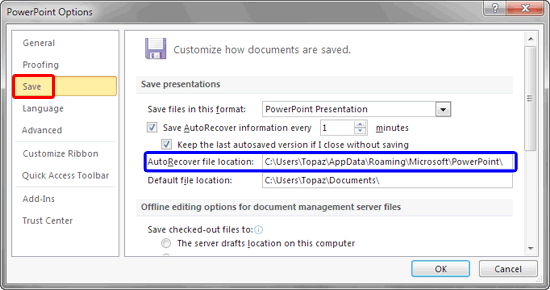
You must have turned on the AutoRecover and AutoSave options, and ensured that the save interval is sufficiently set to save your work frequently.
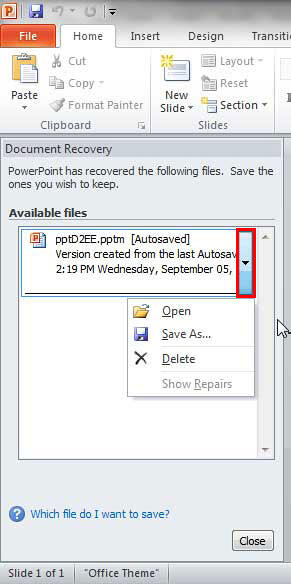
Follow these steps to use the Document Recovery task pane to recover your presentation after PowerPoint or your OS crashes in PowerPoint 2010 in Windows:

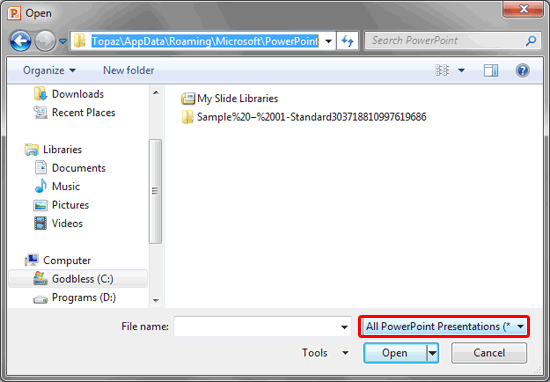
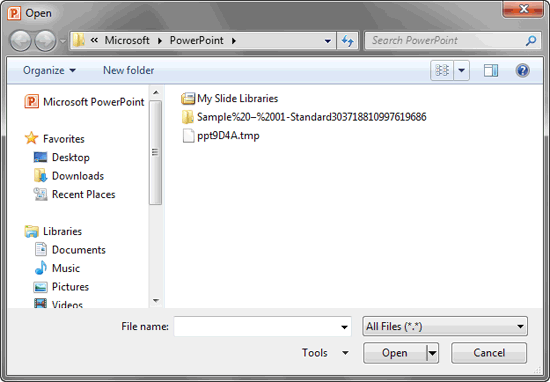
Note that when you open PowerPoint, the Document Recovery Task Pane does not always appear, and if you need to see presentations within the Document Recovery Task Pane, there really isn't an intuitive way to launch it. To see this list of presentations manually outside the Document Recovery Task Pane, follow these steps:

Do you want more keyboard shortcuts?
Explore our PowerPoint Keyboard Shortcuts and Sequences Ebook that is updated for all PowerPoint versions.


Other than the designated AutoRecover folder, some files may also be available in other folders, explore our Recovering Presentations Manually in PowerPoint 2010 for Windows tutorial to learn more.
16 03 02 - Manage Versions: Recovering Unsaved Presentations in PowerPoint (Glossary Page)
Recovering Unsaved Presentations in PowerPoint 2016 for Windows
Recovering Unsaved Presentations in PowerPoint 2013 for Windows
You May Also Like: The Art of Online Communication in Business | Rice PowerPoint Templates


Microsoft and the Office logo are trademarks or registered trademarks of Microsoft Corporation in the United States and/or other countries.