You may create the best presentation in the world, but what happens after the presentation has been delivered? Don't you want to provide the content of the presentation in a document that you can distribute to attendees, or even send them a recap via email? Handouts are meant for such occasions, and PowerPoint lets you create some amazing handouts from your slides that can also contain extra notes that were not visible on the slides. In this tutorial, we will explore an amazing option that creates handouts for PowerPoint presentations in Microsoft Word.
Follow these steps to create handouts in Word from PowerPoint 2010 for Windows:
- Make sure your individual slides have notes within the Notes Pane. Save your presentation. Then, access the File menu to bring up Backstage view. Select the Save & Send tab to bring up the options, as shown in Figure 1, below. Click the Create Handouts option, as shown highlighted in red within Figure 1. You will now see the Create Handouts button, as shown highlighted in blue within Figure 1. Click this button.
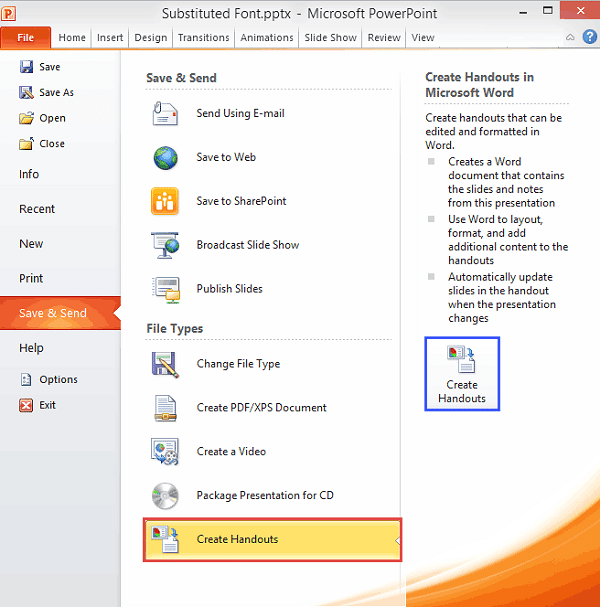
Figure 1: Create Handouts button- This action will bring up the Send to Microsoft Word dialog box, as shown in Figure 2, below.
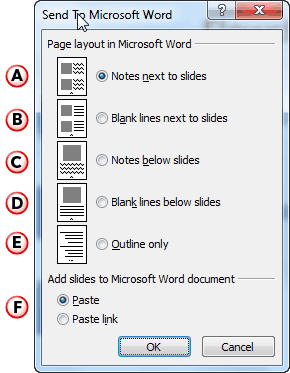
Figure 2: Send to Microsoft Word dialog box- We will now explore options available within this dialog box, as marked in Figure 2, above:
A. Notes next to slides
- Places your slide notes next to a slide thumbnail, as shown in Figure 3, below. Depending upon the length of your notes, 1 to 3 slides are placed on each Handout page.
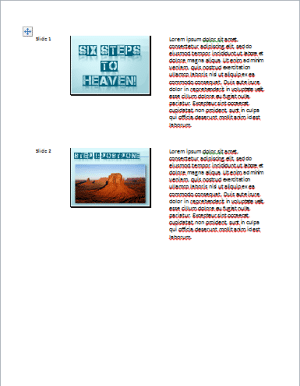
Figure 3: Notes next to slidesB. Blank lines next to slides
- Places some blank lines next to a slide thumbnail, as shown in Figure 4, below. The blank lines will allow recipients and attendees to jot down some of their own notes, as needed. Three slide thumbnails with blank lines are placed on each Handout page.
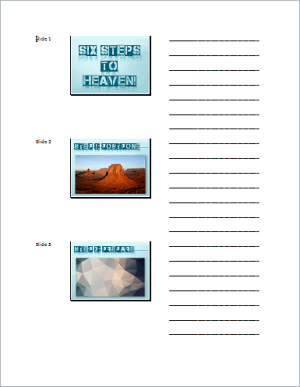
Figure 4: Blank lines next to slidesC. Notes below slides
- Places a single large slide thumbnail and related slide notes beneath the thumbnail, as shown in Figure 5, below. One slide is shown in each Handout page.

Figure 5: Notes below slidesD. Blank lines below slides
- Places a single large slide thumbnail and blank lines beneath the thumbnail, as shown in Figure 6, below. One slide is shown in each Handout page.
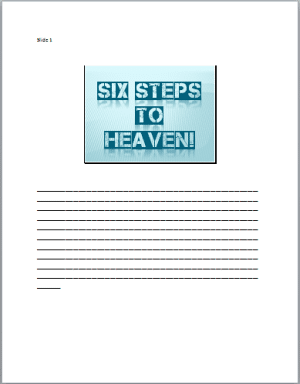
Figure 6: Blank lines below slidesE. Outlines only
- Places the outline of the slides, do note that outlines only include textual content from the Title and Content placeholders. Also, the fonts used in the slides are used in Microsoft Word too. You may want to change fonts in Word, especially if you have a fancy-looking font, as shown in Figure 7, below.

Figure 7: Outlines onlyF. Add slides to Microsoft Word document
- You see two radio buttons within this section, and only one of these can be selected.
Paste
- Creates the outlines in Microsoft Word as a one-time exercise. Changes in your PowerPoint slides are not reflected in the Handout Word document.
Paste link
- Creates the outlines in Microsoft Word as a linked document. Changes in your PowerPoint slides are reflected in the Handout Word document.
Once the Handout document loads in Word, you must save it, ideally within the same folder as the PowerPoint presentation, as explained in our Guidelines: Using Excel and PowerPoint Together tutorial. Although the linked article pertains to using PowerPoint and Excel together, the same concepts also work when you use PowerPoint and Word together.


