Learn how to resize shapes in PowerPoint 2016 for Mac. You can resize shapes by dragging, or by using keyboard shortcuts.
Author: Geetesh Bajaj
Product/Version: PowerPoint 2016 for Mac
OS: Mac OS X
Once you insert shapes on a slide, you may realize that it's not the perfect size. Did you want it larger, or a wee bit smaller? However you want your shapes resized, it's easy to make the size change in a jiffy, right inside PowerPoint.
Follow these steps to resize shapes in PowerPoint 2016 for Mac.
Like most Microsoft Office programs, PowerPoint follows the concept of selection, then action. So, the first thing you may need to do to a shape that you want to be resized is to select it! Any shape that is selected shows several handles, as shown in all shapes, as shown in Figure 1, below.
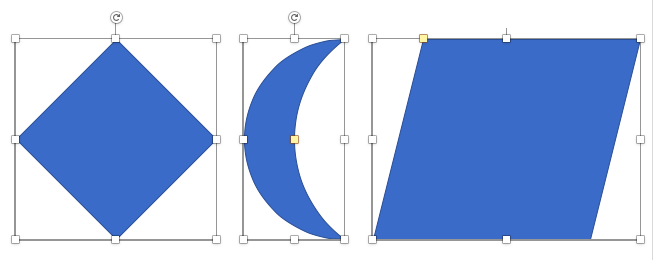
Figure 1: Shapes have several handles
Look closely at Figure 1, above, and you'll find that any selected shape has several handles.
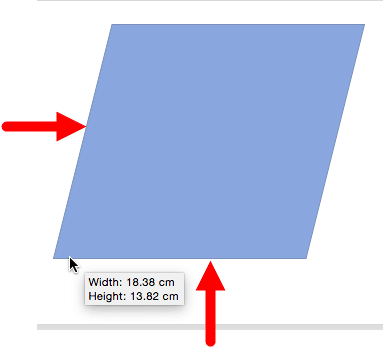
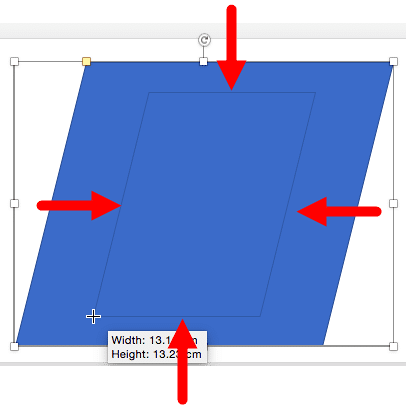
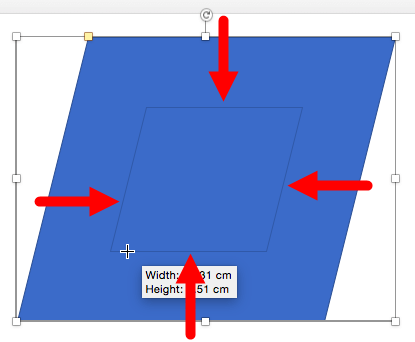
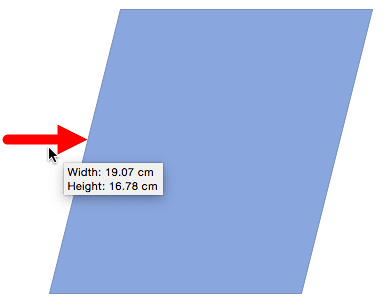
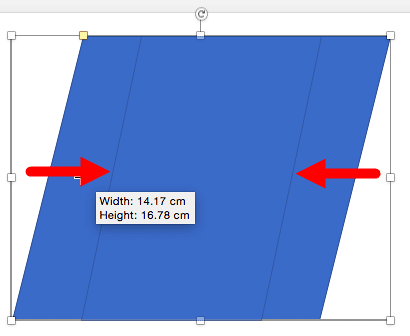
When you drag any of the eight white handles, you can resize the shape in various ways, depending upon certain factors, as explained below:

Do you want more keyboard shortcuts?
Explore our PowerPoint Keyboard Shortcuts and Sequences Ebook that is updated for all PowerPoint versions.
You can also resize the selected shape by pressing the Shift key and then pressing any of the four arrow keys on your keyboard. This option takes the center of the shape as an anchor point to resize from. Use any of the following command combinations to resize the shape.
As you resize the shape, you can see the height and the width change dynamically within the Size group of Format tab of the Ribbon. Also, you can select the Lock Aspect Ratio check box, as shown highlighted in red in Figure 7 and Figure 9, and then use the Shift key in combination with any of the arrow keys to proportionately resize the selected shape.
The options shown above allow you to resize based on what you see rather than resizing them to exact numerical values. To resize any shape to an exact size, you first select it. This activates the Shape Format tab on the Ribbon. In this tab, within the Size group, as shown in Figure 7, below, just change the Height and the Width values to resize the shape. You can press Return key after typing in a value, or use the increase or decrease buttons provided next to the numbers.

Figure 7: The Drawing Tools Format tab includes the Size group
To view even more resize options, right-click (or Ctrl + click) the selected shape and from the resultant menu, chose the Format Shape option, as shown in Figure 8, below.
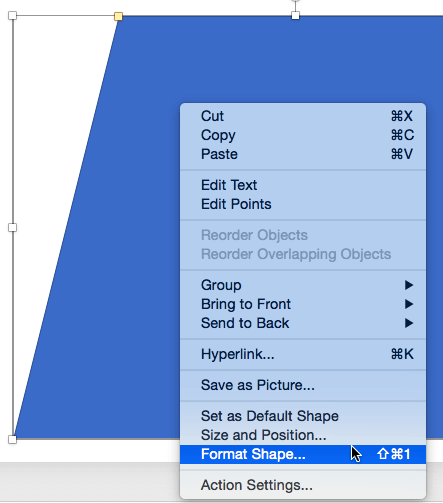
Figure 8: Format Shape option selected
Doing so brings up the Format Shape Task Pane, as shown in Figure 9, below.
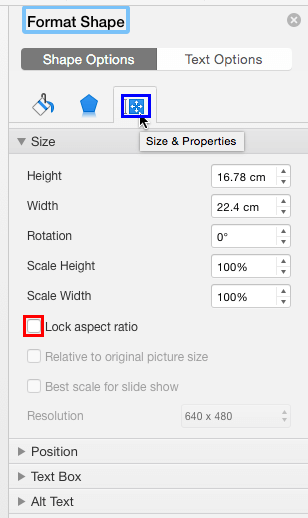
Figure 9: Format Shape Task Pane
Make sure you select the Size & Preperties tab, as shown highlighted in blue within Figure 9, above. Within this tab, you'll find the following options related to resizing shapes:
Type in a value or use the increase/decrease buttons to change the height of a shape.
Type in a value or use the increase/decrease buttons to change the width of a shape.
Type in a value or use the increase/decrease buttons to rotate the shape.
Change the height based on percentage values.
Change the width based on percentage values.
Select this check-box, as shown highlighted in red within Figure 9, so any change in height reflects a proportionate change in the width, and vice versa.
The other options shown in Figure 9, are not relevant to resizing shapes.
06 01 03 - Basics About Shapes: Resizing Shapes in PowerPoint (Glossary Page)
Resizing Shapes in PowerPoint 365 for Windows
Resizing Shapes in PowerPoint 365 for Mac
Resizing Shapes in PowerPoint 2016 for Windows
Resizing Shapes in PowerPoint 2013 for Windows
Resizing Shapes in PowerPoint 2011 for Mac
Resizing Shapes in PowerPoint 2010 for Windows
Resizing Shapes in PowerPoint for the Web
You May Also Like: GoSkills PowerPoint Training: Conversation with Bhavneet Chahal | Board Games PowerPoint Templates

Microsoft and the Office logo are trademarks or registered trademarks of Microsoft Corporation in the United States and/or other countries.