PowerPoint allows you make limited changes to your inserted movie clips. In a previous tutorial, we have already explored how you can correct the brightness and contrast for an inserted movie by using the Corrections option. Additionally, you can also completely recolor your inserted movie. For example, you can make your full color movie appear grayscale, or even like a duotoned movie combining grayscale with any one color such as blue, green, etc. Do remember that the movie Recolor options work almost similarly to Picture Recolor options.
In this tutorial, we will explore the Color options for video clips in PowerPoint 2011 for Mac:
- Open your presentation, and navigate to the required slide where you have already inserted a movie clip. Select or double-click the movie clip to bring up the Format Movie tab, as shown highlighted in red within Figure 1, below, in the Ribbon. Click this tab to activate it.
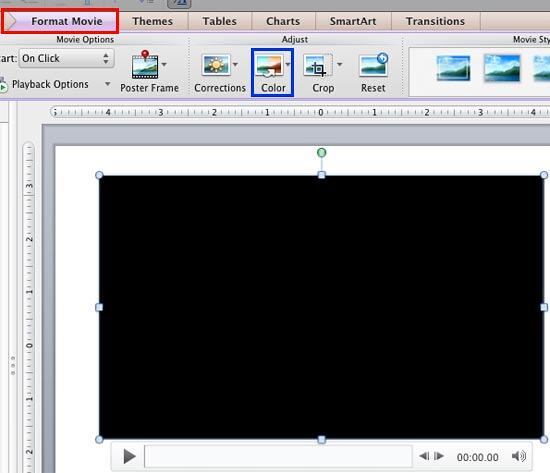
Figure 1: Format Movie tab of the Ribbon - When you insert a movie your slide, it may display a black rectangle on the slide, as shown in Figure 1, above. If your movie clip does not show a black rectangle, then directly proceed to Step 3.
- If you see the black rectangle in place of the movie clip, then you will not be able to see the results of recoloring unless you play the movie clip. To make sure you see a movie frame during recoloring, add a Poster Frame to your movie clip. Doing so will result in seeing a movie frame in the place of black rectangle, as shown in Figure 2, below.
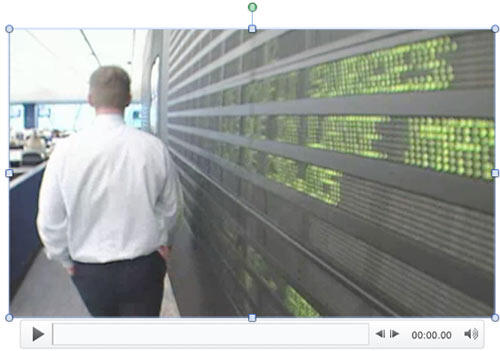
Figure 2: Video clip with a poster frame added - Now, within the Format Movie tab, click the Color button, as shown highlighted in blue within Figure 1, shown previously on this page, to access the Color drop-down gallery, as shown in Figure 3, below.
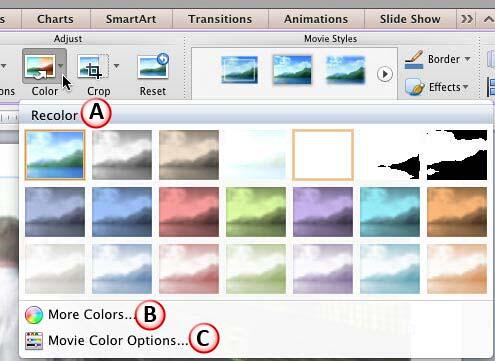
Figure 3: Color drop-down gallery - In Figure 3, above, you can see that the Color drop-down gallery with three sections. Uppermost of these is a section called Recolor, that contains preview thumbnails of Recolor variants. To select any of the Recolor variants, just click on the preview thumbnail of your choice. Let us explore all the Color drop-down gallery options one by one, as marked in Figure 3, above:
A. Recolor
- Accents, tints, greyscale, and black and white variants are shown as previews in this section. Previews in the 2nd and 3rd row of this section are influenced by the Theme of the active presentation. So, if the Theme is changed, colors of these previews will change. Hover your mouse cursor on any of the variants in this section to see its name as a tool tip showing how the change affect the actual movie clip's frame.
B. More Colors
- If you want to use a color that's not influenced by the Theme of the active presentation, then choose this option. This summons the Mac OS X Color picker, as shown in Figure 4, below. You can choose any color from the color wheel. Thereafter adjust the selected color's luminosity using the long, thin slider on the right. Once you are happy with the color attained, click the OK button to get back to your slide. Your selected movie will then be recolored monochromatically using the color chosen.

Figure 4: Mac OS X Color picker C. Movie Color Options
- This last option within the Color drop-down gallery takes you to the Adjust Movie panel within the Format Movie dialog box, as shown Figure 5, below. Note that in Figure 5, the options that are not related to Color have been grayed out because these options are explained in our Video Correction Adjustments in PowerPoint 2011 for Mac tutorial.
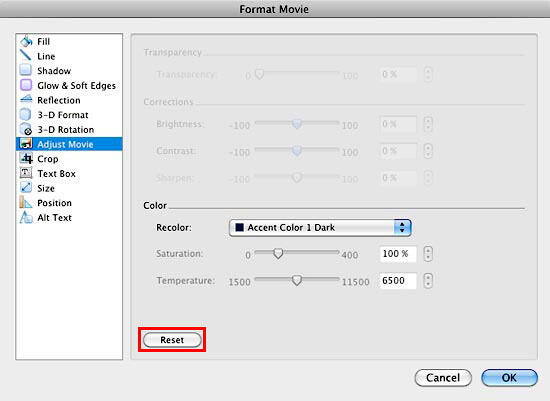
Figure 5: Movie Recolor options within the Format Movie dialog box - Here, you can select any of the preset Recolor types that you see in Recolor section within the Color gallery, but here you will see them as a list, as shown in Figure 6, below.
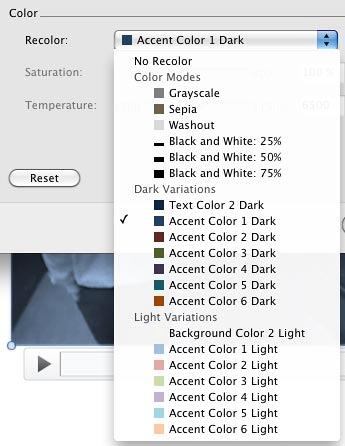
Figure 6: Preset Recolor options within the Format Movie dialog box - If you want to abandon all changes made to the movie clip within the Recolor area, click the Reset button, as shown highlighted in red within Figure 5, above. Note that when you click this button, the movie will be reset to its original form. Once done, click the OK button to apply the changes to the selected movie and get back to your slide.
- Recolor the movie by selecting any thumbnail preview variant, or using the Recolor options within Format Movie dialog box. In Figure 7, below you can see the selected movie after recoloring. Compare the movies in Figures 2 and 7.
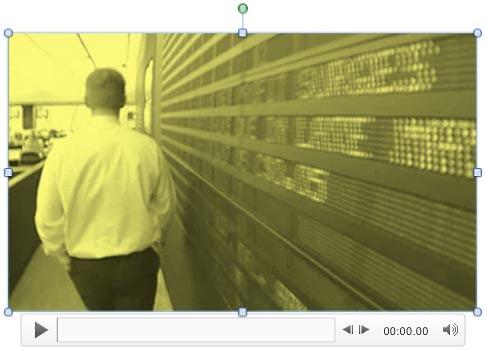
Figure 7: Selected movie recolored - Play your movie clip to see the difference. Make sure to save your presentation.


