Learn how gridlines snap and help you position slide objects in PowerPoint 2010 for Windows. Also, learn how to control the grid spacing.
Author: Geetesh Bajaj
Product/Version: PowerPoint 2010 for Windows
OS: Microsoft Windows XP and higher
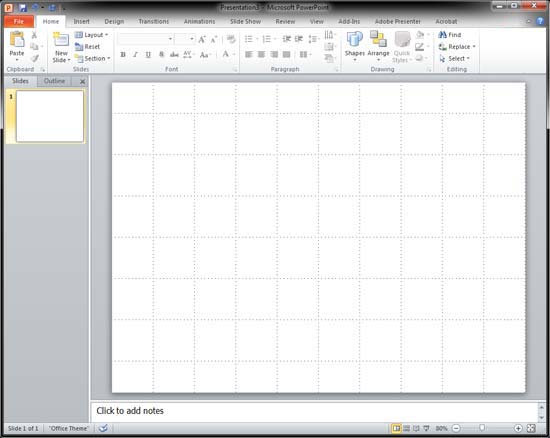
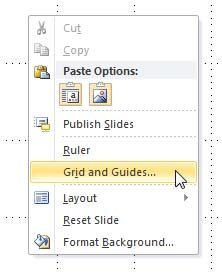
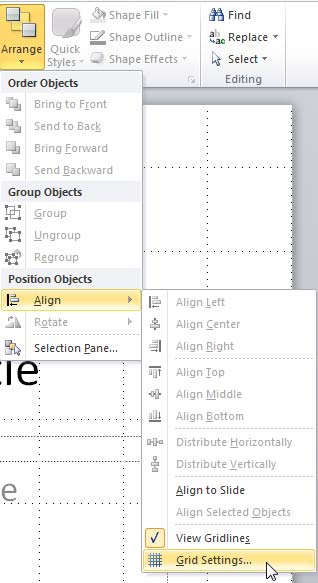
Once you have the gridlines visible on your slide in PowerPoint 2010 for Windows, you can use them to easily position and snap slide objects uniformly on a single slide, or even across successive slides using the Snap to Grid option. To access the Snap to Grid option and to make changes to the way it works, follow these steps:

Click the Shift+F9 shortcut key to toggle the visibility of gridlines in PowerPoint 2010 for Windows.

Do you want more keyboard shortcuts?
Explore our PowerPoint Keyboard Shortcuts and Sequences Ebook that is updated for all PowerPoint versions.


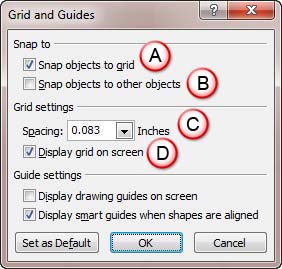
This option snaps objects to the gridlines as soon as they are moved fairly close to them. You can also turn on this option even without accessing the Grids and Guides dialog box by using the (Ctrl + Shift + F9) shortcut key.
You will learn more about snapping objects to the grid in our Working with Snap to Grid in PowerPoint 2010 tutorial.
To position slide objects to any nearby slide objects, turn on this option.
Under the Grid settings section, click the Spacing option to get a drop-down list, as shown in Figure 5, below, and choose any of the grid spacing values available.

Figure 5: Spacing drop-down list
Select or clear the Display grid on screen check box to show/hide the gridlines on the slide. You can also turn on this option even without accessing the Grids and Guides dialog box by using the Shift + F9 shortcut key.
If you want the settings you changed to be the default settings for all presentations you create from now onwards, click the Set as Default button, as shown in Figure 4, previously on this page. Do note that the changed settings will apply for your active, current presentation and for any other new presentations you create hereafter on your installed version of PowerPoint. All settings may not work for existing presentations created previously on the same system or for presentations you have received from others, which have been created on other installations of PowerPoint. This setting is therefore a PowerPoint installation-specific change and not a PowerPoint file-specific change.
01 09 11 - Working with Slides: Snap to Grid Settings in PowerPoint (Glossary Page)
Snap to Grid Settings in PowerPoint 2016 for Windows
Snap to Grid Settings in PowerPoint 2013 for Windows
You May Also Like: Presentation Management is Risk Management | Europe PowerPoint Templates


Microsoft and the Office logo are trademarks or registered trademarks of Microsoft Corporation in the United States and/or other countries.