If your presentation has a large section containing plenty of slides, then it is quite possible that one larger section may make it difficult to view the other remaining sections, as shown in Figure 1, below. The reason here is that slides within this huge section cover up so much screen area that it becomes difficult for you to see the slides in the other sections. And if you want to drag a slide from one section to another, you may be at a loss to do so, or even comprehend what you will end up with, and where your slide will move to? This can also cause an issue beyond moving slides, and you won't feel too intuitive if want to reorder your sections.
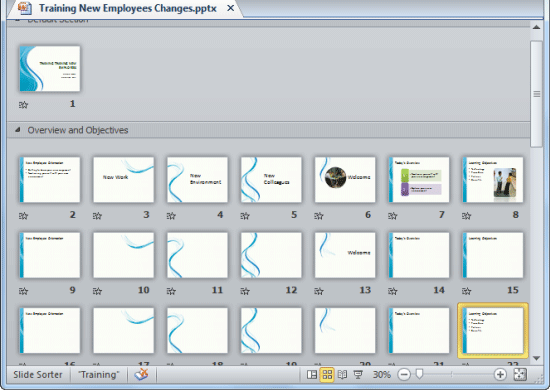
Figure 1: Sections with plenty of slides visible within Slide Sorter view
So, how can you counter this problem? You can collapse and expand single and multiple sections in PowerPoint 2010 for Windows, as explained in this tutorial.
- First open your presentation within which you have already added sections. Change to Slide Sorter view, as shown in Figure 1, above, so that you can easily access the sections.
- Thereafter, collapse your sections so that you only see the section names without any slides. This step makes it possible to easily drag the section to the required position.
There are two ways to collapse and expand sections in PowerPoint.
Collapse/Expand a Single Section
- To collapse a particular section, first click on its name to select it. We selected an expanded section called Overview and Objectives, as shown in Figure 2, below. Then, click the small arrow that you can see in front of its name, as shown highlighted in red within Figure 2.
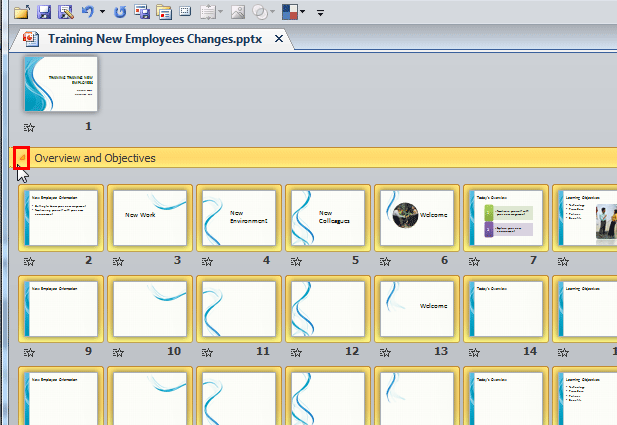
Figure 2: Arrow in front of the section name - Alternatively, double-click on the section's name to collapse it.
- Either way, you collapse all slides within the selected section, and you will see only the name of the section and no slides at all, as shown highlighted in red within Figure 3, below. Also, compare with Figure 2, above, and you will notice that the arrow now points rightwards.
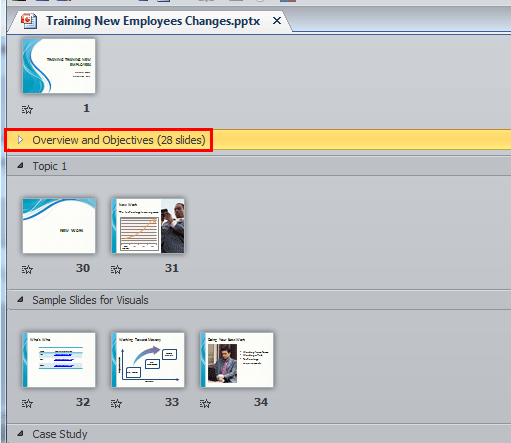
Figure 3: Selected section collapsed - Now, to expand the now-collapsed section, click the same rightward pointing arrow in front of its name, as shown highlighted in red within Figure 4, below.
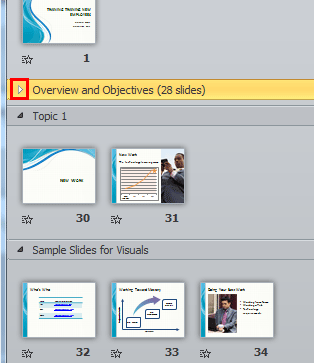
Figure 4: Rightward pointing arrow in front of the section name - Alternatively, double-click on the already collapsed section's name to expand it.
- Any such action will expand the now-collapsed section, making all the slides contained within visible, as shown in Figure 5, below, which is almost what we started with, as shown in Figure 1, previously on this page.
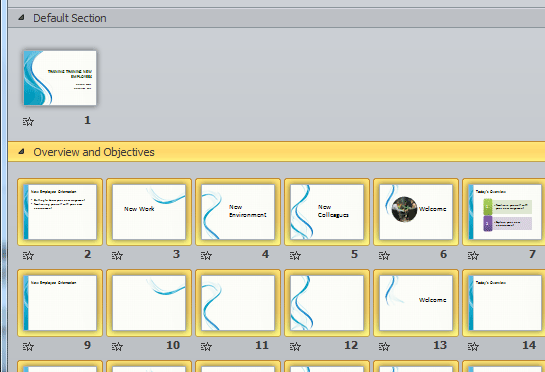
Figure 5: Selected section expanded
Collapse/Expand All Sections in a Presentation
- To collapse/expand all sections within a presentation in one go, first right-click on the name of any section. A contextual menu appears, as shown in Figure 6, below.
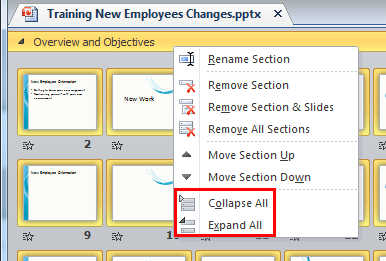
Figure 6: Options to collapse/expand all slides in the presentation - Within this contextual menu, you will find two options for collapsing/expanding the sections: Collapse All and Expand All, as shown highlighted in red within Figure 6, above.
- Let us now explore both of these options:
Collapse All
- This option collapses all sections in the entire presentation, and you will see only the names of the sections and no slides, as shown in Figure 7, below.
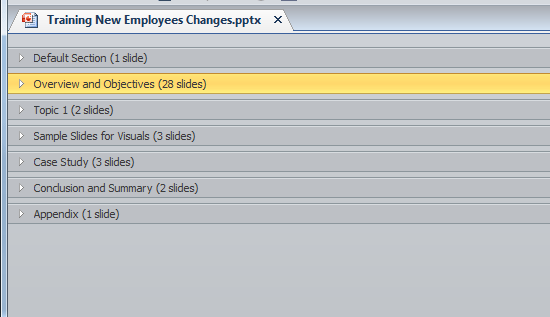
Figure 7: Result of selecting Collapse All option Expand All
- This option expands all sections in the entire presentation. Select a section and right-click on the name of any section, a contextual menu appears, as shown in Figure 8, below. Within this contextual menu, select the Expand All option, as shown in Figure 8.
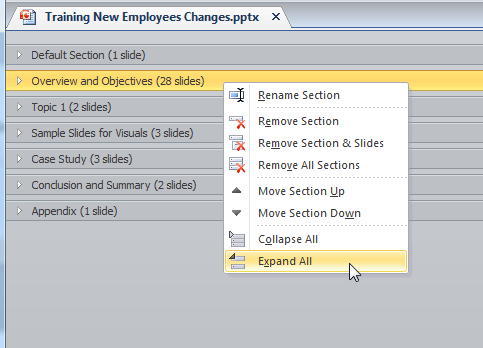
Figure 8: Expand All option selected - This action expands all sections in the entire presentation, as shown in Figure 9, below.
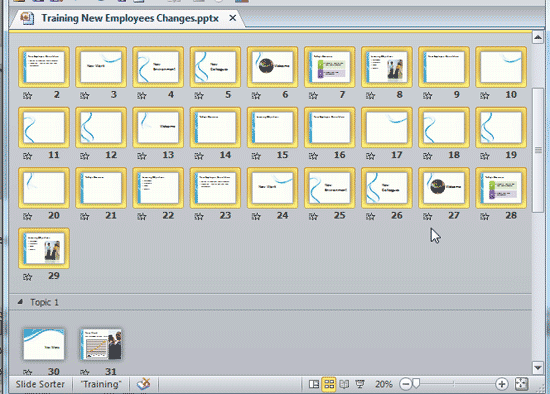
Figure 9: Result of selecting Expand All option - Select any option to collapse/expand section(s) as required.
- Save your presentation often.


