Explore general program options in PowerPoint 2010 for Windows. These options are significant, and some time spent exploring them will help you use PowerPoint better.
Author: Geetesh Bajaj
Product/Version: PowerPoint 2010 for Windows
OS: Microsoft Windows XP and higher
The General tab of the PowerPoint Options dialog box contains basic, yet some very important options related to the appearance and working of the PowerPoint interface. Changes to these options can result in a very different and more efficient workflow. The PowerPoint Options dialog box can be accessed in multiple ways, as explained in our Options Tab in Backstage view in PowerPoint 2010 for Windows tutorial.
In this tutorial, we will explore the various options within the General tab of the PowerPoint Options dialog box. Follow these steps to understand better:
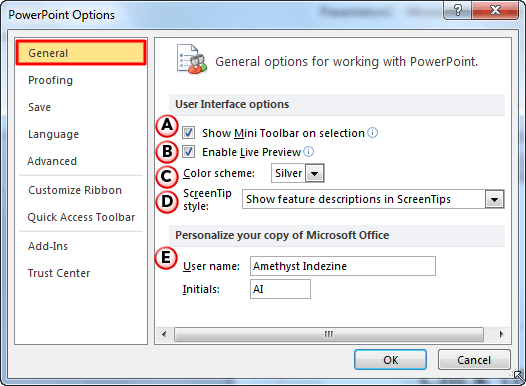
As the name suggests, selecting this check-box will provide easy access to the Mini Toolbar when you select text on your slide. To learn more about Mini Toolbar, explore our Mini Toolbar in PowerPoint 2010 for Windows tutorial.
Selecting this check-box enables Live Preview of slide objects as you hover over options within the Ribbon and elsewhere. To learn more about Live Preview, explore our Live Preview in PowerPoint 2010 for Windows tutorial.
This option is used to change the interface color of PowerPoint 2010. Click the down-arrow to open a drop-down list, as shown in Figure 2, below.
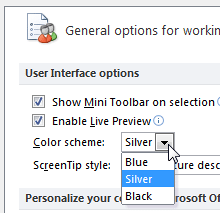
Figure 2: Color scheme drop-down list
Here you'll find three color choices:
Figure 3, below, shows the PowerPoint interface with the Blue color scheme.
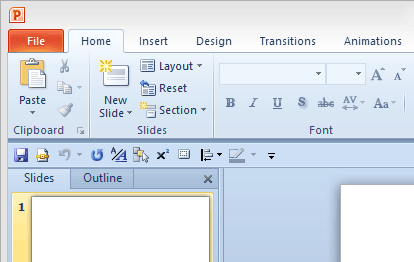
Figure 3: Blue color applied to the interface
Figure 4, below, shows the PowerPoint interface with the Silver color scheme.
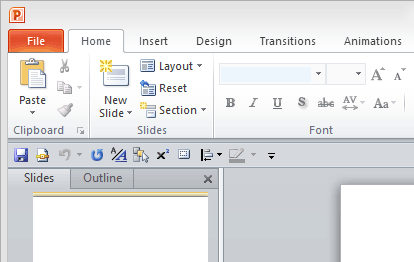
Figure 4: Silver color applied to the interface
Figure 5, below, shows the PowerPoint interface with the Black color scheme.
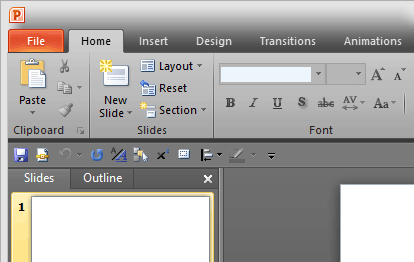
Figure 5: Black color applied to the interface
Change the style of Screen tips using this option. Click the down-arrow to open a drop-down list, as shown in Figure 6, below.

Figure 6: ScreenTip style drop-down list
Here you'll find three Style choices:
This is the default option. In Figure 7, below, you can see that the Screen tip shows both the command name and a small description.
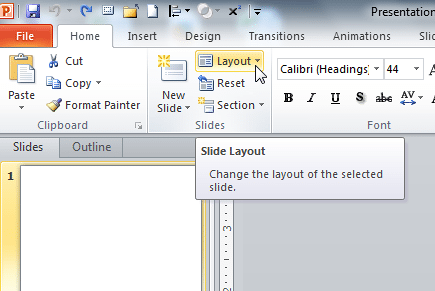
Figure 7: Result of selecting the Show feature descriptions in ScreenTips option
In Figure 8, below, you can see how the Screen tip shows the command name without any description.
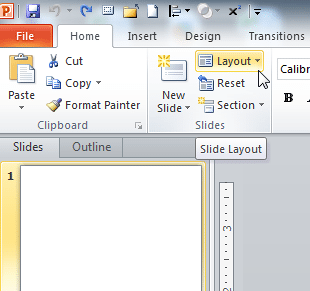
Figure 8: Result of selecting the Don't show feature descriptions in ScreenTips option
In Figure 9, below, you can see the result of selecting this option. Notice that even though the cursor is hovered over the Layout button, there is no ScreenTip displayed.
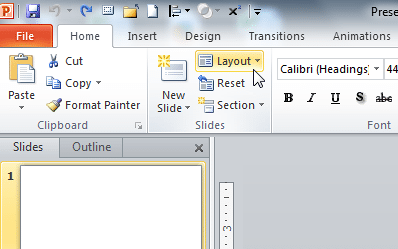
Figure 9: Result of selecting the Don't show ScreenTips option
This last section includes options to change your User name and Initials. Do remember that the details you provide within this area will identify you in any comments or review edits you make in your presentation, especially when multiple authors edit the same presentation.
Any changes you make, as explained on this page, will influence all Microsoft Office programs installed including Word, Excel, Outlook, etc. These changes don’t restrict to just the PowerPoint interface.
01 08 17 - File Types, File Menu, and Backstage View: General Program Options in PowerPoint (Glossary Page)
General Program Options in PowerPoint 365 for Windows
General Program Options in PowerPoint 2016 for Windows
General Program Options in PowerPoint 2013 for Windows
You May Also Like: Explore Fonts: Bauhaus 93 | Strips PowerPoint Templates


Microsoft and the Office logo are trademarks or registered trademarks of Microsoft Corporation in the United States and/or other countries.