The shadow effect in PowerPoint adds more depth to your selected shape, and you may get the perfect shadow effect the very first time you use PowerPoint's default shadow options. However, you may want that shadow to be a wee bit longer, or just a little less pronounced. Or maybe you want the shadow to sport a color that's different. Figure 1 below shows some fancy shadow effects applied within PowerPoint 2013 for Windows:
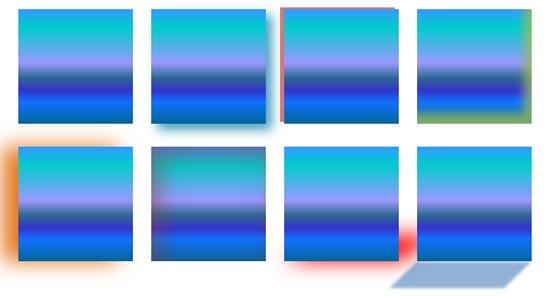
Figure 1: Fancy shadow effects
Fortunately, these shadow effects are quite easy to achieve. Follow these steps to get started:
- Select the shape so that the Ribbon area shows the Drawing Tools Format tab, as shown highlighted in red within Figure 2. Activate this Ribbon tab by clicking on it. Within the Drawing Tools Format tab click the Shape Effects button (highlighted in blue within Figure 2).
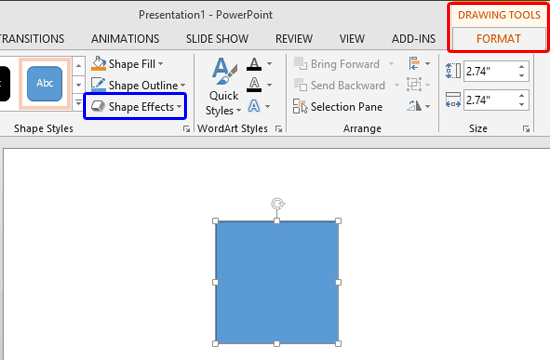
Figure 2: Drawing Tools Format tab of the Ribbon Note: The
Drawing Tools Format tab is a
Contextual tab. These tabs are special tabs in the
Ribbon that are not visible all the time. They only make an appearance when you are working with a particular slide object which can be edited using special options.
- This brings up the Shape Effects drop-down gallery, as shown in Figure 3. From the Shape Effects drop-down gallery, choose Shadow option to bring up the Shadow sub-gallery. From the sub-gallery choose Shadow Options, as shown highlighted in red within Figure 3.
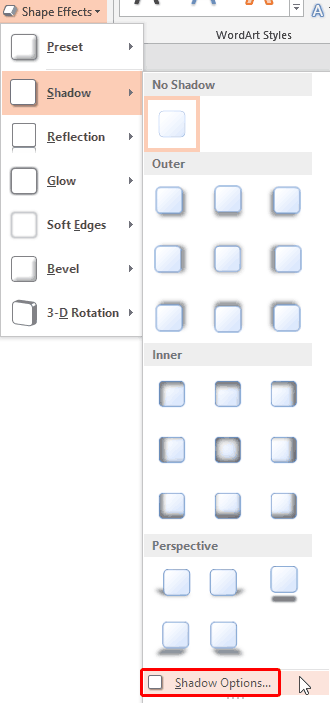
Figure 3: Shadow Options within Shape effects drop-down gallery - This opens the Format Shape Task Pane with the Effects tab selected, as shown highlighted in red within Figure 4.

Figure 4: Shadow options within the Format Shape Task Pane - Shadow options within the Format Shape Task Pane are explained below, as marked in Figure 4, above:
A. Presets
- Click the down arrow next to the icon, which brings up the similar shadow gallery that you can see in Figure 3 above. See our Apply Shadow Effects to Shapes In PowerPoint 2013 tutorial for more information.
B. Color
- Allows you to change the shadow color. Click the down arrow next to color icon to access the Color fly out menu (see Figure 5). Here you can choose any color for the shadow.
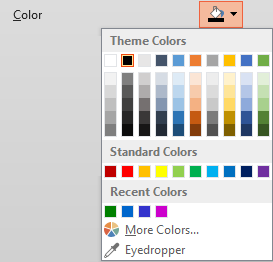
Figure 5: Shadow color options i. Theme Colors:
- Here you can select any of the colors which are from the active Theme of the presentation. You can also select any of the 5 tints or shades for any Theme color. Learn more about Themes here.
ii. Standard Colors:
- Here you can choose from any of the ten standard colors. These ten standard colors are just choices of colors that PowerPoint believes to be widely used. You don't have to limit yourself to either the Theme colors or Standard colors, as you'll learn in the next options. Although, it's a good design idea to use Theme colors as far as possible.
iii. Recent Colors:
- Here you can find the colors most recently used. If you have just launched PowerPoint and created a new presentation, the Recent Colors option may be entirely absent since you haven't selected any color recently!
iv. More Fill Colors:
- This option is to summon the Colors dialog box as shown in Figure 6. This dialog box has two tabs: Standard and Custom. First select the Standard tab (again, refer to Figure 6).
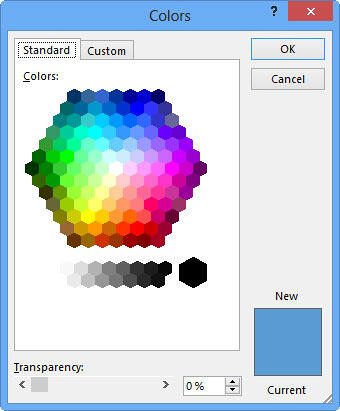
Figure 6: Standard tab within the Colors dialog box - The Standard tab offers 127 colors in a honeycomb style palette, 14 gray shades, black and white. You can even change the transparency value of the selected color in the Transparency slider below. If you want more color choices, then select the Custom tab of the same dialog box, as shown in Figure 7.
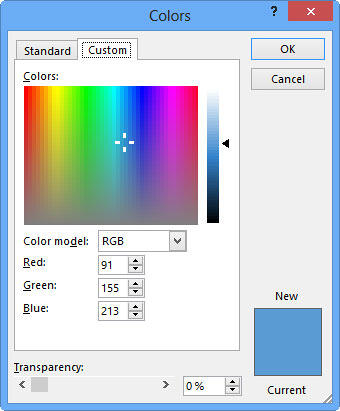
Figure 7: Custom tab within the Colors dialog box - Within the Custom tab, you can choose any color from the spectrum and later adjust the selected color's luminosity with the slider on the right. You can even enter specific values of RGB and HSL to create a specific color. All these combinations provide 16 million color choices!
- Again, you can even change the transparency value of the selected color in the Transparency slider below.
- Choose any color and click OK to apply it.
C. Transparency
- Allows you to alter the transparency of the shadow. You can use the slider, or type the shadow transparency value in percentages.
D. Size
- Use the slider or enter the shadow size value in percentages to increase or decrease the size (spread) of the shadow.
E. Blur
- This option makes the edges of the shadow more feathered (merged with the background). Again you can use the slider, or enter the blur value in points.
F. Angle
- This slider changes the angle of the shadow in relation to the shape.
G. Distance
- Allows you to format the starting and the ending point of the shadow in relation to the position of the shape. You can use the slider or insert the distance value in points.
- Play around with the shadow options untill you get the perfect shadow effect.
- Remember to save your presentation often.


