Very few people are aware that Adobe's PDF files actually support movement and multimedia! Yes, you can have animations
and transitions within PDFs, and also these PDFs can contain audio and video files. So why do the PDFs typically created
from within PowerPoint using PowerPoint's built-in PDF output -- or even created using Adobe's Acrobat Pro program not
contain these niceties? Was that a little confusing? Let's make this easier. Imagine you have a PowerPoint presentation
that has some animation and an embedded video clip. Convert that to a PDF and all the movement and multimedia is lost!
The solution is not very obvious, but Adobe creates a PowerPoint add-in called
Adobe Presenter -- this lets you directly
publish your presentation into a
PDF with all the movement and multimedia preserved. Follow these steps to learn more:
- Open the presentation which already has animation, and then publish it as a PDF. To do so, click
the Publish button within the Adobe Presenter tab of the
Ribbon, as shown
highlighted in red within Figure 1.
-
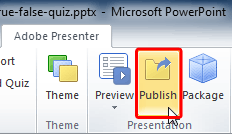
Figure 1: Publish button within the Presentation group
Note: If you don't have the
Adobe Presenter tab within the
Ribbon in PowerPoint, that may indicate you haven't installed it. This tab is not built-in within
PowerPoint and is installed as part of a
PowerPoint add-in
from Adobe called Presenter.
- This opens the Publish Presentation dialog box, as shown in Figure 2.
-
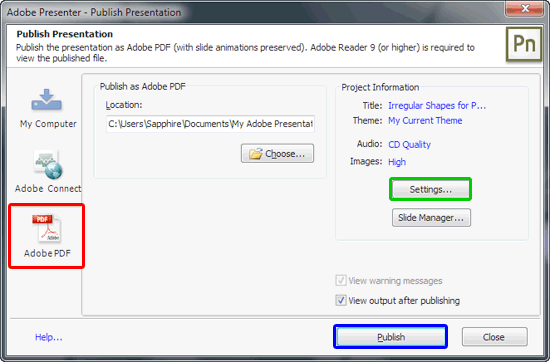
Figure 2: Publish Presentation dialog box
- Within the Publish Presentation dialog box, select the Adobe PDF
tab (highlighted in red within Figure 2, above). While there are many settings
that you can tweak here, let's first accept the defaults. For now, just choose and navigate to the location where you want
to save the PDF file. And click the Publish button (highlighted in blue
within Figure 2, above).
Note: You can further tweak the output by clicking the
Settings button, highlighted in
green within
Figure 2 above. The resultant settings are same as the ones
explained in our
Local Publish Settings
in Adobe Presenter tutorial.
- This will publish your presentation into a PDF, as shown in Figure 3, below -- you will
note that the PDF output also contains Adobe Presenter player. The great part is that all movement and multimedia is
supported within this PDF output.
-
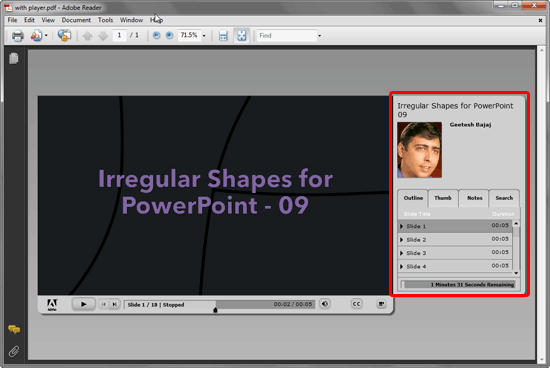
Figure 3: PDF output
While this may work in some scenarios, it may not work all the time. To get rid of the large sidebar (highlighted in
red within Figure 3 above), and to make the navigation bar smaller, follow
these steps:
- Access the Adobe Presenter tab of the
Ribbon, and click the
Theme button (highlighted in red within Figure 4).
-
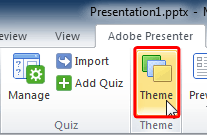
Figure 4: Theme button
- This opens the Theme Editor dialog box, as you can see in Figure 5.
-

Figure 5: Theme Editor dialog box
- Now, look at the preview area of the Theme Editor dialog box. Here we'll hide
the Sidebar, shown highlighted in red within Figure 5, above.
And we will make the navigation bar (shown highlighted in blue within
Figure 5, above) smaller.
- Within the Theme Editor dialog box, you'll find Customize options on
the extreme right -- deselect the Show Sidebar check-box, as shown highlighted in
red within Figure 6.
-
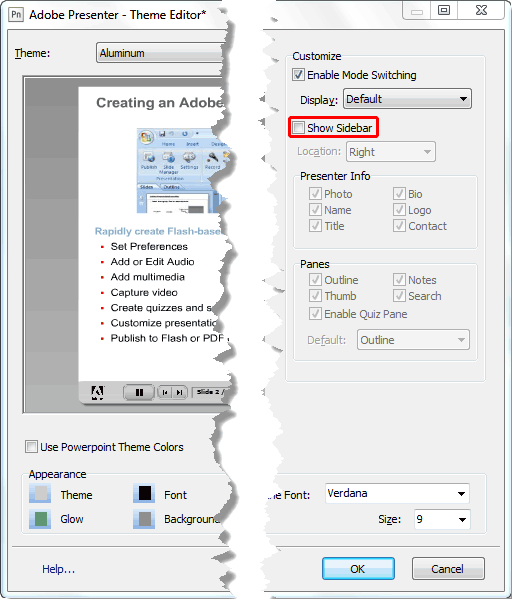
Figure 6: Show Sidebar check-box deselected
- Let the Enable Mode Switching check-box be selected (shown highlighted in
red within Figure 7). Within the Display drop-down menu, select
the Fullscreen option (refer to Figure 7 again).
-
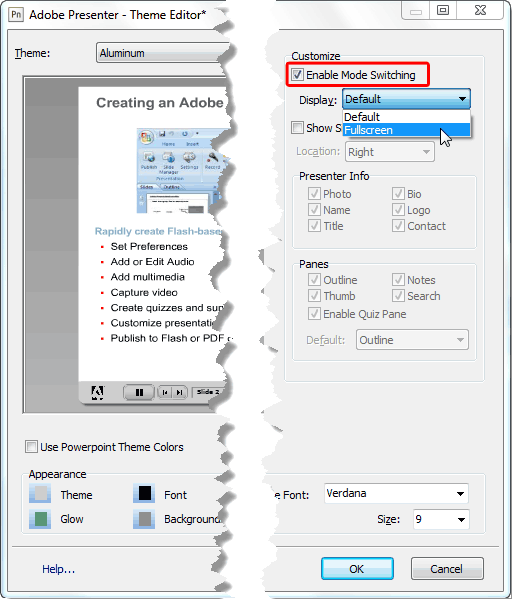
Figure 7: Fullscreen option selected
- After making these changes, your Adobe Presenter player will have the minimum options, as shown highlighted
in red within Figure 8 below. Once done click the OK button,
as shown highlighted in blue within Figure 8, again.
-
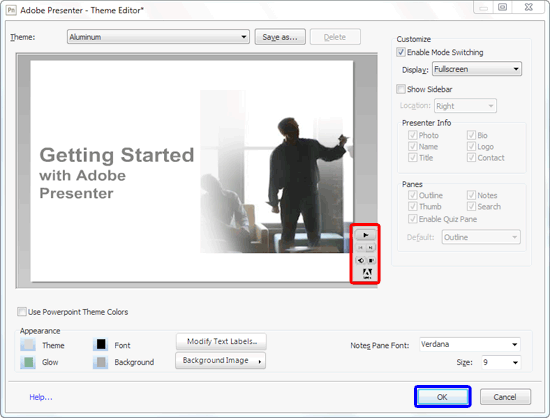
Figure 8: Adobe Presenter player customized
- Figure 9, below shows the the PDF output with no sidebar and minimal navigation options --
compare with Figure 3, shown earlier on this page.
-
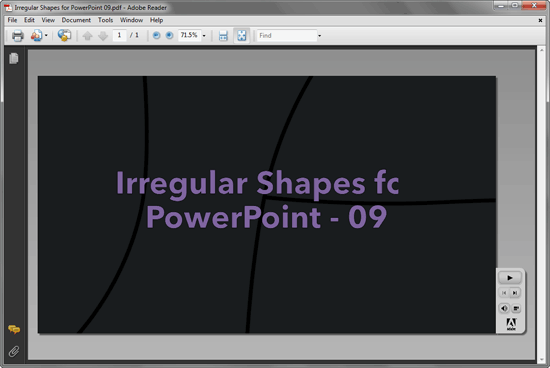
Figure 9: PDF output with no Sidebar and minimal navigation options
The output PDF contains the Adobe Presenter player as well, and that does occupy a fairly minimal environment this time.


