Adobe Presenter provides various
publish options such as to publish
locally, via the Adobe Connect service,
and also as an interactive
PDF. Each of these options has additional settings such as appearance, playback, quality, and attachments. Within
these Settings, you can personalize the output. In this tutorial we'll explore the local publish settings -- follow these
steps to learn more:
- Open the presentation which you want to publish locally. Thereafter access the
Adobe Presenter
tab of the Ribbon,
and click the Publish button, as shown highlighted in red within
Figure 1.
-
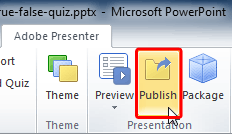
Figure 1: Publish button within the Presentation group
Note: If you don't have the
Adobe Presenter tab within the
Ribbon in PowerPoint, that may indicate you haven't installed it. This tab is not built-in within
PowerPoint and is installed as part of a
PowerPoint add-in
from Adobe called Presenter.
- This opens the Publish Presentation dialog box, as shown in
Figure 2.
-
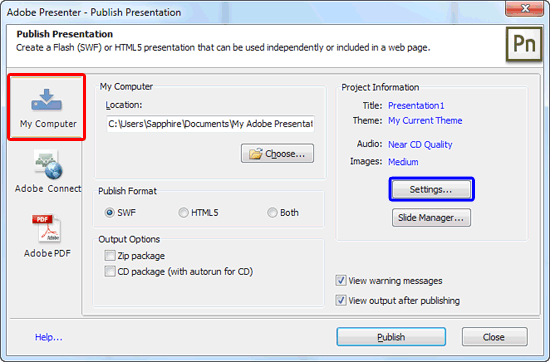
Figure 2: Publish Presentation dialog box
- Within the Publish Presentation dialog box choose My Computer option,
as shown highlighted in red within Figure 2. Then click the
Settings button, as shown highlighted in blue within
Figure 2.
- This brings up the Settings dialog box, as shown in Figure 3.
-
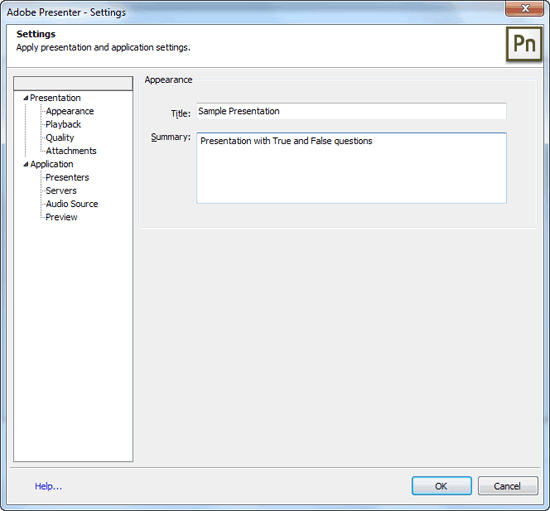
Figure 3: Settings dialog box
- Within the sidebar of Settings dialog box you'll get options to perform
changes for presentation and application. As you select an option in the sidebar, the related parameters appear
on the right side of the Settings dialog-box. All of these sidebar options are explained below
from top to bottom:
A. Appearance
B. Playback
- Here select the required check-boxes (see Figure 4) to enable playback options
such as auto playing the presentation when it is opened, looping presentation, including slide numbers in outline,
pausing after each animation, and setting the duration of slide without audio or video. If you made some changes that you
regret later, the convenient Restore Defaults button (see Figure 4) lets to access
the original settings.
-
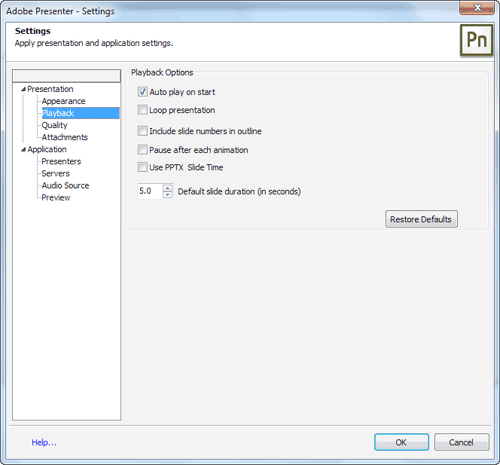
Figure 4: Playback options
C. Quality
- You can set all the publish quality for audio and images (see Figure 5). You
can also choose various other Publish options, such as preloading. Again, the
Restore Defaults button lets to access original settings.
-
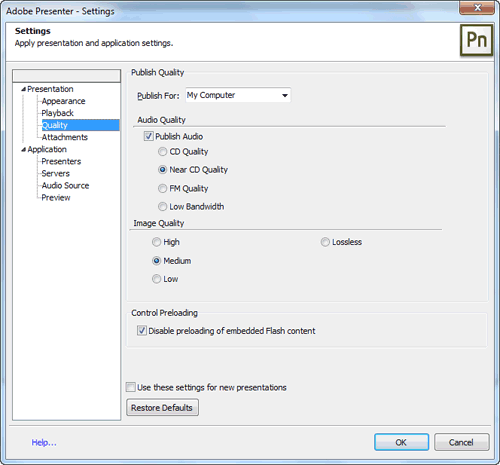
Figure 5: Publish Quality options
D. Attachments
- Here you can attach web pages, documents, PDF files, FlashPaper documents, SWF files, or
spreadsheets to your presentation (see Figure 6). Links to websites or documents hosted by Adobe Connect
Server or a third-party system can also be added. If a presentation contains attachments, you’ll see an
Attachments button at the bottom of the Adobe Presenter viewer. You can click the button to see a
list of attachments associated with the presentation, and then click any listed attachment to open it.
-
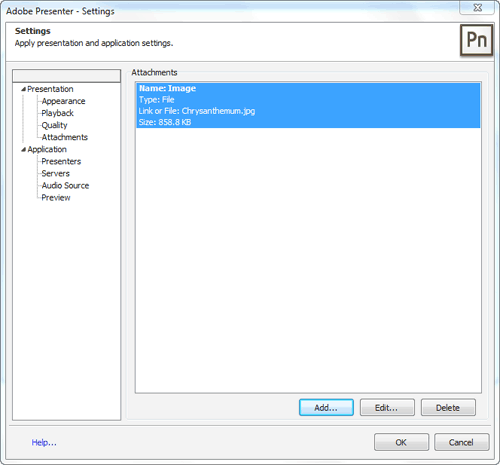
Figure 6: Attachments
E. Presenters
- You can add a presenter here who provides information during a
presentation (see Figure 7). You can assign a single presenter to all slides in a
presentation, or different presenters can be assigned to individual slides. Also, you can provide detailed
information about presenters such as: name, photograph, job title, short biographical notes, a company logo, and
contact information. This information can make a presentation more credible, personal, and interesting.
-
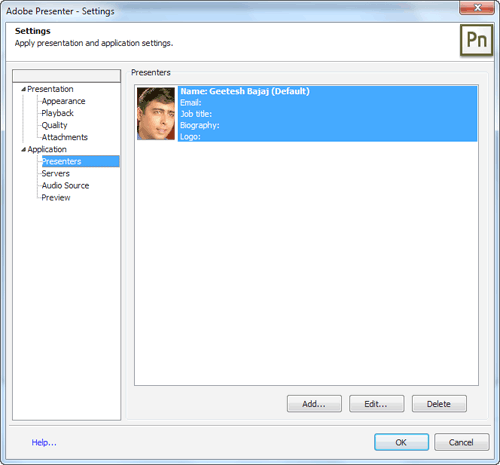
Figure 7: Presenters
F. Servers
- Here you have to add and then select the Adobe Connect servers to which you will
publish your presentation (see Figure 8).
-
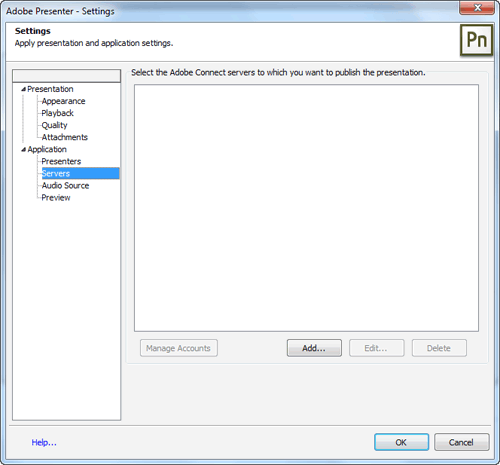
Figure 8: Servers
G. Audio Source
- Choose the audio input source from Microphone or
Line in options (see Figure 9).
-
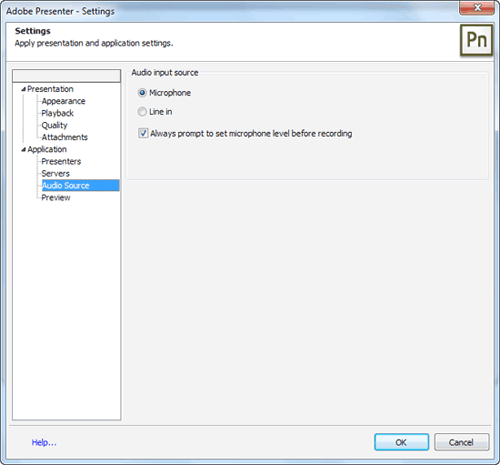
Figure 9: Audio Source
H. Preview
- Here you can set the preview defaults (see Figure 10). By default it is set to
preview the next five slides starting from the currently selected slide. You can change the value 5 to any
other required value.
-
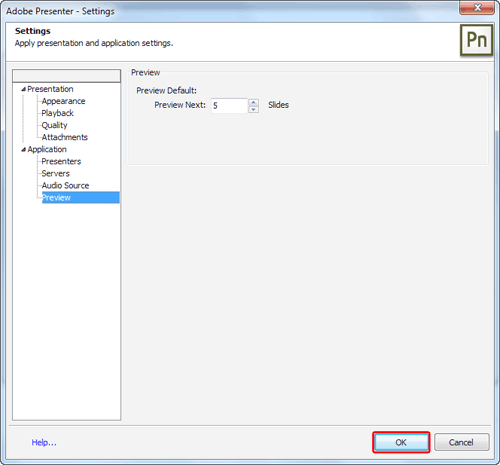
Figure 10: Preview
- After changing the settings, click the OK button, highlighted in
red within Figure 10, above. This will get you back to the
Publish Presentation dialog box, as shown in Figure 2, previously on this
page. All options herein are already explained in our
Publish Options in
Adobe Presenter tutorial.


