If you are happy with the presentation slides you created, you should then move towards practicing your presentation delivery, your timing, and your pace. More importantly, it is time to be comfortable with your slides. PowerPoint itself can help you better handle this job via it's PowerPoint's powerful Rehearse Timings feature that we will explore within this tutorial.
Follow these steps to use the Rehearse Timings feature in PowerPoint 2010 for Windows:
- Open the presentation that you want to rehearse in PowerPoint 2010 for Windows. Do note that your presentation slides must be "done" to proceed. Small changes in the slides may be acceptable after this stage, but if you do larger changes, you may want to reuse the Rehearse Timings feature all over again.
- Choose to save a copy of your presentation. Always rehearse with a copy of your slides, and not the original. We will look at reasons why we suggest you work with a copy later in this tutorial.
- Now, access the Slide Show tab of the Ribbon, and click the Rehearse Timings button, as shown highlighted in red within Figure 1, below.

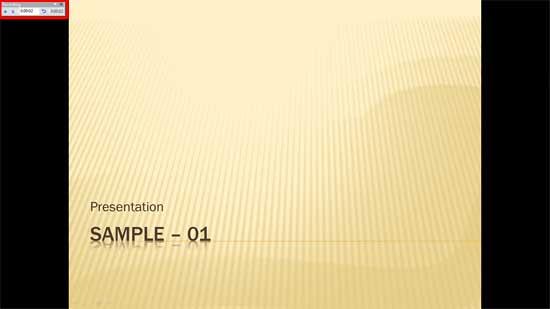
Figure 1: Rehearse Timings button- Doing so will launch your presentation in Slide Show view, but with one difference. Unlike in Slide Show view, you now can also see a floating toolbar, as shown highlighted in red within Figure 2, below.

Figure 2: Rehearse Slides view with floating toolbar- Figure 3, below, shows just the Recording toolbar. It's strange that you see a Recording toolbar during rehearsal. Actually, although the slides themselves are not being recorded, the timings are recorded even during rehearsal, and we shall explore this part during the end of this tutorial.
- The toolbar interface lets you rehearse your slide timings. Imagine you are in front of a live audience, and are delivering a presentation.

Figure 3: Recording toolbar- Let us now explain to you the options within Figure 3, from left to right:
Right Arrow
- This lets you move to the next slide, or the next animation in your presentation. You can also use the N, Spacebar, or Right Arrow keys on your keyboard.
Pause
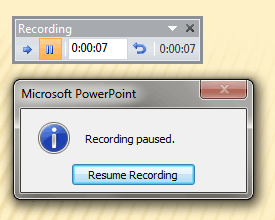
- Let you pause your rehearsal. This is great when you want to take a break, or need to attend an unexpected phone call while rehearsing. Once you press this button, you will see the Recording Paused message window, as shown in Figure 4, below.

Figure 4: Pause and Resume- Press the Resume Recording button to resume your rehearsal. When you resume, the Slide Time in your Recording toolbar will also resume. In the example shown in Figure 4, above, we paused at 7 seconds.
Slide Time:
- Shows you how much time you have used to rehearse for the active slide.
- Repeat: Is almost the same as the Pause option, but with one crucial difference. When you resume, the Slide Time in your Recording toolbar will reset from where you left. In the example shown in Figure 4, above, we paused at 7 seconds. While resuming, we will thus start 0 seconds for the active slide.
Cumulative Time
- Shows you the time spent for all slides that you have rehearsed yet.
- Once you are done rehearsing your slides, press the Esc key or press the Close button on the Recording toolbar. PowerPoint will prompt you via a message window whether you want to save the timings, as shown in Figure 5, below.

Figure 5: Do you want to save the new slide timings?- You should probably say Yes. Even if any changes are made to your presentation by PowerPoint to preserve these timings, that's perfectly acceptable since you realize that we are working on a copy of the presentation! Yes, that's precisely why we suggested in Step 2 that you make a copy of your presentation.
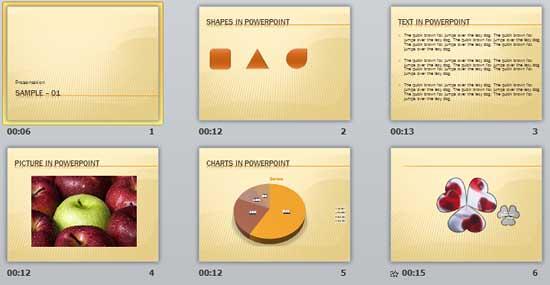
- Once you click Yes, PowerPoint will display your slides in Slide Sorter view, as shown in Figure 6. On the surface you cannot see the changes made.

Figure 6: Notice all the transition times?- Here you will see that each slide has its own transition time. This approach has its pros and cons. The advantage here is that you are aware of the amount of time you need to deliver each individual slide. The disadvantage is that if you use these slides for your final presentation, then your slides will advance without you being aware! Of course, that's why we rehearsed with a copy of your presentation.
- You can re-rehearse any number of times, and each time, your older transition times will be overwritten. Again, work on a copy of your presentation.
- Make sure to save your presentation often.


