In PowerPoint, shapes and pictures are important parts of a slide. Both are mainly used to add visual elements to your presentations. However, there are some problem areas when you use a picture as a fill for a shape. Primarily, you'll find that PowerPoint insists on filling the entire picture to a shape. In the process, the picture itself may appear distorted.
Figure 1 depicts an example. On the left is the actual picture we used to fill the shape. On the right, note that the man's face is squeezed and squashed when used as a picture fill. This completely destroys the look we wanted to attain. Fortunately, regaining the proportion is an easy option, as you will learn in this tutorial.

Figure 1: Picture gets distorted when used as a fill for a shape
The options to set the proportions of a picture fill can be surprisingly found within the Crop options! While you are using the Crop tool, you can also select a particular portion of the picture to fill the shape, or you can zoom to an area within the picture fill.
Follow these steps to learn more in PowerPoint 2011 for Mac:
- Before you start, we are assuming you have already inserted a shape on your slide that has a picture fill. Select the shape to bring up the Format Picture tab (highlighted in red in Figure 2) of the Ribbon. Activate this contextual tab by clicking it. Locate the Adjust group, and click the downward pointing arrow in the Crop button (highlighted in green in Figure 2).
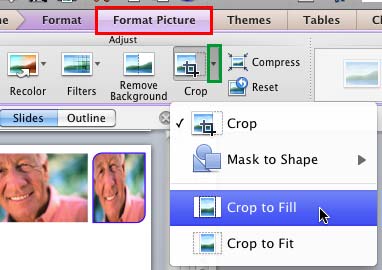
Figure 2: Crop to Fill option within the Crop drop-down gallery Note: The
Picture Tools Format tab is a
Contextual tab. These tabs are special tabs in the
Ribbon that are not visible all the time. They only make an appearance when you are working with a particular slide object which can be edited using special options.
- This opens the Crop drop-down gallery. Select the Crop to Fill option (refer to Figure 2, above).
Note: Make sure to select only the Format Picture tab, not the Format tab.
- As soon as you select this option, you can see that the picture fill is no more distorted, as shown in Figure 3, below. Also notice that dark crop handles appear on the edge of the container shape, and bluish-white selection handles appear on the edge of the picture used as fill.
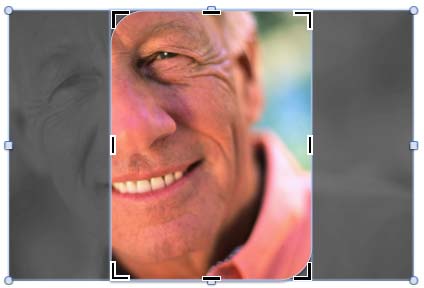
Figure 3: Crop to Fill option applied to a Picture filled shape - You can drag the dark crop handles to resize the container shape. Similarly, you can use the selection handles to resize and reposition the picture fill. However, we suggest that you do not just drag and resize the selection handles yet since there are more options available, and we discuss these options next.
- Reposition the picture within the shape: Do you want to show a particular portion of the picture fill that may not be visible clearly by default? Look again at Figure 3, above and you will notice that roughly half of the man's face is visible within the shape, and one of his eyes is in fact not visible at all. To counter this problem, place your cursor anywhere in the middle of the shape away from the edges so that your cursor changes to a four-headed arrow as shown in Figure 4, below.
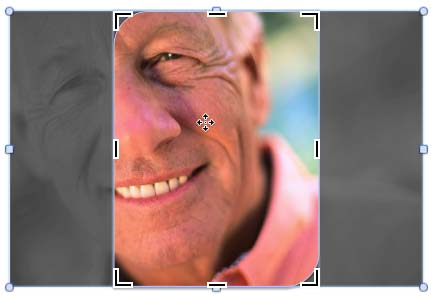
Figure 4: Cursor changed to four-headed arrow - Now, click and drag the picture within the shape to reposition it so that the area you want to show is visible within the shape. Note that all crop and selection handles will disappear when you start dragging. All through the process of dragging and repositioning, you will see a tool tip that shows you the new coordinates of the picture as it is being dragged (see Figure 5, below). Note that you can press the Shift key on your keyboard as you are dragging so as to reposition the graphic at 90 degree increments up, down, left, or right.
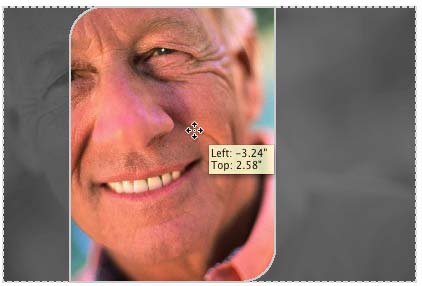
Figure 5: Drag to reposition your picture fill - When you achieve the desired result, just click on the Slide Area away from the shape to come out of the Crop mode. Everything except the selected area is subtracted from the shape fill, as shown in the sample towards the right in Figure 6 (see below). Compare Figures 1 and 6.

Figure 6: Effect of repositioning the picture fill - Resize the picture within the shape: In addition to repositioning the picture, you can also resize the picture fill itself so that you can show a zoomed-in area as the picture fill. To do that, place your cursor on any of the four corner selection handles (bluish-white circles on the four corners of the picture fill). When the cursor is placed on any of the handles the cursor changes to a two sided arrow, as shown highlighted in red within Figure 7. Click to select the handle.
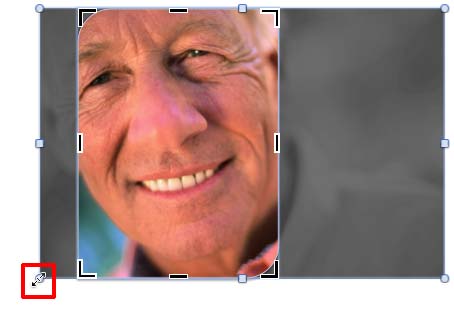
Figure 7: Cursor placed on the corner selection handle - Do not let go off your mouse button. Also hold down the Shift key on the keyboard and drag the corner handle to resize the picture fill, as shown in Figure 8. In addition, you can optionally also hold down the Alt key (in addition to the Shift key) to resize from the center of the picture. Once you achieve the desired result, just click on the slide area away from the shape to come out of the Crop mode.
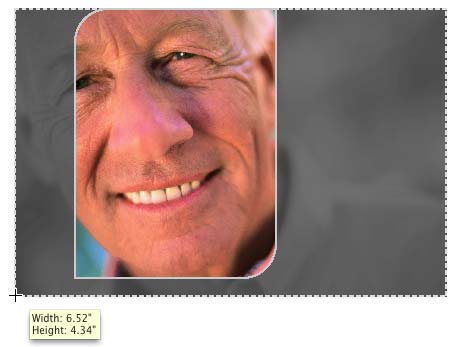
Figure 8: Picture fill being zoomed - As the picture resizes, you will see a tool tip that shows you its new coordinates (see Figure 8, above).
- Once you have resized the picture fill, you can also reposition it as explained in Step 3. Look at Figure 9 below, in which the container shape is filled with just the close-up view of the man's face. Compare Figures 1, 6, and 9.

Figure 9: Effect of zooming and repositioning the picture fill - Save your presentation.


