PowerPoint 2013 for Windows provides twelve default Slide Background Styles, much like previous versions. Apart from applying these Styles, you can also change the default Slide Background to something else such as a solid color or gradient, a pattern or a texture, or, even a picture. In this tutorial, we'll explore these options that can be accessed within the Format Background pane.
Note: Any changes you make beyond the
12 Background Styles are changes that override the active
Theme of your presentation. To get back to the defaults, just choose any one of the 12 Background Styles again. This action effectively acts as a
Reset option.
Follow these steps to change the background of your slides beyond the default Background Styles:
- Create a new presentation or open an existing presentation. Select the Design tab of the Ribbon, and click the Format Background button, as shown highlighted in red within Figure 1.

Figure 1: Format Background button within the Design tab of the Ribbon - Alternatively, right-click anywhere on an empty area of the slide to bring up the contextual menu. Within this menu select Format Background option, as shown highlighted in red within Figure 2.
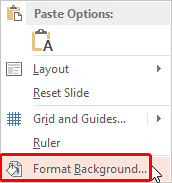
Figure 2: Format Background option to be selected - This brings up the Format Background Task Pane, as shown in Figure 3.
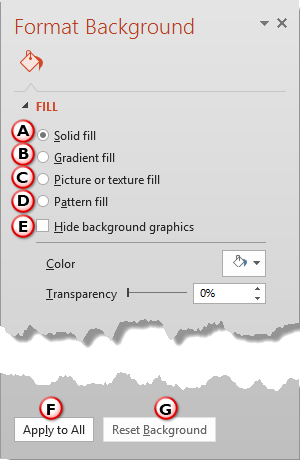
Figure 3: Format Background Task Pane - Options within the Format Background task pane are explained below, as marked in Figure 3. You can use any of these options to change your Slide Background. The options listed below provide links to detailed tutorials:
A. Solid Fill
- This option adds a solid color background to your slide. You can use any of the Theme colors, Standard colors, or any other color of your choice. To learn more about this option, read our Solid Fills for Slide Backgrounds in PowerPoint 2013 for Windows tutorial.
B. Gradient Fill
- This option applies a gradient as a slide background. A gradient is a blend of two or more colors merging into each other. For more information on this option, refer to our Gradient Fills for Slide Backgrounds in PowerPoint 2013 for Windows tutorial.
C. Picture or Texture Fill
- Allows you to use a picture or a texture as a background. More info can be found in our Picture Fills for Slide Backgrounds and Texture Fills for Slide Backgrounds tutorials.
D. Pattern Fill
- Choose from 48 different patterns contained within PowerPoint. Learn more in our Pattern Fills for Slide Backgrounds tutorial.
E. Hide Background Graphics
- If your Slide Background includes graphics which you want to hide for printing purposes, or another reason, you can select this check-box. Although the background graphics will remain part of your presentation, it will be hidden from view. Compare Figures 4 and 5 below, to understand the difference this option makes to the visual look of your slides.
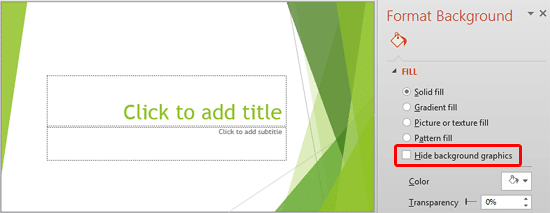
Figure 4: Slide background with Hide Background Graphics check-box deselected 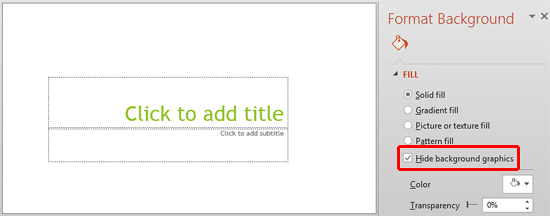
Figure 5: Slide background with Hide Background Graphics check-box selected F. Apply to All
- Click this button if you want changes made to be applied to all slides within the active presentation.
G. Reset Background
- If you want to abandon all changes you made to the Slide Background, click the Reset Background button. Note that this button will be grayed out unless you make some changes to the Slide Background.
- You will also find this option within the Background Styles gallery with a different name, Reset Slide Background (highlighted in red within Figure 6). To access the Background Styles gallery, refer to our Slide Background Styles in PowerPoint 2013 for Windows tutorial.
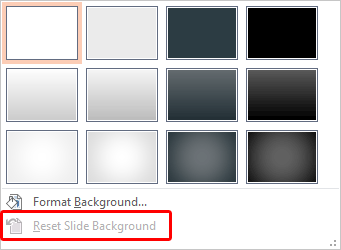
Figure 6: Reset Slide Background option within the Background Styles gallery - Save your presentation.


