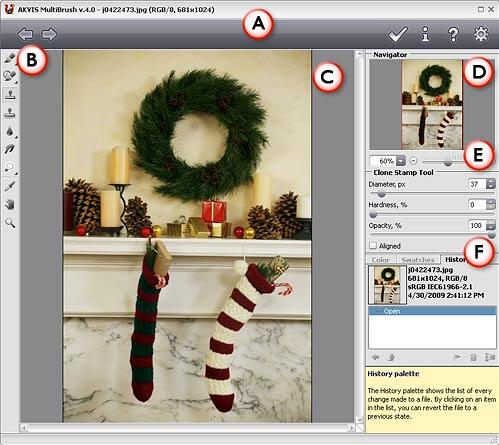
AKVIS MultiBrush 4 is a Photoshop compatible plug-in that allows to enhance photos and retouch portraits.
Author: Geetesh Bajaj
Product/Version: PowerPoint
AKVIS MultiBrush is a Photoshop-compatible plug-in that allows to enhance photos and retouch portraits. The plug-in is a new enhanced version of AKVIS Stamp. AKVIS MultiBrush performs picture enhancements, removes unwanted objects from digital pictures such as spots, stains, or even unwanted elements in a photograph. A useful tool for portraits which allows the user to remove wrinkles, scars, scratches, and enhances imperfect skin, this plug-in also available as a standalone application that runs independent of Adobe Photoshop.
MultiBrush is from AKVIS, a company based in Russia that specializes in graphics programs and scientific research. Apart from MultiBrush, AKVIS also creates other Photoshop-compatible programs like Chameleon, ArtSuite, ArtWork, Coloriage, Enhancer, Retoucher, etc.
You can download a free 10-day trial version of MultiBrush from the AKVIS site.
My contact at AKVIS for this review was Katerina Kharina. Thank you, Katerina.
Follow these steps to use AKVIS MultiBrush:

Here's a "before" and "after" sample


| Photoshop Versions: | 5+ |
| Platforms: | Windows, Mac |
| Site: | AKVIS |
| Price: | US$49 and above |
| Trial Version: | 10 days |
Photoshop: AKVIS Plug-ins (Glossary Page)
You May Also Like: SignageTube: Conversation with Kurt Dupont | Military and Defence PowerPoint Templates


Microsoft and the Office logo are trademarks or registered trademarks of Microsoft Corporation in the United States and/or other countries.