There are various fills that you can apply to the Plot Area of a chart, such as a solid color, a picture, a texture, or a pattern, or a gradient fill. Gradients are typically blended fills between two or more colors. Although most gradients tend to use brighter colors, you can very well use neutral or muted colors. Such a gradient fill can provide a great, understated backdrop for your chart.
In this tutorial, let us learn how to apply a gradient fill to the Plot Area of a chart:
- Select the chart that you want to format the Plot Area for. If you want to start afresh, you can insert a new chart.
- Now, carefully right-click (or Ctrl+click) the Plot Area. From the resultant menu, select the Format Plot Area option, as shown in Figure 1, below.
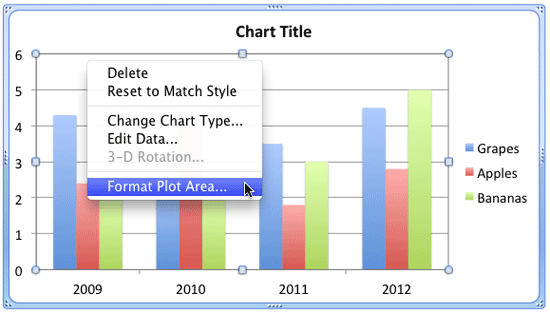
Figure 1: Format Plot Area option - Doing so summons the Format Plot Area dialog box, as shown in Figure 2, below. Make sure that the Fill option is selected within the sidebar, highlighted in red within Figure 2, below. Then select the Gradient tab, highlighted in blue within Figure 2. Within this tab, most of the options may be greyed out. That is because, we haven't selected any gradient style yet. This is indicated by the Style option set to None, highlighted in green within Figure 2.
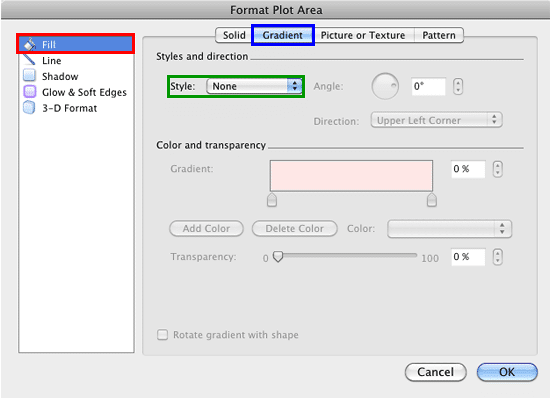
Figure 2: Format Plot Area dialog box - Choose any gradient style, as shown highlighted in red within Figure 3, below, and all options within Gradient tab will be activated.
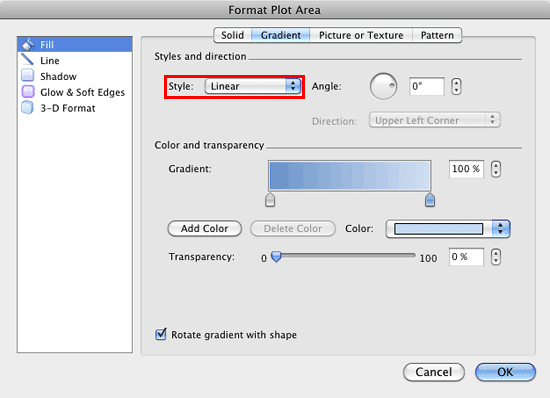
Figure 3: Gradient style selected within the Format Plot Area dialog box - All gradient fill options within the Gradient tab of the Format Plot Area dialog box work similar to the options within the Gradient tab of the Format Shape dialog box, except the Rotate gradient with shape option. This is because charts cannot be rotated.
Why Cannot I Rotate the Plot Area?
- Even though the Rotate gradient with shape check-box is available for selection within the Format Plot Area dialog box, selecting/deselecting this option make any difference to the gradient fill. That's because you can't rotate the Plot Area.
- For more info on these options, refer to points 5-A to 5-G in our Add Gradient Fills to Shapes in PowerPoint 2011 for Mac tutorial.
- Select the required option from the Gradient tab of the Format Plot Area dialog box. In Figure 4 you can see the Format Plot Area dialog box showing the gradient setting options we chose for our sample chart's Plot Area. After selecting required options, click the OK button within the Format Plot Area dialog box to get back to your slide.
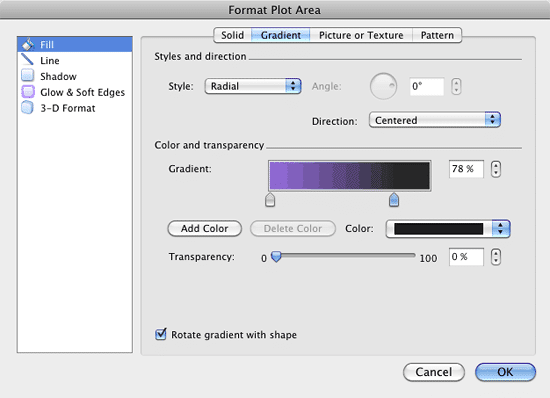
Figure 4: Gradient option set within the Format Plot Area dialog box - In Figure 5, you can see the Plot Area of our sample chart filled with a gradient fill (compare with partially visible chart in Figure 1, above).
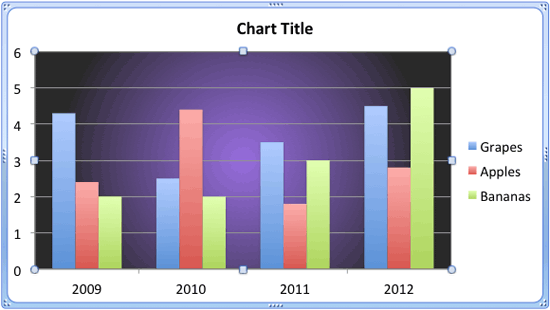
Figure 5: Plot Area applied with a gradient fill - Save your presentation often.


