Photos in Org Charts
One of SmartDraw's easiest features is the creation of quick organization charts that include photographs. Such photo org charts, as shown in Figure 1, below require that SmartDraw's Image Plug-in is also installed.
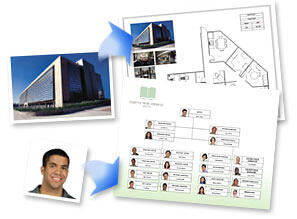
Figure 1: Photo org charts in SmartDraw
The Image Plug-in is part of the SmartDraw 7 Suite and can be purchased separately, if you use another (or older) version of SmartDraw. If you don't have SmartDraw installed, you can download a free 30-day trial version of the SmartDraw Suite that includes the Image Plug-in.
Back
The Photos
Once you have the full or trial version of SmartDraw Suite installed, you can follow the rest of this tutorial. By the end of this tutorial, we'll create a photo org chart that will be inserted inside a PowerPoint slide. Download the finished slide here.
It goes without saying that we need photos to create photo org charts. Since we needed photographs of people that could be shared with all of you without any royalty problems, we cooked up my own pictures using the Fusion part of ScanSoft's SuperGoo. Look at them, shown below in Figure 2.

Figure 2: Imaginary people
Download these SuperGoo pictures.
Back
Tutorial
- Start SmartDraw and opt to create a blank org chart, as shown in Figure 3, below.

Figure 3: Blank org chart- Draw two rectangles of the same width, as shown in Figure 4, below. The height can be different.

Figure 4: Two rectangles inserted- Align them one over the other while making sure their widths are the same. We placed the smaller rectangle below the larger one, as shown in Figure 5, below.
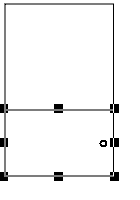
Figure 5: Rectangles aligned and placed one above the other- Select the bottom rectangle and type some text. Then, right-click the top rectangle and choose Photo Frame Properties from the resulting context menu. In the ensuing Photo Frame Properties dialog box, place a check mark next to both the top options, as shown in Figure 6, below. Leave other options unaltered.
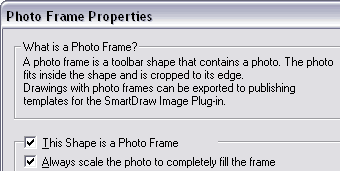
Figure 6: Photo Frame Properties dialog box- You'll end up with a photo frame and a text frame, as shown in Figure 7, below. Select both and choose the Arrange | Group option.

Figure 7: Group shapes- Select the grouped rectangles and select Edit | Copy (or Ctrl + C). Thereafter, paste this 7 times by choosing Edit | Paste (or Ctrl + V) seven times. Rearrange all grouped rectangles as required or refer to the arrangement, as shown in Figure 8, below.
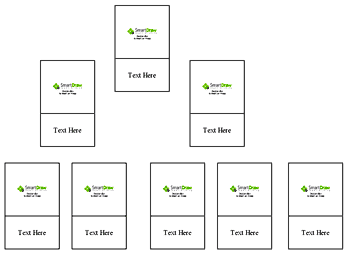
Figure 8: Duplicated shapes- Ungroup a single group of two rectangles and double-click the top Photo Frame shape. This action will activate SmartDraw's Image Plug-in. Browse to the folder where you saved the downloaded pictures and insert them in the Photo Frame. SmartDraw might ask you if you want to replace the current content with the new image, as shown in Figure 9, below. Click Yes.
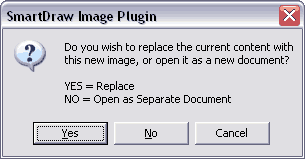
Figure 9: Replace the current content- Type the name and designation of the person in the bottom text rectangle. Select both the rectangles and group them again.
- Similarly, add pictures and text for the remaining grouped rectangles.
- Connect all the grouped shapes as required with SmartDraw's connectors.
- Save your SmartDraw org chart. Then, choose File | Export and save to an EMF graphic.
- In a new or existing PowerPoint presentation, insert the EMF graphic. Here's how our photo org chart looks like, as shown in Figure 10, below.

Figure 10: EMF graphic placed on slide
Download a copy of this presentation.
Back
More in PowerPoint
You can take this photo org chart further in PowerPoint by following these steps:
- Select the graphic inside PowerPoint. Then, access the Drawing toolbar and choose the Draw | Ungroup option.
- PowerPoint will warn you with a message, This is an imported graphic and not a group. Do you want to convert it to a Microsoft drawing object, as shown in Figure 11, below. Click Yes.

Figure 11: Message window- Once this EMF graphic is ungrouped, you can individually animate all or some components to create a photo org chart with an animated build.
Back
More About SmartDraw
In SmartDraw, you can use existing org chart templates as an alternative to drawing everything from scratch.
Also, look at the how you can create better org charts in SmartDraw.
Learn more about using SmartDraw content within PowerPoint in another Indezine article.
Read an interview with Paul Stannard, the CEO of SmartDraw elsewhere on this site.
Back


