Introduction
About Demo Builder
Download and Installation
Using Demo Builder
Pricing and Support
Conclusion
Introduction
There are so many tutorials online that now show you a screen recording rather than a textual series of steps. It's almost like being right in front of the user's system -- and faster online speeds make it possible to view such recordings on demand without any wait.
However easy it might be to view such recorded content, it's nowhere as simple to create them in the first place -- our review product Demo Builder aims to make that process simpler -- this review will focus on what it does different than other similar programs, and how it performs overall.
Back
About Demo Builder
Demo Builder Pro is from Tanida Inc., a company based in Toronto, Canada that also creates e-learning software for home and office use. You can learn more about Demo Builder Pro, and download a free trial version from their site.
In addition to Demo Builder Pro, there's also a Demo Builder Standard version that allows the user to create professional and fully
interactive demos, presentations, and tutorials. The Pro version adds more capabilities, including the option to create audio-visual
Flash movies. In this review, we are exploring the Pro version.
My contact at Demo Builder for this review was Dan Tatomir - thank you, Dan.
Back
Download and Installation
Download the installer from their site, run the setup routine and follow the instructions.
This will create a new group in the Windows Start menu. Figure 1 shows you the Demo Builder group.
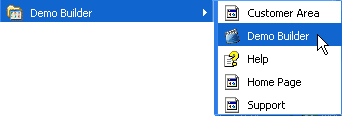
Figure 1: Demo Builder Start Menu group
Back
Using Demo Builder
Follow these step to use Demo Builder:
- Go to your Windows Start menu and choose All Programs | Demo Builder | Demo Builder, as shown in Figure 1, above.
- Doing so opens the Demo Builder opening screen, as shown in Figure 2, below.
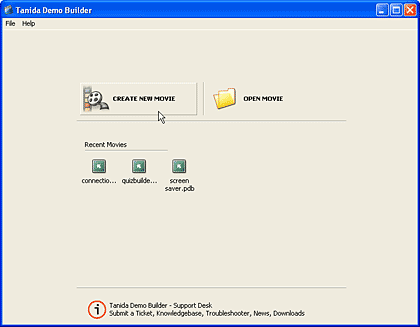
Figure 2: Demo Builder opening screen- Here you choose options to either create a new movie (recording), or open an existing movie. The Recent Movies area displays the most recent projects you have been working on. For this walkthrough, choose the Create New Movie option.
- Doing so brings up the Create New Movie wizard (a set of screens that asks you to select choices), as shown in Figure 3, below. In the first screen, you provide a name for the movie, set the dimensions, and choose from several record options.
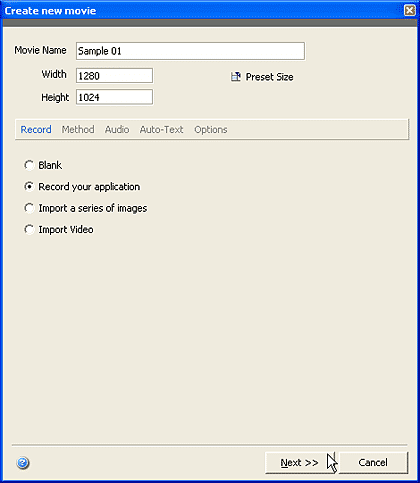
Figure 3: Create New Movie Wizard - When done, click Next to continue with the wizard.
- The second screen, as shown in Figure 4, below, allows you to choose different methods of recording, capture rate, etc.
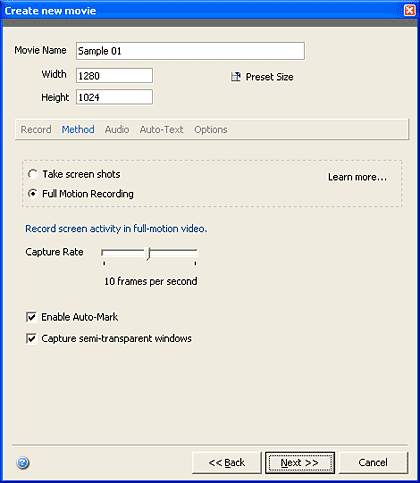
Figure 4: Method of recording Click Next to continue. - This screen allows you to choose the Audio options, as shown in Figure 5, below, which essentially translates to selecting the Record narration check box. Click the Next button to proceed.
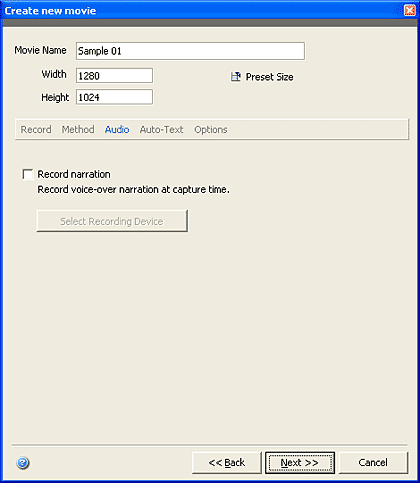
Figure 5: Audio - The subsequent screen allows to choose the Auto-Text option, as shown in Figure 6, below, where you can enable automatic text balloons at capture time, set the language and reader profile.
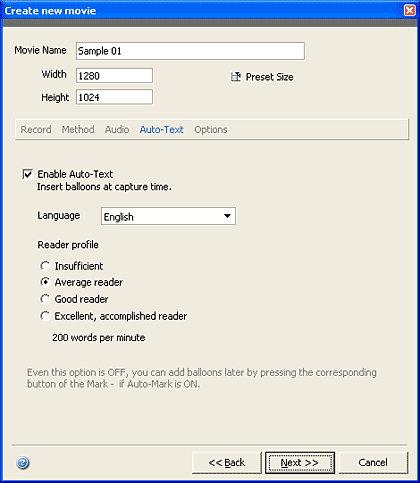
Figure 6: Auto-Text- Click the Next button to continue.
Note:
- The Auto-Text option places text balloons based on when you click an option or choose a menu selection -- it works differently with various applications -- for instance, I found more Auto-Text balloons when using Paint than with Adobe Photoshop.
- The last screen of the wizard is Options, as shown in Figure 7, below. Here, you can opt to show the cursor as part of the capture, export the capture to a Flash SWF as soon as recording completes, hide the system tray icon, set hotkeys, etc.
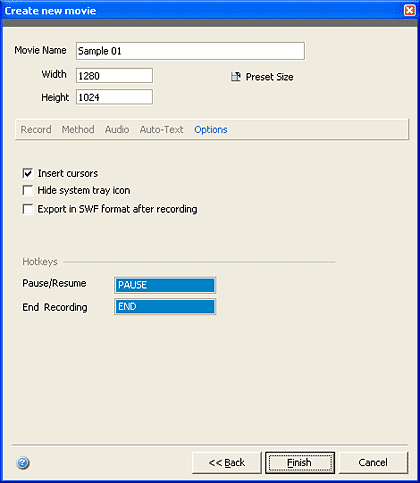
Figure 7: Options- Click the Finish to apply the changes.
- The captured area is then previewed inside a red rectangle, as shown in Figure 8 , below. Adjust the dimensions further if required within the helpful interface, and click the prominent Record button. Demo Builder will now record the content and the activities of the screen within the area of the red rectangle.
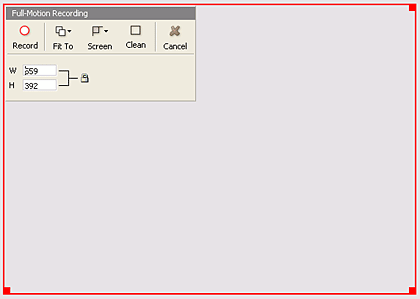
Figure 8: Capturing onscreen activity - Click on the icon in the system tray to end the capture session.
- The recorded scene will appear within the Demo Builder, as shown in Figure 9, below. Double-click the thumbnail to open the Demo Builder editing interface, as shown in Figure 10, further below.
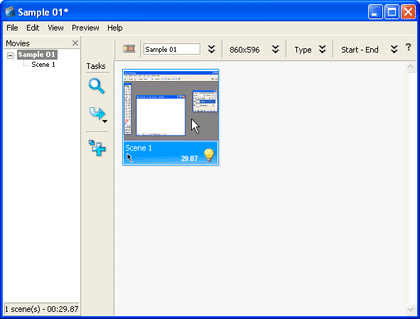
Figure 9: Captured scene
Figure 10: Demo Builder editing interface - You can edit the captured clip in the timeline, insert objects such as text, buttons, images, etc.
- Once done with the edits, save the project and choose File | Export options, as shown in Figure 11, below.
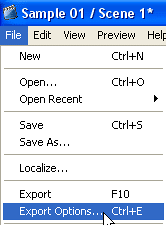
Figure 11:Export Options - This will open Export Option dialog box, as shown in Figure 12, below.
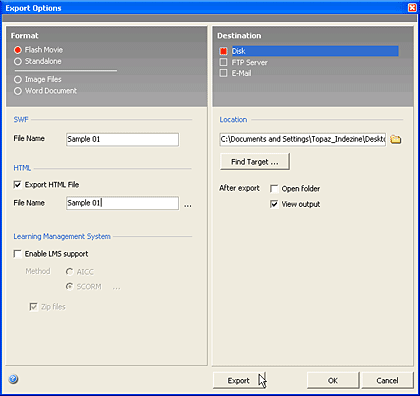
Figure 12: Export Options - Export options are explained below:
- Flash Movie SWF (.SWF): Macromedia Flash file and a HTML file.
Standalone EXE (.EXE): Executable Demo
Image File: This creates a sequence of image files. Optionally you can export an html file in order to display all the images within a web page.
Word Document: Publish your project in Microsoft Word DOC.
Back
Pricing and Support
The Standard version costs US$199 and the Professional version costs US$249. The Standard version has all the functionality and features that the Professional version has, except for full motion recording and the ability to import video files as a scene.
Support options include email support, FAQ, phone support, tutorials, and an online forum.
Back
Conclusion
Demo Builder Pro is a capable screen capture program that includes niceties like Auto-Text, hotkeys, etc. It allows you to edit the capture recordings, and export to a range of file format types.
Back
You May Also Like: Making the Most of Your Potential
| Daffodil PowerPoint Templates
Popular Posts
Pictures in Presentations
Is a picture is worth a thousand words? You probably have heard this adage so often that we decided not to repeat this phrase throughout this book!
Now here’s some more info: the human brain uses a larger part of its area to store visual information rather than textual content. And that’s possibly
because a picture describes so much more than text.
Go and get a copy of our Pictures in Presentations ebook.


