In this tutorial, we will learn how to export a PNG graphic from Xara X¹ with an alpha channel that PowerPoint can import. I have used the new Xara X¹ on Windows XP Professional. The PowerPoint version used is 2003.
You can download a 15-day trial version of Xara X¹ from the Xara website (link no longer exists).
- Xara X¹ opens with a new open document already in place.

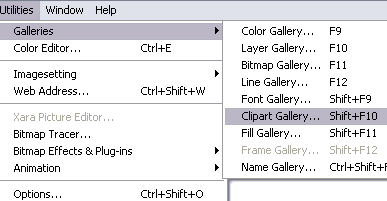
- Choose Utilities | Galleries | Clipart Gallery or use the shortcut key (Shift+F10). Doing so will open the Clipart Gallery.

- If no clipart is visible within the Gallery, click the Get Clipart... button to download some clipart from the Xara website. You'll need to be connected online for this to work. You'll find several folders within the Clipart Gallery. For this tutorial, I suggest you open the 'Xara Examples 1' folder. Drag the 'Red Car' picture into the new document (see screenshot).

- Close the Clipart Gallery. Choose Edit | Select All (or Ctrl + A) to select all shapes that comprise the drawing and position it in the middle of the document area. Then choose File | Export... (or Ctrl + Shift + E). Doing so will open the Export File dialog box. Choose a name and location for your graphic, and choose the PNG option in the Save as type dropdown box. Click the Export button.
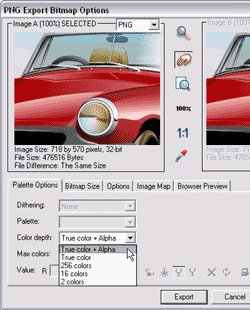
- You'll now see the PNG Export Bitmap Options dialog box. With all other options unaltered, select 'True color + Alpha' in the Palette Options tab, from the drop down list for Color Depth (see screenshot). Xara X¹ will export the drawing to an alpha channel equipped PNG graphic. Save your document and exit Xara X¹.

- In PowerPoint, create a new presentation or open an existing one. On a blank slide, just insert the exported PNG using the Insert | Picture command. The screenshot below shows you how the transparent areas reveal themselves.


