As we have already explored, you can recolor the entire SmartArt graphic at any time. This technique applies new colors to the entire SmartArt graphic including contained shapes. However, there may be times when you want one of the shapes to look differently.
Follow these steps to explore fill, line, and effect options for individual shapes within a SmartArt graphic in PowerPoint 2011 for Mac:
- Select any individual shape within your existing SmartArt graphic, as shown in Figure 1, below. As you can see, we have selected the largest of the three gear shapes.
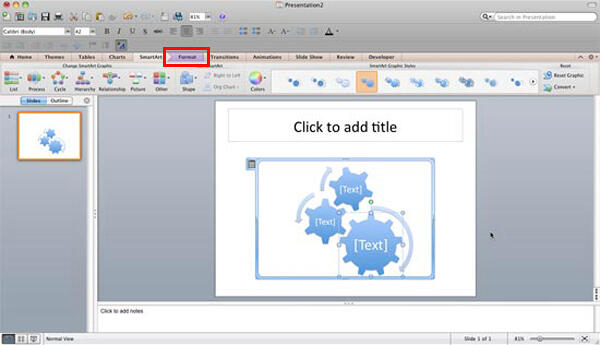
Figure 1: Shape selected within the Gears SmartArt graphic - Doing so brings up the Format tab for SmartArt on the Ribbon as shown highlighted in red within Figure 1, above. Click on this tab and locate the Shape Styles group. This group includes Fill, Line, and Effects options for the selected shape, and also some Shape Styles (presets), as shown in Figure 2, below.

Figure 2: SmartArt Format tab of the Ribbon Contextual Tabs
- The SmartArt Format tab is a contextual tab. This is a special tab on the Ribbon that is not visible all the time. This tab only makes an appearance when you are working with a particular slide object which can be edited using special options.
- These options are explained below:
A. Fill
- Click the downward-pointing arrow next to this button. Doing so brings up the Shape Fill drop-down gallery, as shown in Figure 3, below. Select any color to fill the selected shape, or choose from other options. To learn more about various shape Fill types refer to our Add Solid Color Fills to Shapes in PowerPoint 2011 for Mac tutorial.
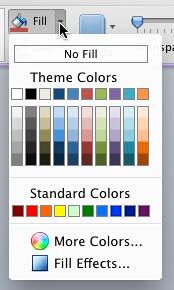
Figure 3: Fill drop-down gallery B. Line
- Click the downward-pointing arrow next to this button. To bring up the Line drop-down gallery, as shown in Figure 4, below. Here, you can select any color, effect, style, or thickness to apply to the outline of the shape selected. To learn more about Shape Outlines (Lines) refer to our Formatting Lines for Shapes in PowerPoint 2011 for Mac tutorial.
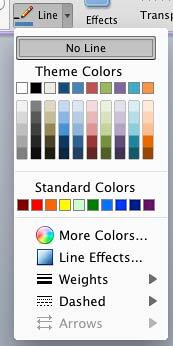
Figure 4: Line drop-down gallery C. Effects
- Click this button to open the Effects drop-down gallery, as shown in Figure 5, below. You can select any of the effects for your selected shape. To learn more about Shape Effects refer to our Applying Effects for Shapes in PowerPoint 2011 for Mac tutorial.
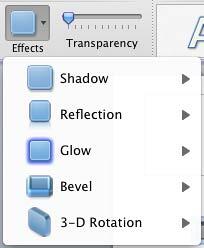
Figure 5: Effects drop-down gallery D. Shape Styles
- These are the collection of some preset Styles that can be applied to the shapes. To apply, click on any previews in the Shape Styles gallery, as shown in Figure 6, below. To learn more about Shape Styles refer to our Shape Styles in PowerPoint 2011 for Mac tutorial.
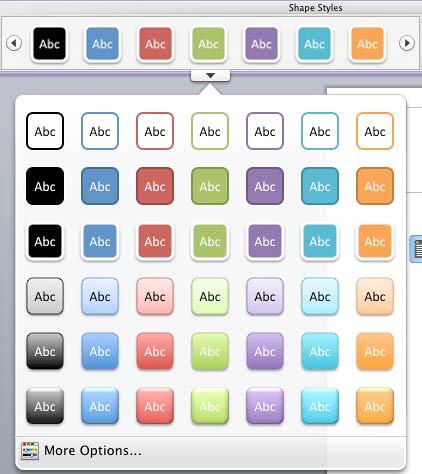
Figure 6: Shape Styles drop-down gallery - You can select any of the above options for the selected shape. Similarly, you can select other shapes within the SmartArt graphic, and change their appearance. Figure 7, below, shows the gear SmartArt graphic, notice that the shapes have different fills, outlines, effects, and styles applied (compare with Figure 1).
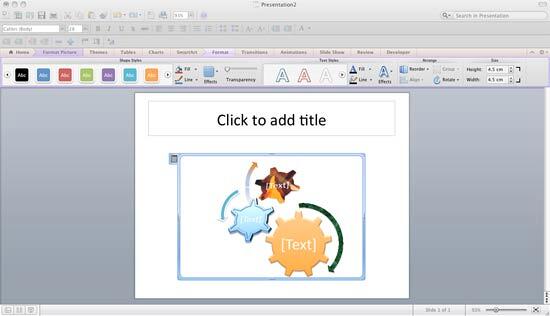
Figure 7: Different fills, outlines, and effect applied to individual shapes within the SmartArt graphic - Save your presentation often.


