After inserting a SmartArt graphic in PowerPoint 2013, you can add animation to your SmartArt graphic. You'll discover that the entire graphic animates at the same time. It may seem that you have no control over animating individual SmartArt shapes, but that's not entirely true since PowerPoint 2013 for Windows does provide some control over animating SmartArt shapes. In this tutorial, you'll learn where to find those options, and how to use them to animate a SmartArt graphic with more control.
Follow these steps to animate SmartArt graphics in PowerPoint 2013 for Windows:
- Select your existing SmartArt graphic, as shown in Figure 1, below. The SmartArt layout used in this example is Basic Matrix.
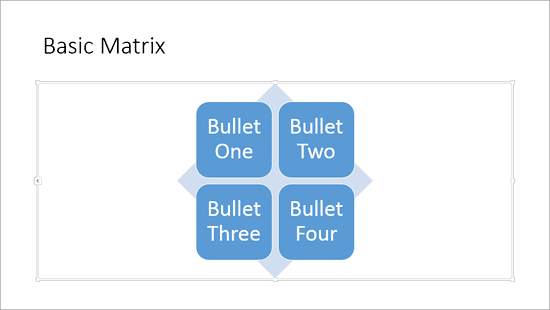
Figure 1: Basic Matrix SmartArt graphic
- Now, select the Animations tabs on the Ribbon. Locate the Animation group, and then, click the down arrow, as shown highlighted in red within Figure 2, below.

Figure 2: Animation group - Doing so brings up the Animation drop-down gallery, as shown in Figure 3, below. You can choose any of the Entrance animations or choose the More Entrance Effects option located at the bottom of Animation gallery, as shown highlighted in red within Figure 3.
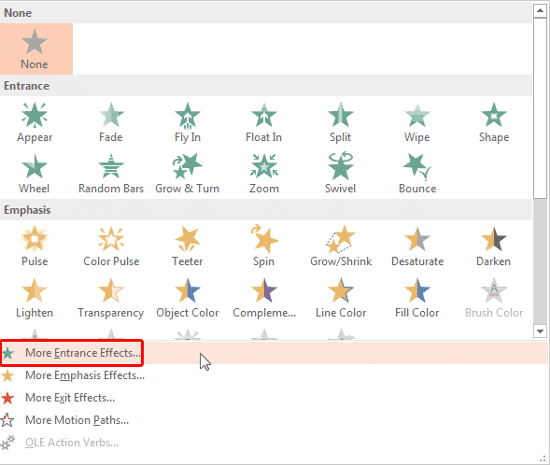
Figure 3: More Entrance Effects option PowerPoint Animation Types
- PowerPoint provides four animation types. To know more about animations, check the Types of Animation tutorial.
- This step launches the Change Entrance Effect dialog box, as shown in Figure 4, below. Within this dialog box, if you click on any entrance effect, you can see the live preview of how it works on your selected SmartArt graphic. Select any of these effects and click the OK button. For this tutorial, we have selected the Wipe entrance effect, as shown highlighted in red within Figure 4.
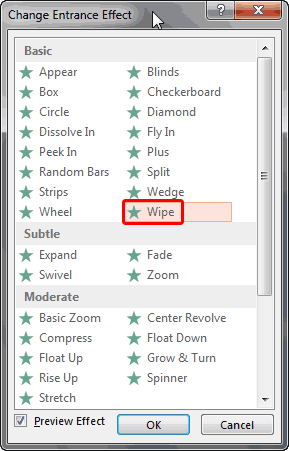
Figure 4: Wipe entrance effect - This action applies the selected animation to the SmartArt graphic. The digit 1, as shown highlighted in red within Figure 5, below, indicates that the SmartArt graphic has an animation applied. And since you see only "1", you can assume that everything is going to be animated with one click.
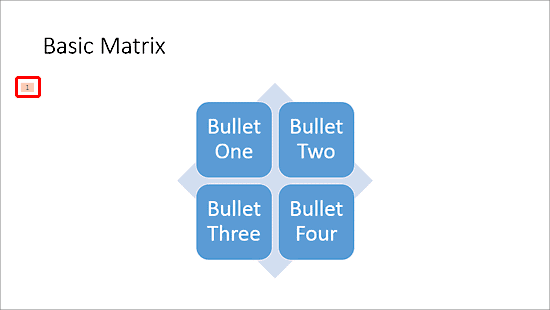
Figure 5: Wipe entrance animation applied to SmartArt graphic - As soon as the animation is applied, the Effect Options button located next to the Add Animation drop-down gallery is no longer grayed. Click the button to summon the Effect Options drop-down list, as shown in Figure 6, below.

Figure 6: Effect Options drop-down gallery - Within the Effect Options drop-down gallery, you can choose from four Wipe animation Directions.
Effect Options
- The Effect Options will be different for each Animation Type.
- Additionally, you can choose the Sequence of the animation,
as explained below:
- As One Object: Animates the entire SmartArt graphic at one go.
- All At Once: Animates all SmartArt shapes at one go.
- One by One: Animates SmartArt shapes one by one.
- Alternatively, click the dialog launcher, as shown highlighted in red within Figure 7, below, within the Animation group of Animations tab.

Figure 7: Click the dialog launcher in the Animation group - Doing so summons a multi-tabbed dialog box with the same name as the animation applied to your SmartArt graphic, as shown in Figure 8, below.
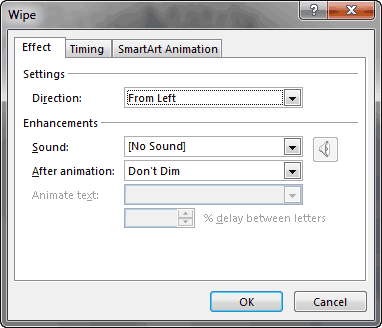
Figure 8: Wipe animation dialog box - Within this dialog box you'll find three tabs, as shown in Figure 8, above. They are:
Effect
- Within this tab you can find setting for the animation effects, as shown in Figure 8, above.
Timing
- This tab provides you options for changing the timing of the animation effect you have applied, as shown in Figure 9, below.
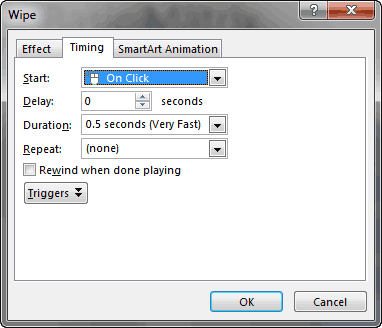
Figure 9: Timing tab SmartArt Animation
- Within this tab you can find the Group graphic drop-down list containing the same Sequence options, that are explained in point 6, earlier on this page. Additionally, you can set the animation to play in reverse order by choosing Reverse order check-box, as shown highlighted in red within Figure 10, below.
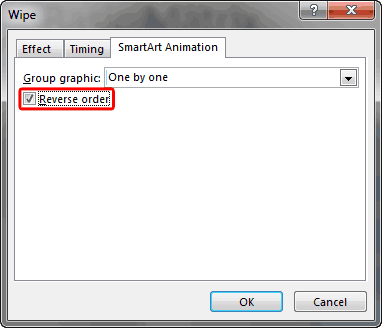
Figure 10: SmartArt Animation tab - Click the OK button to apply the changes. Play your slide to preview the animated
SmartArt graphic.
- Save your presentation.


